Using Google Forms for Jekyll Comments
Displaying comments on your blog using your own data source
by JD Porterfield on updated
Updated September 25, 2021: I have completely revamped comment-section.html and added a few new features. Please see Using Google Forms for Jekyll Comments, Revisited for more details!!


Updated April 03, 2021: I have added additional scenarios at the bottom of this article including: dealing with code minification, lazy-loading the comment section, and solving issues with comment times showing up incorrectly.
Although it's not new, I recently discovered Jekyll for posting articles to my own website and even creating a static release notes page for my Notification Launcher app. Jekyll-generated sites were basically what I was looking for but were missing one thing that I had wanted: user comments. This thread on the Jekyll forums has many suggestions but I found each approach lacking in some way.
- Disqus - requires user login and also shows ads for the free version
- Staticman - requires setting up a backend and hosting it somewhere like Heroku and also commits to the repository that your static site is hosted in
- Talkyard - isn't free
- HyvorTalk - also isn't free
- etc.
I'm sure there are also other approaches, but instead of looking forever, I decided to build what I was looking for. Specifically, I wanted a comment system that had the following attributes:
- Free (and not ad supported)
- Allows me to own the data
- Allows for some kind of moderation
- Moderately easy setup
- Allows user commenting without requiring any type of sign-in
Luckily, inspiration struck me when I saw an unrelated Android library posted on Reddit. The project, RetroSheet, allows users to treat Google Forms as a backend for their applications. As Google Forms/Sheets is free, I found this very interesting and dug into the internal code to see the approach taken. After figuring it out, I created the commenting system I will outline below. In the following article, I will give an overview of how the commenting system looks and works, show how to implement it, and then briefly cover some of the more interesting internals.
Finished product
The finished product that I came up with has two states. One in which the article or blog entry does not have any comments and invites readers to leave a comment and also a version in which comments have been left already. The empty state looks as follows:
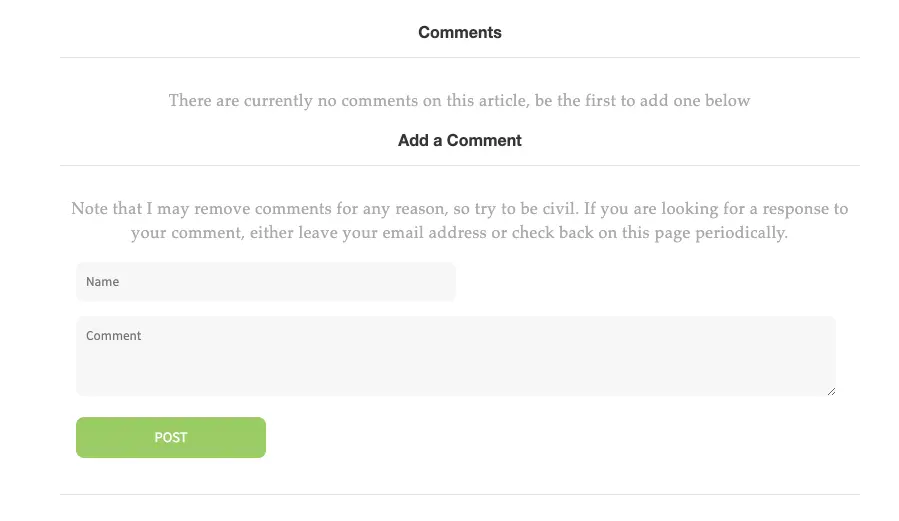
This state is rather simple and just shows a single text to the reader inviting comments to be added. It also features a simple comment entry form that has 2 required fields, the commenter name and comment itself. When the comment is added, the page will refresh the comment list automatically.
The other state, in which comments have already been left looks like this:
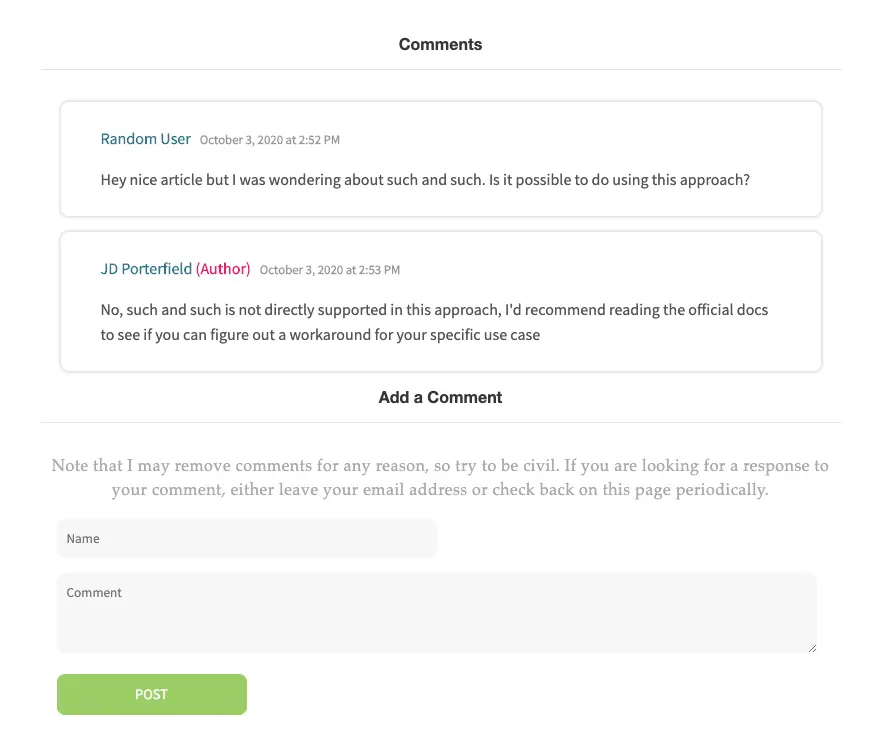
It shows the comment with the name of the poster and time of posting. It also denotes when a comment has been left by the original author of the article. The comment form in this state functions the same as in the empty state.
Implementation
The implementation requires 2 parts. The first part of the setup requires setting up Google Forms and Google Sheets to act as the 'backend' for the comments. We will use a single form for all posts on the site/blog and then use queries to separate out comments for each post individually. The second part is the Jekyll setup that is rather minimal.
The first thing we want to do is create a Google Form. From Google Drive, we can do this by clicking on the 'New' button and then selecting "Google Forms".

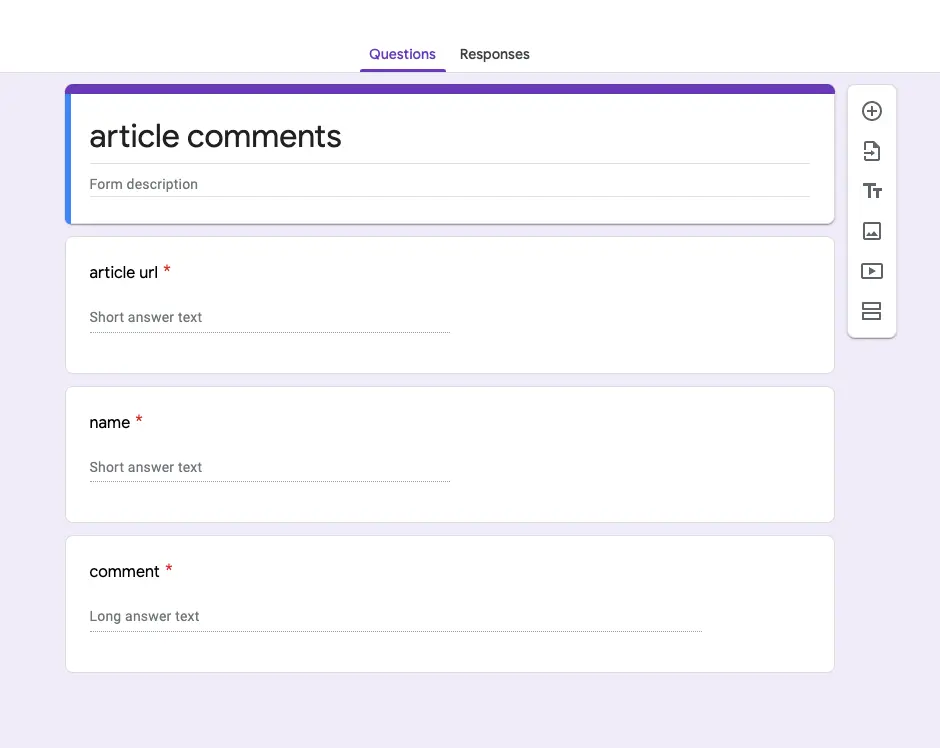
Next, we add the 3 fields that we will need. These are the article URL, commenter name, and comment field. Note that for the implementation to work out-of-the-box, these should be added in this order (but you can edit or add more after understanding the approach)
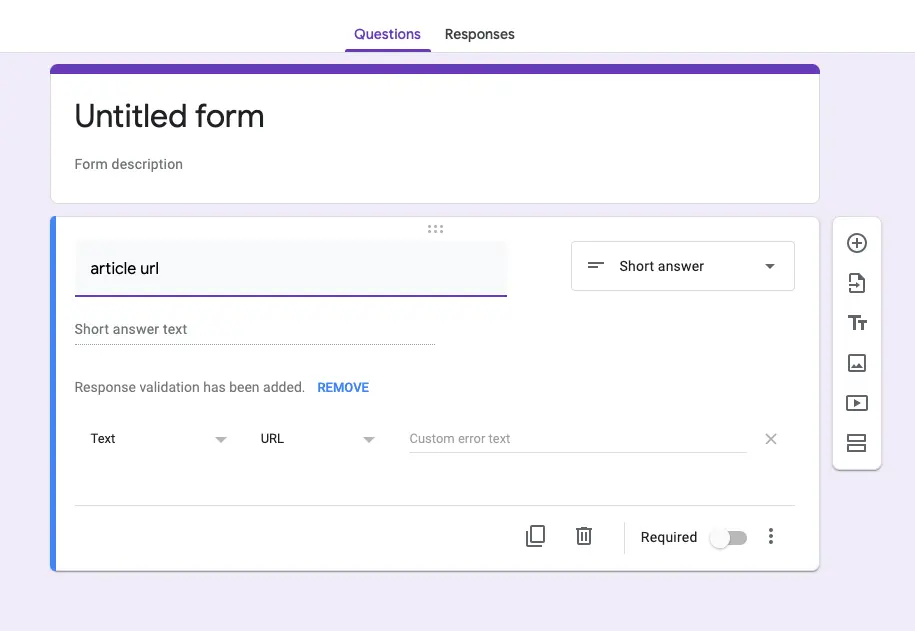
If field validation is enabled as shown in the following screenshot, make sure to remove it.
When finished, your form should look as follows:
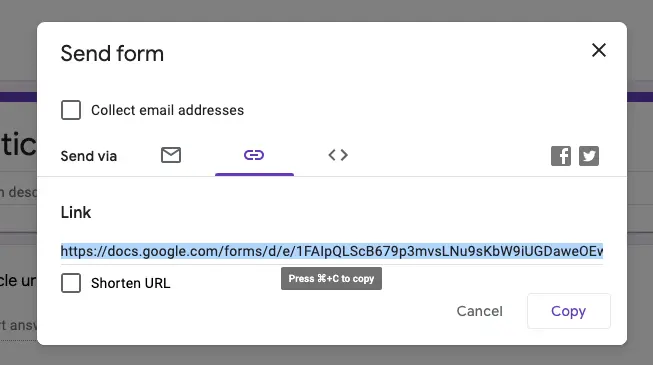
Next, click the Send Form button and then copy the URL from the Dialog and set it aside for now.
Google Sheets
Google Forms will act as the entry point for the data. but we will use Google Sheets to actually look at, potentially modify, and eventually use for our site's comment data.
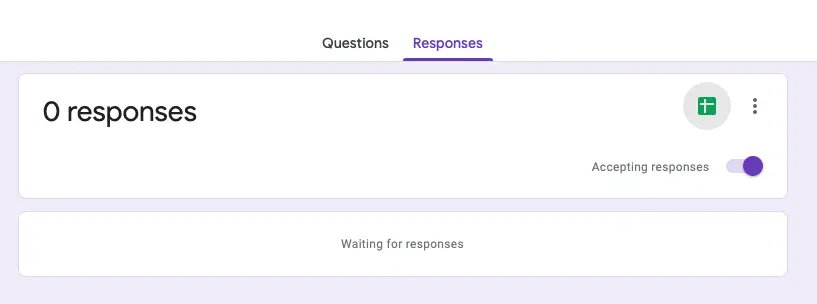
To open the requisite Google Sheet corresponding to your Google Form data, click on the "Response" tab on your Google Form and then select the green sheets icon (highlighted in the image below).
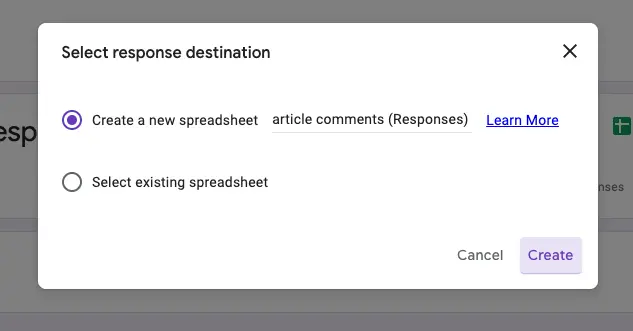
Choose "Create a new spreadsheet", enter whatever name you want, and then click "Create"
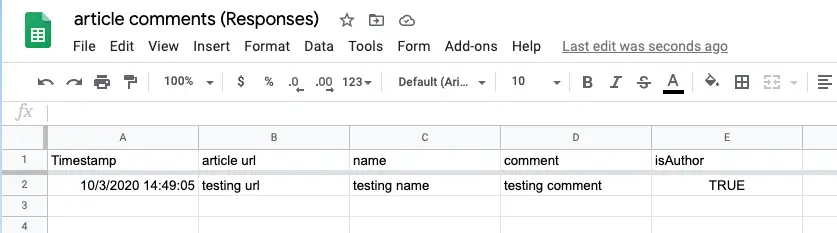
Next, the sheet will open and you will see something like this:
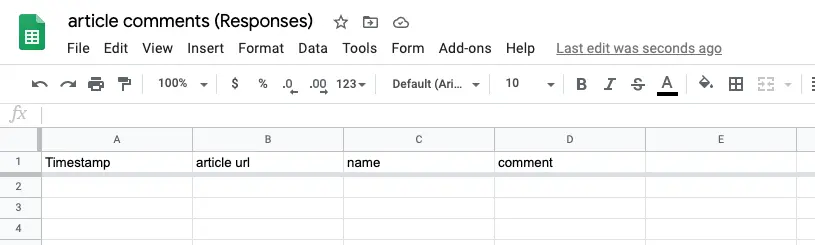
At this point, you should also rename the sheet "comments" in the bottom left-hand corner.

In order to support verified author comments, we need to add one more column, "isAuthor". This will never be populated by our form since it is not a form field, but if we (as the author) leave a comment, we can come to this sheet and edit the appropriate row. In the case that we are the author, we will enter TRUE into the field.
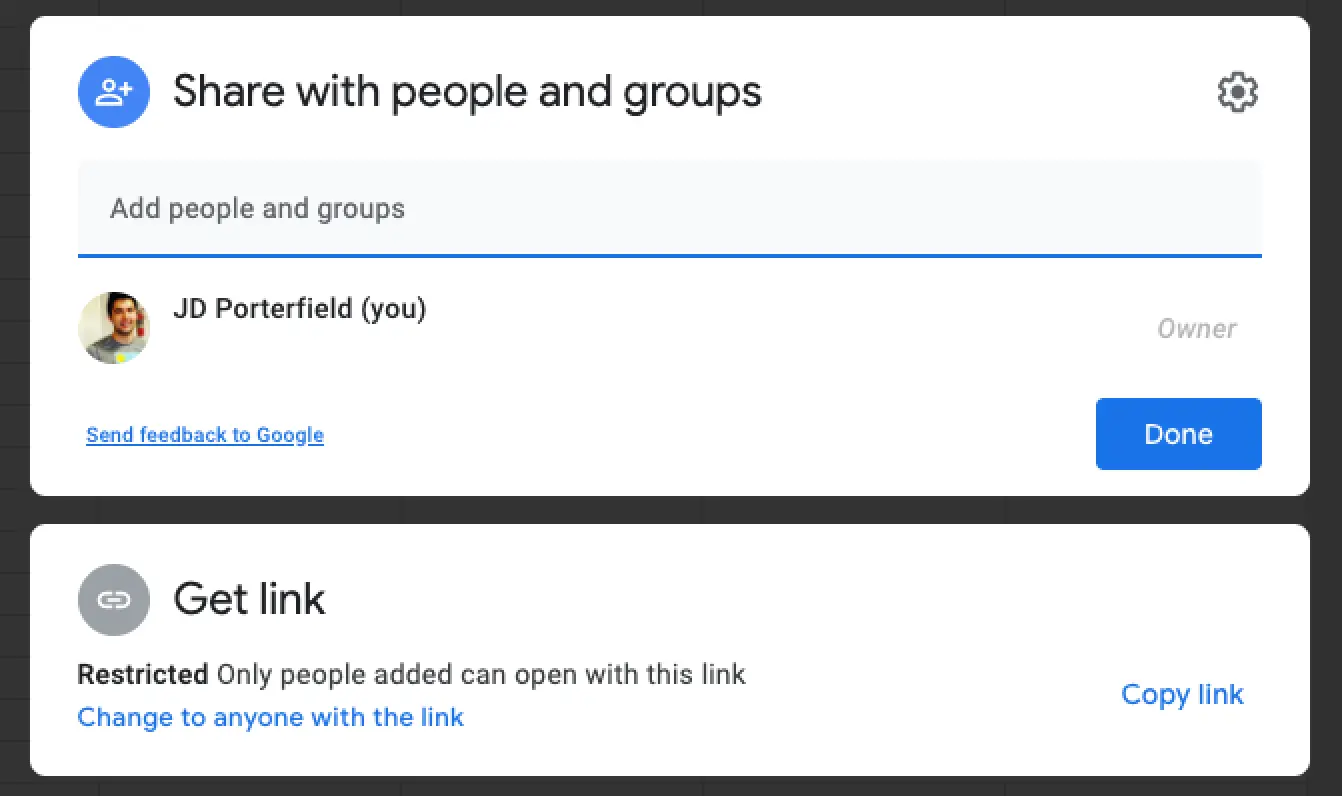
The last thing we need to do is edit the permissions on this sheet. This part is super important since by default the sheet will be private and accessible to only you. In order to make sure that any user can see comments, we need to make the sheet public, but we do not want random people to be able to delete or edit comments so we need to make sure that the sheet is publicly viewable but only editable by yourself. To do this, click the "Share" button in top right corner. By default, the sheet will be restricted, so click the "Change to anyone with the link" text.
Ensure that the sheet is now visible to anyone with the link, but that they will only be a viewer.
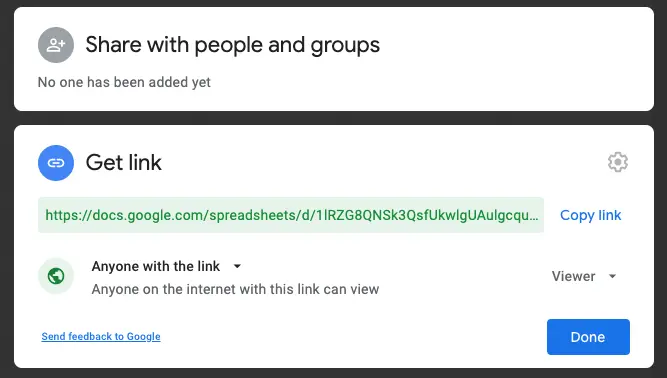
Next, click the copy link button and set that link to the side as well.
Jekyll Setup
The next part of the setup process is actually setting up Jekyll. This setup is pretty straightforward but I will give more details about the inner workings after describing how to just get it working if you don't want to know about the internals.
The first thing you will need to do is download the comment-section.html file that contains the code used for this implementation (update 2021.09.25, this originally contained a link to the old comment section gist but now refers to the GitHub project file that should be used going forward). This is a single file that contains the HTML for the section and also in-line scripting and CSS so that only one file needs to be added. Once you've downloaded this file, place it in your _includes folder.
Next, you need to update your _config.yml to supply the options necessary. These options require the Google Forms and Google Sheets URL and also a few fields we haven't discussed yet. You will need to add these to your _config.yml as the comment-read, comment-post, and comment-post-fields options.
First, take your Google Forms URL that you had copied originally. This URL should look something like this (notice the viewform part at the end):
https://docs.google.com/forms/d/e/1FAIpQLSd4vTzFMyfQAOWyLKRGQUklJ4B3nvjxsoHqbjGxV4auwSI9Ng/viewform?usp=sf_link
remove the part after the very last slash (including the slash itself) and add it your config file as comment-post
comment-post: https://docs.google.com/forms/d/e/1FAIpQLSd4vTzFMyfQAOWyLKRGQUklJ4B3nvjxsoHqbjGxV4auwSI9Ng
Next, take the shared link for the Google Sheets which may look something like this:
https://docs.google.com/spreadsheets/d/1lRZG8QNSk3QsfUkwlgUAulgcquWWJvZlWEU-JEiKrSI/edit?usp=sharing
And again remove everything after the last slash (including the slash itself). This field will be comment-read.
comment-read: https://docs.google.com/spreadsheets/d/1lRZG8QNSk3QsfUkwlgUAulgcquWWJvZlWEU-JEiKrSI
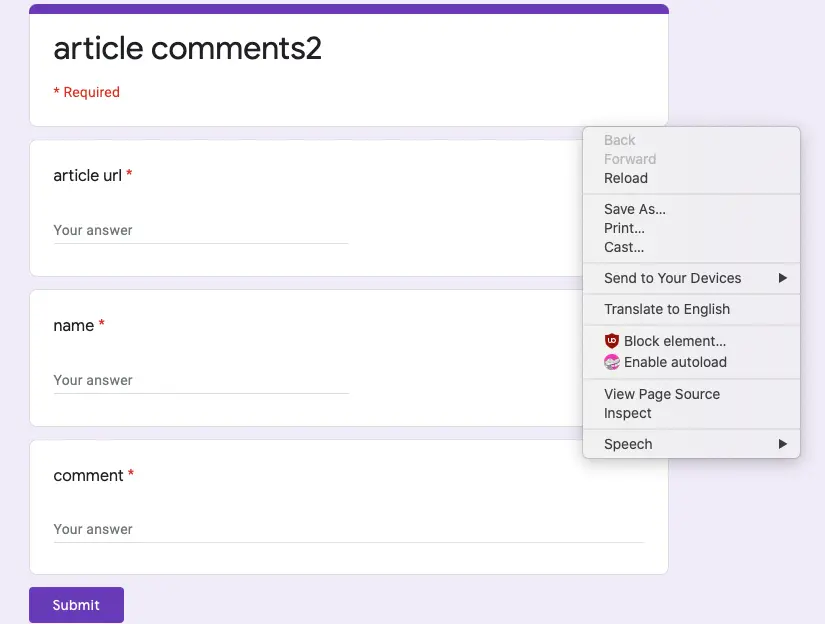
Finally, we need the comment-post-fields which actually post data to the Google Forms API and submit comments to Google Sheets. To get this, view the user-visible version of your form, right click, and choose "Inspect". Note that is this is only valid in Google Chrome. I'm not personally sure of the way to get to developer options in other browsers.
With Developer Options open, click on the "Network" tab. Finally, enter sample information in the form and click submit. For this part, make sure you enter data in each field that you can identify as part of each field. For example, in the article field you might type "article" and "name" in the name field, etc. After you click submit, find the "formResponse" item in the Network Tab. Scroll down until you find the "Form Data" section.
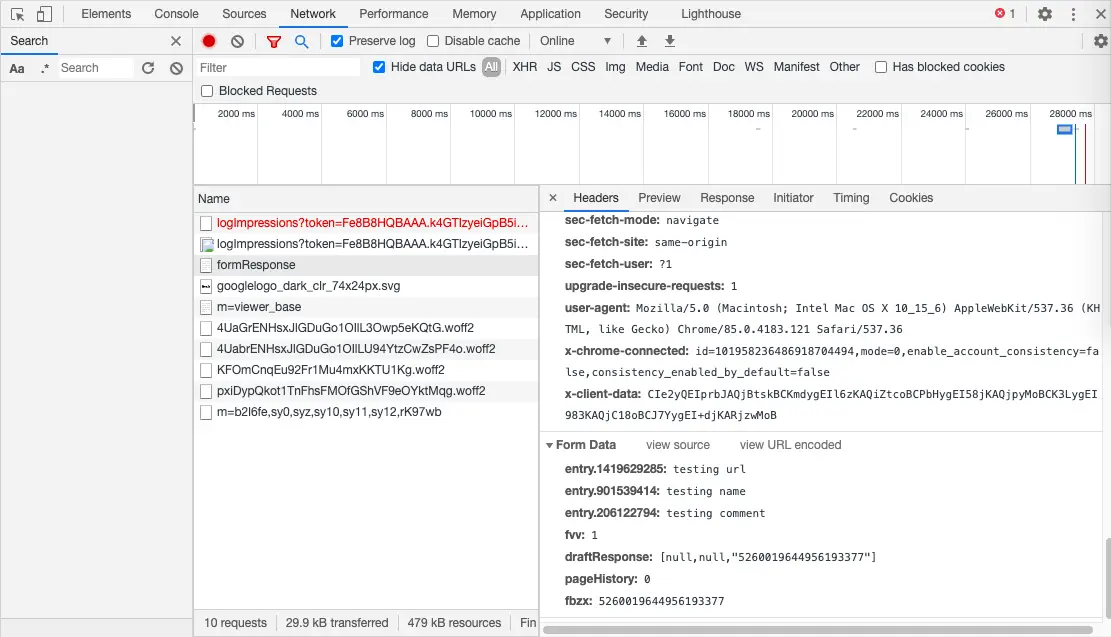
The Form Data section should contain 3 (or more depending on how many fields your form has) entries that start with the text entry.. These fields correspond to your form fields and are required to get the Jekyll comments working. Copy these to your _config.yml file as an array for comment-post-fields. These should be in the order url, name, comment.
When all is said and done, your config file should have options similar to the following:
comment-read: https://docs.google.com/spreadsheets/d/1lRZG8QNSk3QsfUkwlgUAulgcquWWJvZlWEU-JEiKrSI
comment-post: https://docs.google.com/forms/d/e/1FAIpQLSd4vTzFMyfQAOWyLKRGQUklJ4B3nvjxsoHqbjGxV4auwSI9Ng
comment-post-fields: [ entry.1419629285, entry.901539414, entry.206122794]
Finally, you need to include the comment-section.html anywhere you want to add comments. For my personal blog, I do this in the post _layout file by adding the following liquid directive
{% include comment-section.html url=page.url %}
Note that we need to pass the variable url in order to be able to sort comments by each post.
Wrap-Up
At this point in the guide, comments should be working properly in your site. Note that test comments on your test site will likely show up in your prod site since they will have the same relative URLs. This shouldn't be a problem though as long as you make sure to delete the rows in the Google Sheet before you publish the blog post or article to production. I'd also recommend setting up notifications so that you know when form answers have been submitted so that you know when you get new comments on your posts.
If you want to see this working in production, check out my posts at https://jdvp.me/articles or even comment on this page directly (if you are viewing this page on my site instead of on Medium). If you end up using this approach or have any suggestions for improvements, please let me know! I hope this is helpful and hope you have a nice day!
For anyone curious of the internals of the comment-section.html file, please keep reading!
The comment-section.html file should be pretty well commented, so I will just go over the parts that I find interesting. About half of the code is taken up by HTML, CSS, and external dependencies tags so we will ignore that half. In the remaining half, we have the 2 most important bits anyway:
- Reading from Google Sheets
- Writing to Google Forms
When we first load the page, we use the following function to load the existing list of comments:
/* Calls to the Google Sheets gviz API to load the comment data
   Since we are storing comments for all of our blog articles in one sheet, we filter
   by page URL. */
function reloadComments() {
	/* Use SQL in the gviz URL to load the correct csv.
	In this implementation, columns are mapped to the following:
		A - timestamp, the time the comment was left
		B - page url, the page the comment was left on
		C - name, the text left in the comment name field
		D - comment, the text left in the comment field
		E - isAuthor, boolean indicating if the comment was left by the actual author
	*/
	var sqlStatement = encodeURIComponent(`SELECT A, C, D, E WHERE B = '${thisPageUrl}'`);
	fetch(`{{ site.comment-read }}/gviz/tq?tqx=out:csv&sheet=comments&tq=${sqlStatement}&headers=0`)
	.then(response => response.text())
	.then(response => displayComments(response));
};
This section generates a SQL statement to get to read the appropriate columns of data and filter by the specific post page are on. If you end up changing this, the columns just correspond to the actual column names in the Sheet. Next, the SQL statement is URI-encoded and a fetch call is made. After the call returns, we get the response text and update the comment section. (Technically this isn't SQL but Google Visualization API Query Language. For more information see the Query Language Reference documentation)
The URL used in the fetch statement is a Google Visualization construct but we can break down the individual sections. When doing this at first, I found this StackOverflow answer helpful.
Specifies that we want the data in CSV format. There are other options (even including JSON) but it actually makes implementing our use-case a bit harder, so we stick to CSV.
Specifies that we want to pull data from the "comments" sheet, which is helpful if your overall workbook has many unrelated sheets
Specifies the data we want using the Query we had previously created.
Indicates that we do not want the returned CSV to have headers, since we rename the items anyway.
After the call to fetch comments returns successfully, we call the displayComments method. This method is pretty straightforward overall so I will just mention the following block of code:
/* Add headers so json objects are named properly */
comments = `timestamp,name,comment,isAuthor\n${comments}`;
commentList = $.csv.toObjects(comments);
This section renames the fields retrieved in the CSV from Google Sheets. If you end up adding more fields, make sure you map these items as well. The reason we add our own headers here is to ensure that the JSON is properly named without having the Google Sheets header names be specific values.
Writing comments relies on the Google Forms URL and is generally easier to understand than the reading comments portion.
/* Posts a comment */
function postComment() {
	var username = $("#comment-name").val();
	var comment = $("#comment-comment").val();

	fetch(`{{ site.comment-post }}/formResponse`, {
	  method: 'POST',
	  mode: 'no-cors',
	  headers: {
	    "Content-Type": "application/x-www-form-urlencoded"
	  },
	  body: encodeFormData({
	  	"{{ site.comment-post-fields[0] }}" : thisPageUrl,
	  	"{{ site.comment-post-fields[1] }}" : username,
	  	"{{ site.comment-post-fields[2] }}" : comment
	  })
	}).then(response => {
		$("#comment-name").val('');
		$("#comment-comment").val('');
		reloadComments();
	})
	.catch(error => {console.log(error);});

	return false;
};
Basically, we take the Google Form URL and then append /formResponse. We post data using the comment-post-fields from the config file and then reload the comments and clear the form once the post is successful. I currently have no logic for the error state, and I leave that as a challenge to the reader. If you end up wanting more fields on your Google Form, you will need to make sure to add those to the body section of this code.
Thanks for reading this far, hope you enjoyed it and/or were able to find it helpful!
Update : April 03, 2021
Minification
In the comments, Jolle mentioned that his site wasn't working with the provided comment-section.html file. After getting down to the bottom of things, we realized that the issue was caused by improper behavior when the code was minified by the theme that he was using. Since many others would be using minification as well, I have updated the gist for the [comment-section file] to work even when minified. This change mostly ensured that statements were separated by semicolons and that comments use multi-line comments instead of single line comments (since multi-line comments have indication of the comment ending). If you use the updated version and still have issues, please let me know!
Another issue I noticed is that for those that DO NOT use the MM-DD-YYYY date format, dates were not always being displayed properly in comment headers as shown below:

From my limited research, it seems that the following JavaScript Date construction doesn't work for other formats. If you know the proper way to read in these ambiguous date strings, let me know.
var date = new Date(stringDate);
There are basically 2 options to fix this. The first is to update the formatDate method in comment-section.html to properly read in the format you expect. You might do this by parsing the stringDate returned by Google Sheets and then use the Date constructor that accepts separate month, day, and year fields.
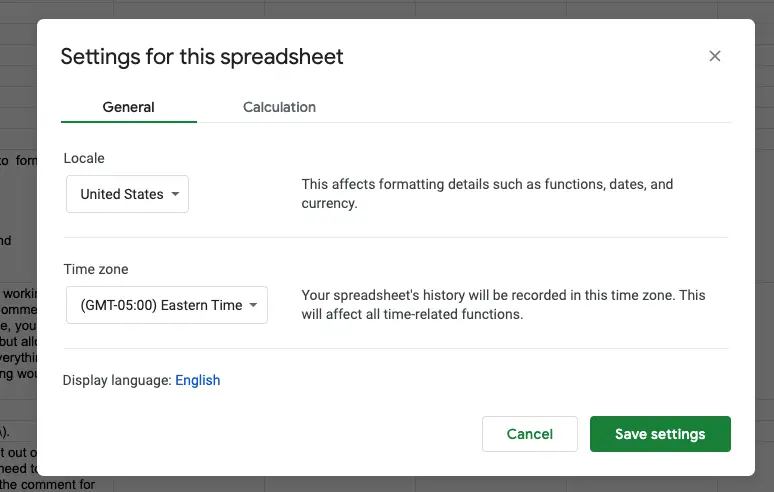
The second option doesn't require any coding. Basically, you need to change your spreadsheet's Locale to "United States". To accomplish this, you open your spreadsheet, go to File > Spreadsheet Settings, and the choose "United States" for the "Locale" setting. When you are done, the dialog should look as follows:
In either case, if you are based outside the US, you may want to consider updating the formatDate anyway in order to display the date how you want. Basically, you would probably want to replace "en-us" with the proper locale string in the following code.
return `${date.toLocaleDateString("en-us", dateOptions)} at ${date.toLocaleTimeString("en-us", timeOptions)}`;
In the comments, Mato requested a version of the comment-section.html file that allowed the entire comment-section to be lazy-loaded only when/if the user decided to actually look at the comments. By using this approach, we won't make any additional calls for the comemnt section until the user taps the "Load Comments" button.
This functionality can be seen in this gif:
If you want to use load comments this way instead of when the page does the initial load, you simply need to replace your comment-section.html file with the lazy-load version of comment-section.html. If you have made changes to to your file, you'll need to make sure to re-do those changes in this new file.
Update : September 25, 2021
Updated references to the old comment-section.html to refer to the new jekyll-comments-google-forms project with the most up-to-date, configurable version of the file. It contains configuration options for lazy loading, chunked comments, API via Google Apps Script, and reCAPTCHA so definitely refer to that project rather than any of the old gists.
---
This article is also available on Medium. You can find it
here.Filed under: