Using Google Forms for Jekyll Comments, Revisited
Making free comments even better
by JD Porterfield on updated
Roughly a year ago, I published an article outlining how I added commenting to my site using Google Forms and gave a step-by-step guide to doing so. Overall, the feedback I got was very positive and the community seemed to like it generally.
However, in the intervening year there have been more comments on the original article asking for various improvements and my own personal usage has led me to want to make a few updates as well. As such, I have made some updates to the original files required (comment-section.html) and will outline the changes in this article.
If you had previously been using comment-section.html, after following the previous guide, you should be able to immediately begin using the new comment-section.html file right away. There are a couple of new changes that are enabled by default, but the functionality should largely be the same. If you are new to using Google Forms for setting up Jekyll comments, please see the original article for instructions on how to set up Google Forms and Jekyll: Using Google Forms for Jekyll Comments. Reading until the start of the 'Wrap-Up' section should be sufficient.
Previously, I had released the code for the comment-section.html file across multiple gists on GitHub - one for the regular comment section, and one for lazy-loaded comments that are only loaded when the user wants them to be. This was not only tedious for me, but likely made it hard for early adopters to know when something had changed or been updated.
As such, going forward, I will maintain the code in a dedicated GitHub project with labeled releases: jekyll-comments-google-forms.
For reference, the v1.0.0 release refers to code that existed when the initial article was written and v2.0.0 refers to the code that existed at the time of the original writing of this article. I may not always update this article to reflect the most up-to-date features (if more end up being necessary) so check that project's README for implementation details to be sure. This article will include details for implementation but it may get out of date sooner or later.
To update from v1.0.0, simply copy the new comment-section.html from the jekyll-comments-google-forms project. If you've made changes yourself, you will need to re-make them.
After upgrading, you will see the something similar to the following in all places with comments enabled that have more than 5 comments.
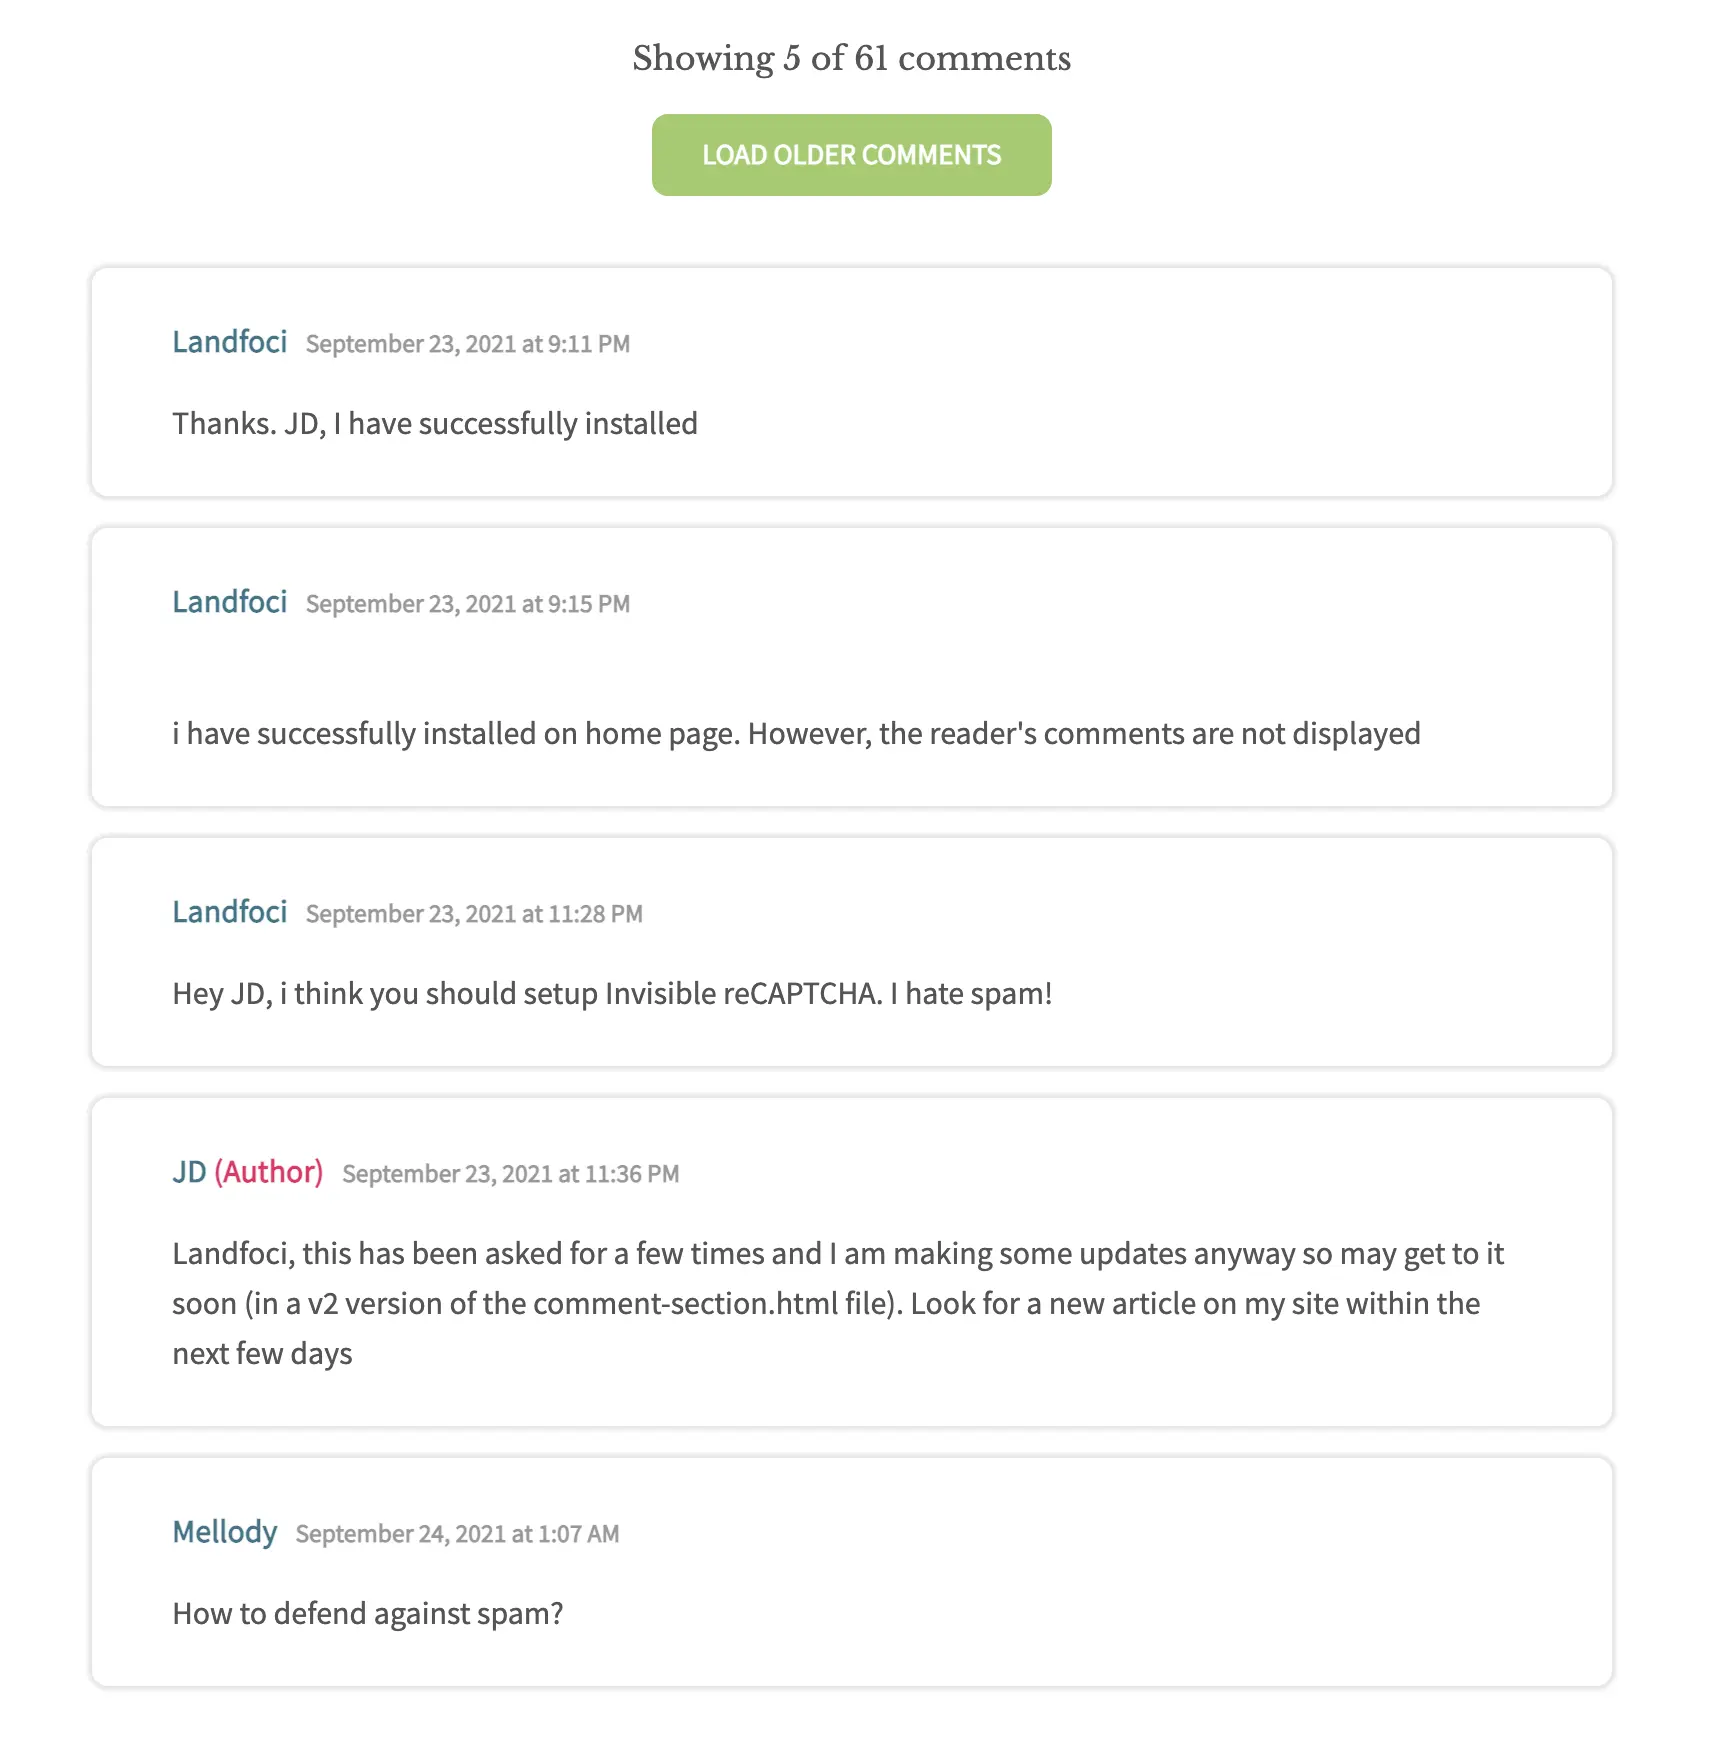
I had previously noticed that on my original article with dozens of comments that the page scroll bar was getting out of hand and that I had to scroll through all of the very old comments even when I wanted to just view the last one or two. As such, comments will now be shown to the user 5 at a time. If the user actually wants to see more comments, they are able to do so using the "Load Older Comments" button.
Note that this is mainly a visual change since the request made to Google Sheets to get the comments retrieves all of the comments at once, so the button simply displays more of the data that is already available.
Since the chunked comments feature is now turned on by default, you must opt out in you site's _config.yml or individual page's frontmatter:
Copied!
google_forms_comments:
  chunked_comment_loading: false
chunked_comment_loading: false
If the page's front-matter value for chunked_comment_loading differs from the configuration option mentioned in the base site config, the page's value will be used. Therefore, you can have a site with chunked comments off on all but a single page or vice versa.
Chunk Size
If you want to change the chunk size, you will need to update the code inside comment-section.html directly.
Concretely, you need to update this block of code:
Replace -5 with the negative version of whatever you want the chunk size to be. For example, if you want to show 8 comments at a time, you should update the code to be:
The reason the value is negative is because we want to show the latest comments first (which is why the load more button says to load 'older' comments). If it was positive, it would show the oldest comments and the user would need to click to see newer comments.
Also want to quickly mention that the label above the comments shown in the screenshot above ("Showing 5 of 61 comments") will now be present any time more than 0 comments are displayed. If you don't want this, find all usages of num-comments-displayed in the code and remove the items accordingly.
The next large 'feature' that can be used without much trouble is lazy loading of the comment section. Technically, this had already been supported via a separate lazy-loading comment section file but I had found it hard to maintain both at the same time and keep them up-to-date with each other, so I've now made this configurable via the site's _config.yml or individual page's frontmatter. By default it is turned OFF.
To opt in:
google_forms_comments:
  lazy_load_comments: true
If the page's front-matter value for lazy_load_comments differs from the configuration option mentioned in the base site config, the page's value will be used. Therefore, you can have a lazy loaded comments an all but a single page or vice versa.
When enabled, this feature waits to load comments until after the "Load Comments" button is clicked. This means that the comments themselves, as well as JavaScript files needed for the comment section feature are not loaded until necessary.

For reference, the current list of JavaScript libraries that are imported for use in the comment section are as follows:
- jquery-csv : Used for parsing CSV returned by Google Sheets, minified version is ~2.8kB
- jquery : Necessary as it is a dependency for jquery-csv, otheriwse unused. Minified version is ~31.1kB
- validator : Used to sanitize comments both during submission and display. Minified version is ~20.0kB
By not loading these, you save 50kB per page load in addition to the size of the actual comments payload itself. This may not be a lot, but any little bit can be helpful in terms of performance. Further, users that don't want to view the comments in the first place will have their data spared.
Larger Changes - Using Google Apps Script
The changes mentioned in the previous section are relatively simple and still rely on the process outlined in the previous article for the setup process. However, the change described in this section completely changes the setup process.
By using Google Apps Scripts to be a bridge between our spreadsheet and Jekyll site, we can enable some more advanced features that require a server usually - such as reCAPTCHA. Further, we can get rid of our Forms entirely and make our sheet private so that no one else can see the data.
Setting Up Google Apps Script
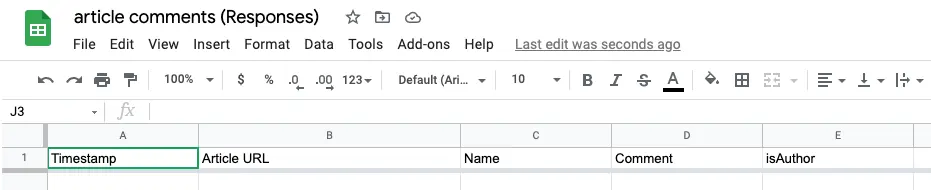
If you have v1.0 comments setup already, navigate to the Spreadsheet that your comment responses are stored in. If you don't, go ahead and make a spreadsheet with the following columns: [Timestamp, Article URL, Name, Comment, isAuthor]
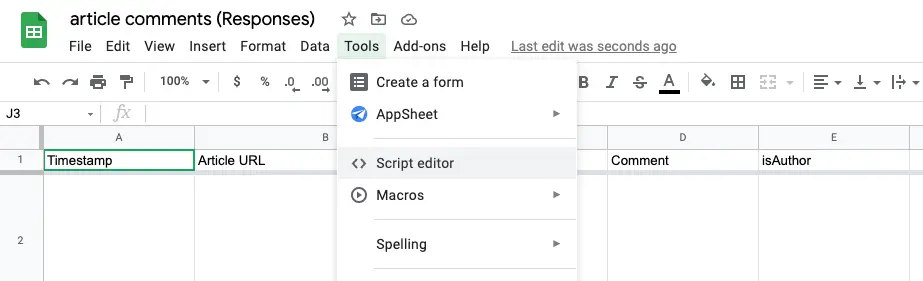
Next, open the `Tools` menu and select the `Script editor` option. If you ever need to come back to the script editor, you can click this same option from your spreadsheet.
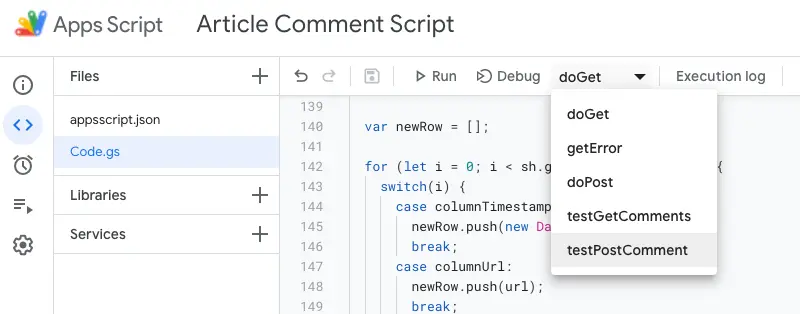
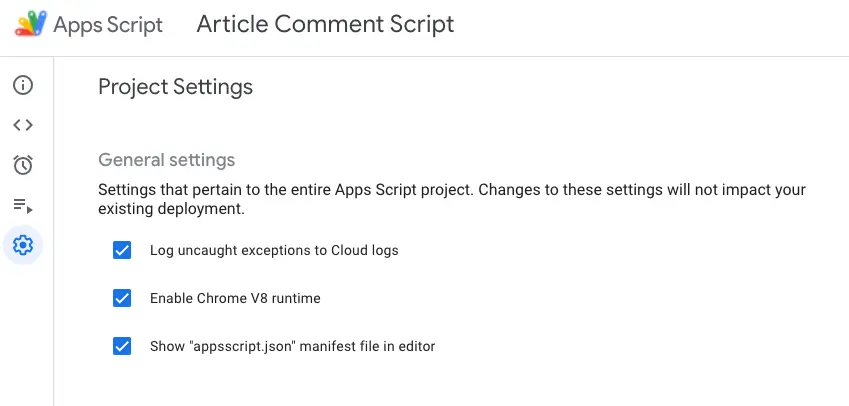
This will open up a new script editor project that should look a bit like the following screenshot.
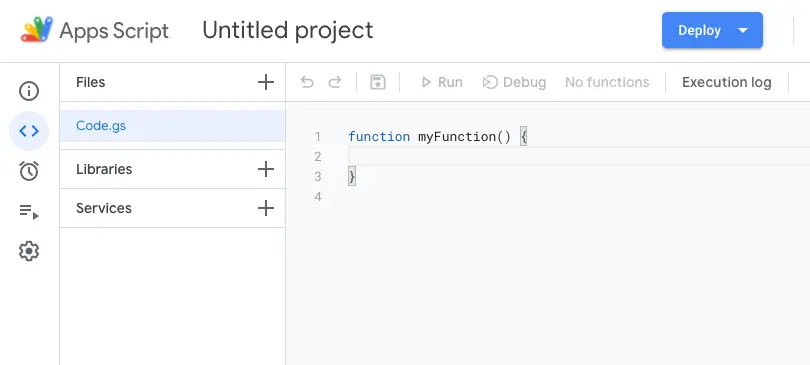
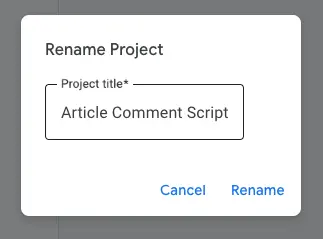
Tap on the "Untitled Project" text at the top to give it a better name. This will be helpful later since you will have to give it permission to access your spreadsheet so it will live in your Google account's permission page (Apps with access to your account). If it's named Untitled Project, you might end up revoking permission later accidentally.
With that accomplished, head on over to the jekyll-comments-google-forms project. Inside the project, open the appscript folder and copy the contents of the Code.gs to the Code.gs file open in your Apps Script editor.
The code you copied into your edit has 2 main functions, doGet and doPost, and 2 helper functions to aid testing & setup, testGetComments and testPostComment.
doGet : This method is used to get comments via an HTTP GET request.doPost : This method is used to post comment data via an HTTP POST request. If reCAPTCHA is enabled, it is verified before actually writing the data.testGetComments : Used in the editor only to test the doGet function.testPostComment : Used in the editor only to test the doPost function.
As far as I can tell, doGet and doPost are required names for the Apps Script "Web app" deployments, which we will be using. The URL in both cases will be the same but one will use a GET and the other a POST.
Now that the code is in place, switch to the testPostComment execution item in the editor:
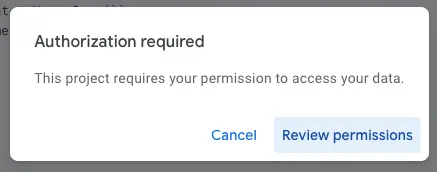
Next, click the the "Run" button. At this point, you will need to provide permission to the app to read and write to the spreadsheet. A dialog asking you to give your permission should appear on screen.
Tap on the "Review permissions" button and then choose the account you want to use, which should be the account that was used to make the spreadsheet.
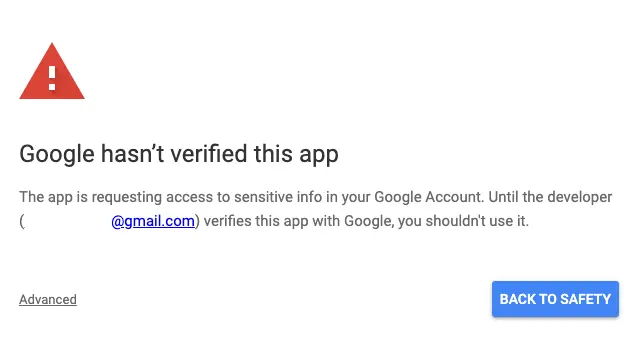
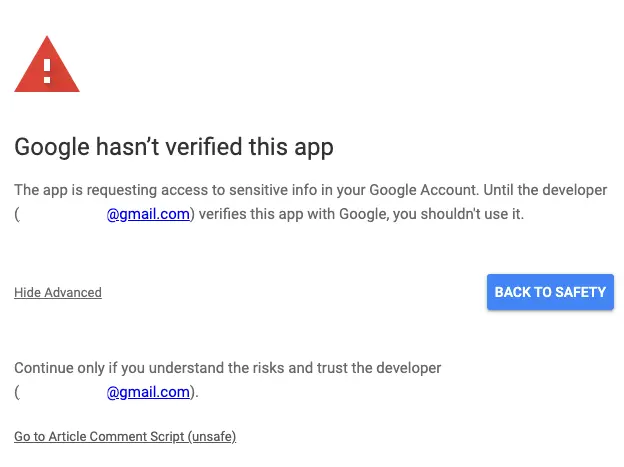
If you get a permissions error saying that the "Google hasn't verified this app" like in the following screenshot, ensure that the email address matches the one you are using, and then click "Advanced".
From the advanced menu, select the link at the bottom ("Go to Article Comment Script (unsafe)" in the following screenshot), which should mention your script's name.
Finally, check that the permissions are correct. It should only ask for permission to "view and manage spreadsheets that this application has been installed in". Since this script was created from the comments spreadsheet, this will only grant the script access to the single spreadsheet. If for some reason it has a broader set of permissions than that, see the "Using Explicit Apps Script Permissions" section below.
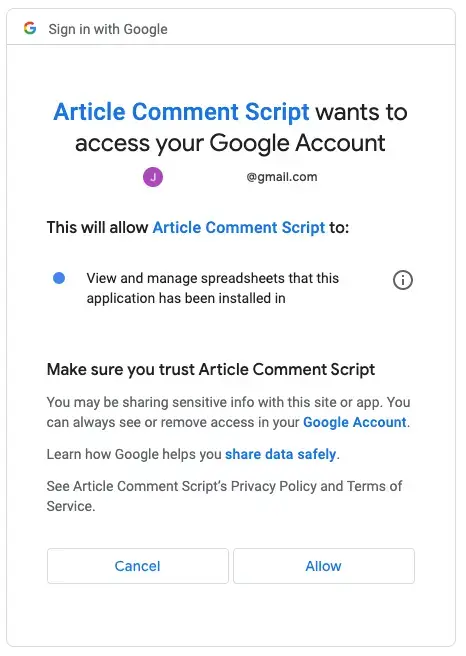
Once you tap the "Allow" button, the testPostComment script will finally run. It should bring up the "Execution log" panel and results similar to the following.
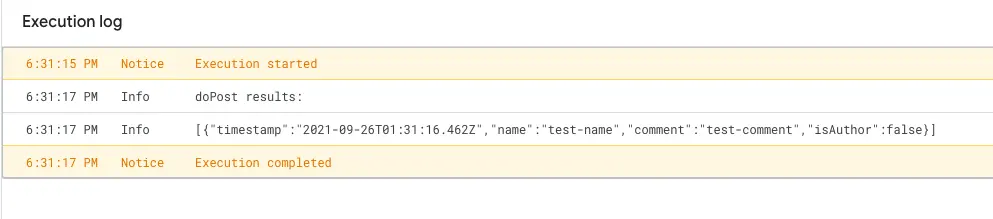
If you check your spreadsheet at this point, you should be able to see a new item added as a result of the testPostComment execution. Since testPostComment also queries the sheet, both should be working.
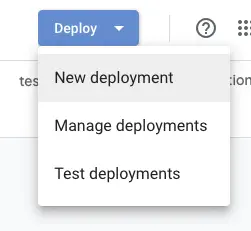
The final step is to provide this script as an Apps Script web app so we can hit it like an API.
To do this, click the Deploy button at the top right of the script editor and then choose the New deployment option.
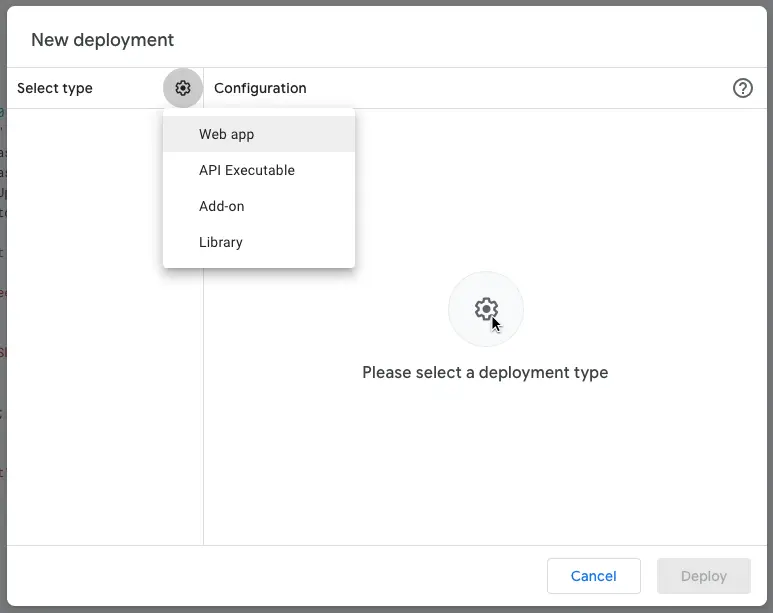
In the New Deployment dialog, select the Gear icon and then choose the Web app option.
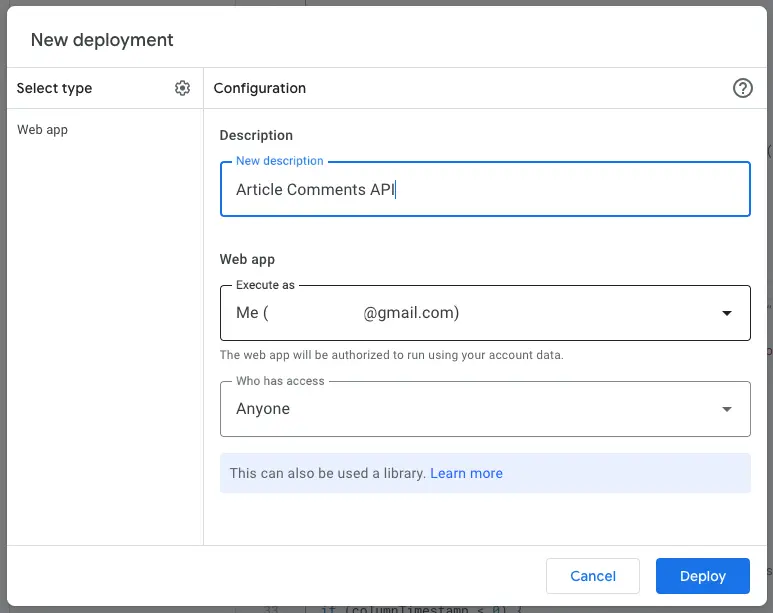
Now you'll need to enter some info. First, give a meaningful description, although I don't think it will be visible many places. Then, select Me in the Execute as field, which means that the app will run as if it is you. This is why we want to ensure the app has as narrow a scope of permissions as possible. Finally, choose Anyone in the Who has access field so that anybody can hit this API.
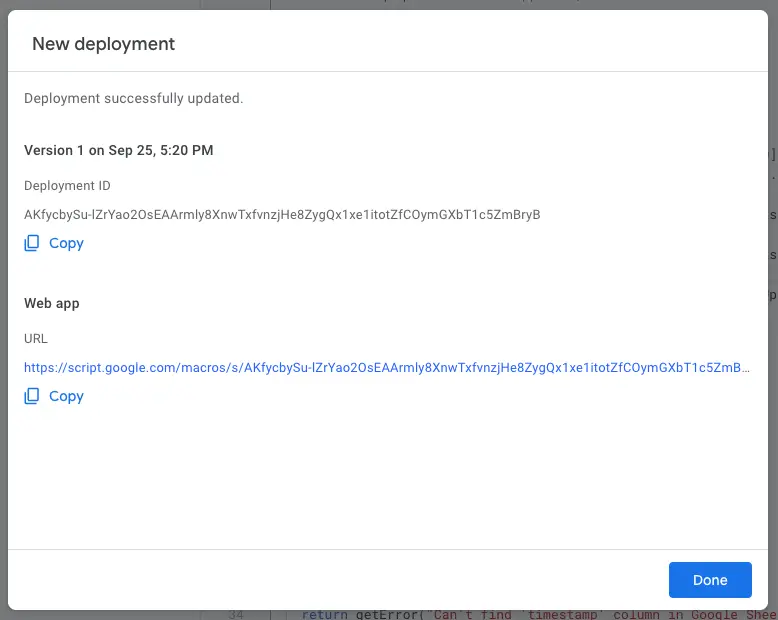
Finally, click Deploy. This will hopefully deploy properly and display some information like in the following screenshot. Copy the link in the "Web app" section, since it will be needed for Jekyll setup. You can click "Done" and leave the editor if you want.
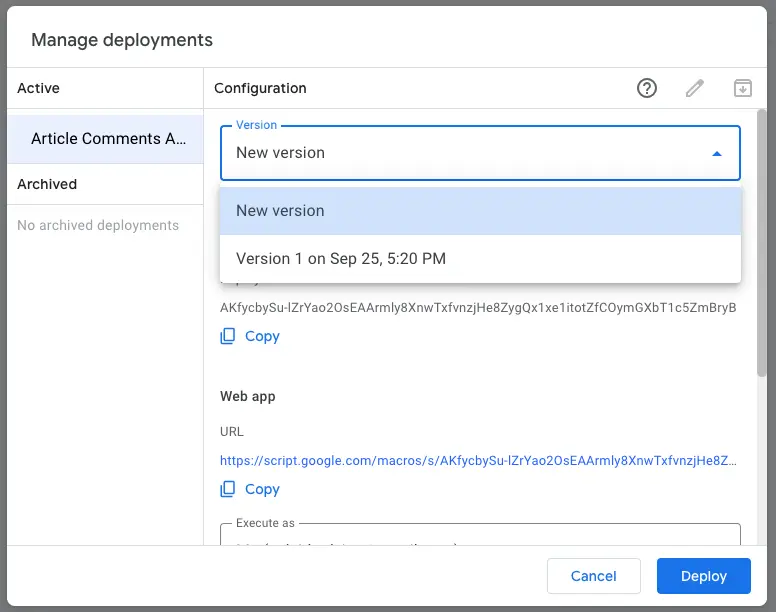
Important note: If you make changes to the Code.gs file, saving is not sufficient for it to be run when hitting your API. You must redeploy the code. To do this, click Deploy > Manage Deployments. Choose your current deployment from the Active section and click the Pencil icon to edit it. In the Version drop-down, select New version and then hit the Deploy button. You should see an updated deployment confirmation pop-up similar to before. The URL should still remain the same in my experience.
Jekyll Setup
The Jekyll Setup is really straightforward compared to the Apps Script setup.
First, remove the following from your _config.yml file: comment-read, comment-post, and comment-post-fields. You can leave them if you just want to test out the Apps Script approach for a bit but may revert, but they will be unnecessary if using Apps Script. If you eventually do choose to use Apps Scripts permanently, you can also unlink your Google Sheet from the original Google Form, delete the Google Form, and make the Sheet private again.
Next, add the gogole_app_script config item inside of _config.yml as a child of google_forms_comments. The value for this should be the URL you copied after deploying your Apps Script. For reference, it generally starts with https://scripts.google.com/macros/s/
google_forms_comments:
  google_app_script: your copied URL here
The comments-section.html file will determine which version you are using and act accordingly. Only the code for one or the other will be included in the generated site. You can now run or re-generate your site for testing.
Using Explicit Apps Script Permissions
You can skip this section if the permissions worked properly for you above. If otherwise it seemed like Apps Script wanted permissions for ALL sheets, then you can try the following steps.
First, open the Apps Script settings by clicking on the gear icon on the left. Inside the menu, ensure that the Show "appsscript.json" manifest file in the editor option is checked.
When you go back to the editor, you'll see a new file other than the Code.gs file we had updated earlier. Update the contents of that file, appsscript.json, with the version from the jekyll-comments-google-forms project, which explicitly defines the permissions we want.
Try re-running the testPostComment function again and the permissions prompt should hopefully be correct.
Considerations
Although I personally think that using Apps Scripts is worth it, it may not fit your needs. Here is a brief list of pros and cons of using the Apps Scripts approach.
Pros
- Allows us to stop using both Google Forms + Google Sheets
- Allows our Google Sheet to be private
- Since code is running on server, it can't be tampered with to prevent reCAPTCHA or other bot-mitigation tools
- Since Apps Scripts is accessible from within Google Sheets itself, it does not appear to require signing up for extra tools like Heroku, etc
- The exposed API actually returns JSON rather than CSV, so client logic is much simpler
- Apps Scripts has direct access to spreadsheets so doesn't require any weird workarounds to read and write to Google Sheets, like would be required if hosting this script somewhere else
- With the Apps Scripts method the client side code never imports jquery or jquery-csv as they are not required since the API returns JSON directly
Cons
- Apps Scripts appears to be quite a bit slower than using the Forms approach. I've seen the Post request take up to 5 seconds before, but that may be acceptable, especially as a rate-limiting measure (LOL)
- Apps Scripts DOES have quotas, but I am not totally sure how they apply. My plan is to watch out and see what happens. My main concern would be whether or not the following items impact this project:
- Triggers total runtime (limit is 90 minutes per day)
- Simultaneous executions (limit is 30, does this mean the script would break if more than 30 people on site at once?)
- This thread on StackOverflow seems to indicate that the only issue might be execution time but the thread is very old
- If using reCAPTCHA with server-side validation (will describe after this section), could run into the URL Fetch calls quota (20,000 per day). However if validating more than 20k comment post actions per day, it might be worth it to use a paid comment system or use something like AWS Lambda. However, if using an external service, it will end up having to wrap the Google Forms approach since it doesn't have the kind of access that Google Apps Scripts provides so then it becomes easier to use a different storage mechanism etc. etc.
With that being said, I will personally be using Apps Scripts for the time being. If it becomes untenable or anything weird happens, switching back to the Google Forms approach just requires reverting changes to _config.yml so not too worried.
reCAPTCHA
The last major change to comment-section.yml is the additon of reCAPTCHA v3 (Invisible reCAPTCHA). reCAPTCHA helps to prevent spam and bot accounts from posting tons of comments. At a basic level, with reCAPTCAH v3, flow is as follows:
- Client side reCAPTCHA library is loaded along with the comment section code
- When the user clicks the "Post" button, reCAPTCHA generates a token
- This token is sent along the rest of the POST comment information to our Google Apps Scripts API
- The server (Google Apps Scripts in our case) sends the token separately to Google to get a score
- Apps Scripts checks the score to see if the user is likely to be a bot or suspicious
- If suspicious, the comment is rejected and an error is displayed to the user
- If not suspicious, the comment is posted as normal
reCAPTCHA v3 is never visible to the user (other than the disclaimer), so no popups are shown to challenge the user. If that kind of behavior is desired, you might try to tweak comment-section.html to use v2 instead of v3.
To get started, you would first need to follow the instructions on the reCAPTCHA website to get API keys. One important thing to note is that you may want to include your local environment for testing purposes. For reference, during development my Domain settings were as follows:
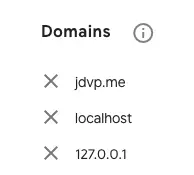
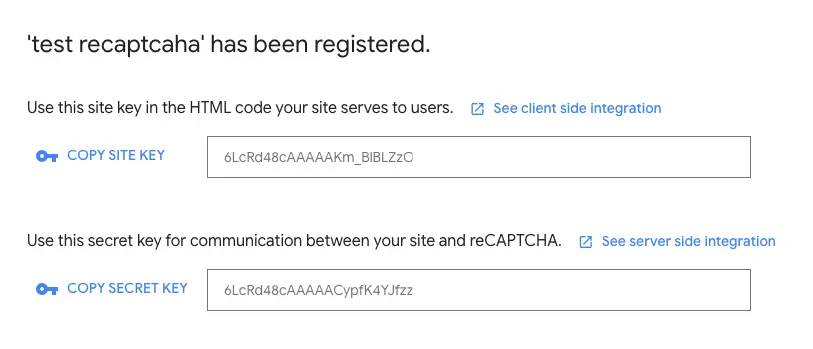
Once you've walked through the steps to register your site, you should get a pair of keys. The first key is the site key and will be visible to end users poking through your source code. The second key is the secret key that will be hidden away in your Apps Script API. This combination of keys allows
Apps Script Updates
Copy the secret key into the RECAPTCHA_SECRET_KEY field in the Apps Script Code.gs file. If this is present and non-null, the code to reCAPTCHA validation will be run when comments are posted. Note that you should ensure that the key is surrounded by quotation marks.
It should look something like this:
var RECAPTCHA_SECRET_KEY = "abcdefghijklmnopqrstuvwxyz";
If you had manually updated appsscript.json earlier to add the Spreadsheet permission, update the oauthScopes list to include https://www.googleapis.com/auth/script.external_request since permission is required to make API calls necessary for reCAPTCHA. The appsscript.json will then look a something like this:
{
  "timeZone": "America/Los_Angeles",
  "dependencies": {},
  "exceptionLogging": "STACKDRIVER",
  "runtimeVersion": "V8",
  "oauthScopes": [
    "https://www.googleapis.com/auth/spreadsheets.currentonly",
    "https://www.googleapis.com/auth/script.external_request"
  ],
  "webapp": {
    "executeAs": "USER_DEPLOYING",
    "access": "ANYONE_ANONYMOUS"
  }
}
Once that's updated, or if you didn't update appsscript.json in the first place, run the testPostComment method and run through the permissions dialogs again. Finally, re-deploy the script.
Jekyll Site Updates
Next, add the site key into your site's _config.yml file.
google_forms_comments:
  recaptcha_site_key: Site Key Here
In order to use reCAPTCHA, you must also have the Apps Scripts feature enabled. If a recaptcha_site_key is provided but Apps Scripts is not being used, the token will essentially be generated and then thrown away so scoring will not be validated. This is because otherwise the validation code would be in the client code anyway and trivial to defeat.
Once these are completed, the client side comment box will have a disclaimer underneath it mentioning reCAPTCHA. Either this disclaimer or the reCAPTCHA badge must be shown according to the reCAPTCHA FAQs, so keep that in mind if updating the disclaimer.
Other Small Changes
Other than the 4 large items (Chunked Comments, Lazy Loading, Apps Scripts, reCAPTCHA), there are a few smaller changes.
One visible change is a new loading indicator that is shown to the user right after they click the post comment button. This will show while the relevant API calls are inflight. While the indicator is visible, the button is also disabled, which also prevents accidentally submitting the comment twice or purposefully spamming the comment without re-entry. The know-how for adding this indicator was found here.
Another minor change was to fix a bug that could occur in sheets where un-linking and re-linking the sheet to the comments form would cause new comments to be added to the sheet above the old comments. As such, comments are sorted before being displayed now since table order isn't guaranteed to be sorted by timestamp.
Comments inside comment-section.html are also written in liquid now, so should not end up in the generated site code. This had caused issues with minification in multiple cases so I think this is the best solution since the end user wouldn't need the comments anyway.
Thanks
That's it for today I think. I may have forgotten a few minor updates but they would be mostly quality-of-life things not features or anything like that.
Thanks for sticking with me this far and let me know if this helps you out in the comments below!
If you need any help, feel free to ask in the comments or create an issue in the GitHub project if you encounter any problems: jekyll-comments-google-forms!
Update : November 18, 2021
Updated to fix some minor grammar issues. Thanks to pippim on the Jekyll Talk forums for catching it!
Update : January 29, 2022
Updated the project to support replying to comments. This feature is enabled on my site, so you can try it out below!
This feature is set using the comment_replies_enabled option and is disabled by default.
google_forms_comments:
  comment_replies_enabled: true
Once enabled, comments will have show a "Reply" button. When clicked, it adds a field to the the "Add a Comment" entry form indicating that you are replying to the comment. When you finish leaving the comment, the new comment has a link to the previous comment which helps give context to your comment. Clicking on the link jumps to the comment that is being replied to. See the video below for a sample of the flow.
At a technical level, this new feature is backwards compatible since it does not require changes to the underlying Google Sheet. The way this works is that the extra data is stored as JSON in the beginning of a comment and the timestamp is used as the comment ID.
Update : September 09, 2023
Add link that was missing. Thanks to Martin for pointing it out in the comments!
Update : October 18, 2023
Added clarifactions/updates to the section about setting up reCAPTCHA as it had been confusing and outdated as mentioned by Martin in the comments.
Filed under: