Genshin Impact Wood Burning Project: Kokomi
A fun mix of multiple hobbies!
by JD Porterfield on
Meta-note: Starting with this article I will be adding non-technical articles/blogs onto my site! They will be filtered out by default in the main articles list page but you can un-filter them if you want! I think the creative ones will show up in the site's Atom feed though. I don't think I have enough people listening in on that for it to matter but if you are and it's annoying, please let me know and I will figure something out.
In the last year or so I have been dabbling in Wood Burning as a hobby. I'm still getting better and none of my projects have been perfect, but I thought it might be cool to show-case my projects. In my latest project, I wanted to enter an art contest for my favorite Genshin Impact character, Kokomi. I'm not much of an artist so both digital art and regular illustration were far outside my skill-set but I felt that I could try to wood burn something.
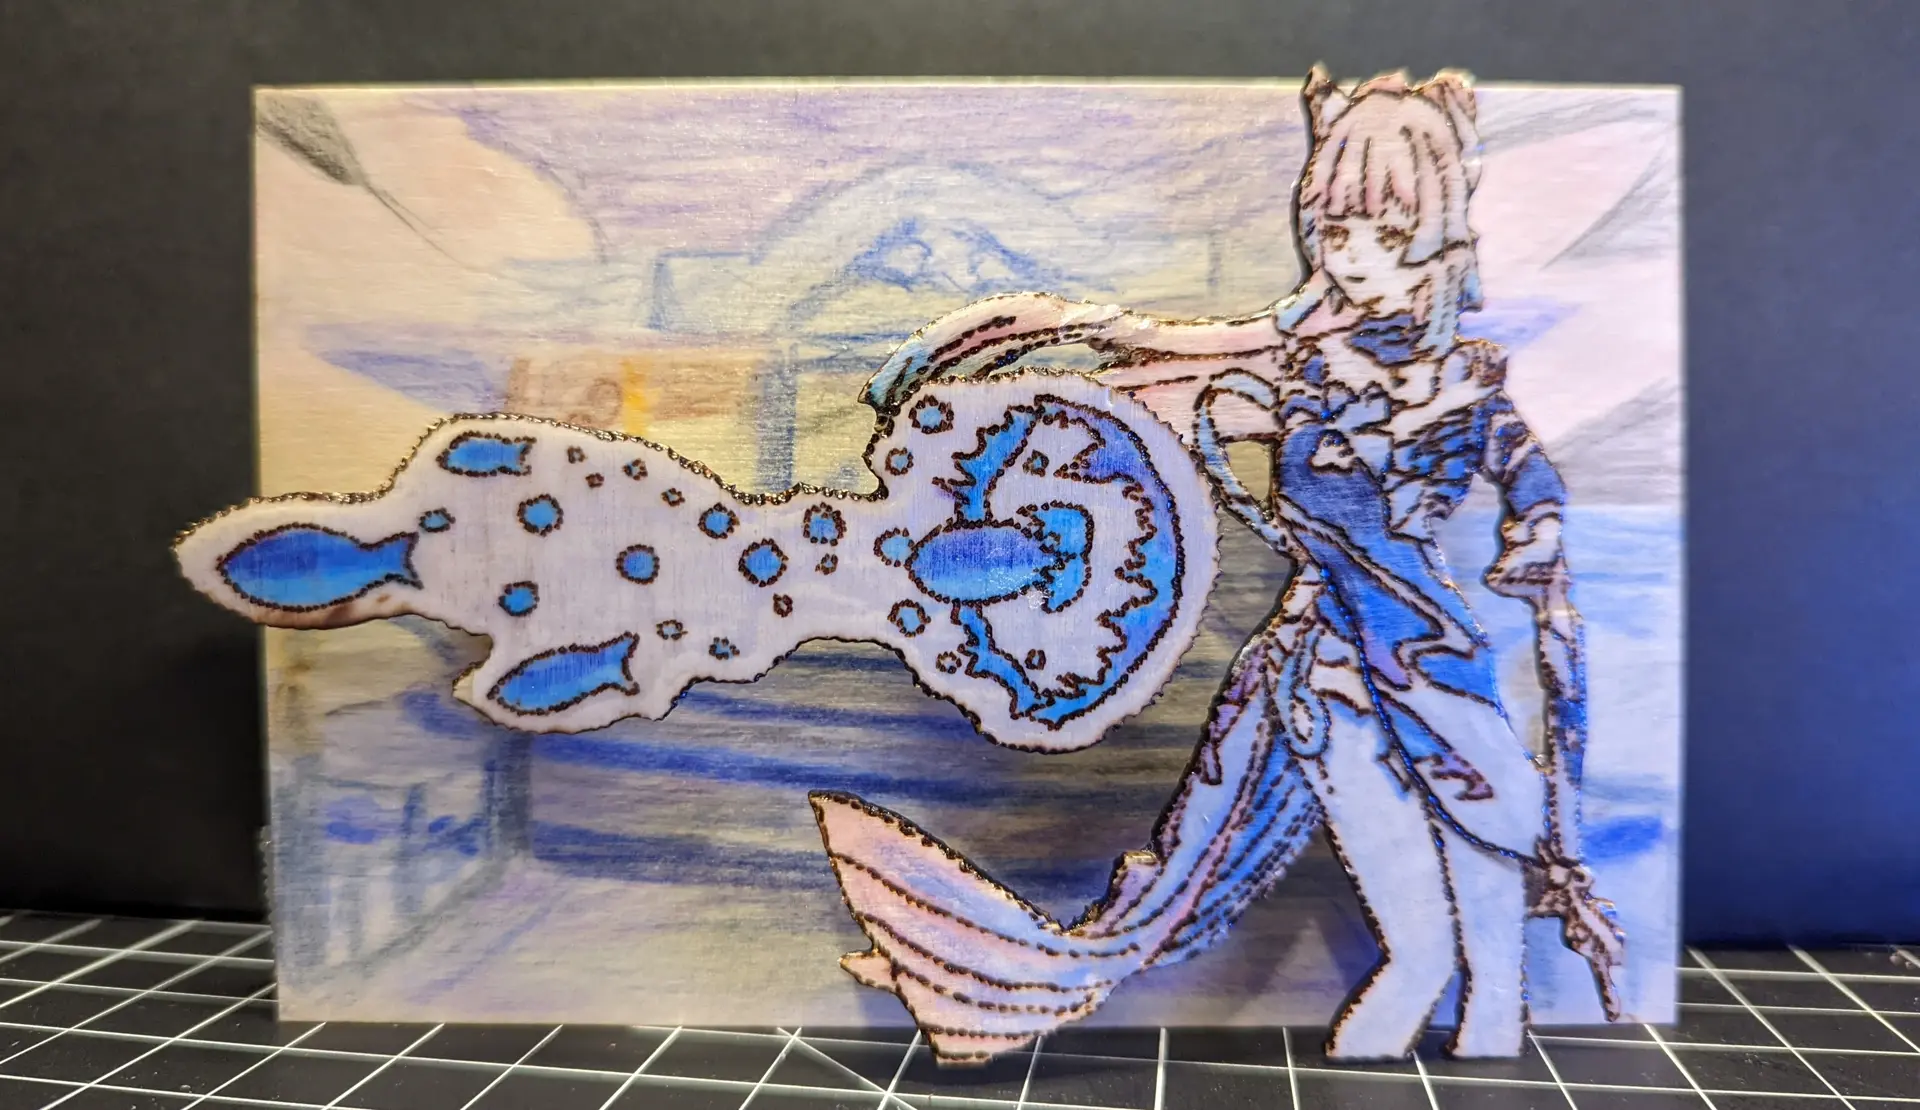 Final output in case it's all you see!
Process
In case you aren't familiar with what wood burning is, it's basically using a really hot piece of metal to burn a design into a piece of wood. It's also called pyrography. The tool that I use has a brass tip that can get up to 950 degrees Fahrenheit and cost about 30 dollars on Amazon, so it's pretty cheap to get into as far as hobbies go.
For me, creating something with wood burning follows a pretty simple process:
- Gather inspiration and/or print out design
- Use carbon transfer paper to trace design onto wooden work piece
- Wood burn the lines
- Sanding
- Coloring if necessary
- (Kind of optional) Varnishing
In this project, there were a few additional steps since I wanted to make a more 'dynamic' fan art. I wanted to create something similar to acrylic character stands but with a bit more depth. As such, I also had to cut out the individual pieces, figure out how to attach them, and create the background art.
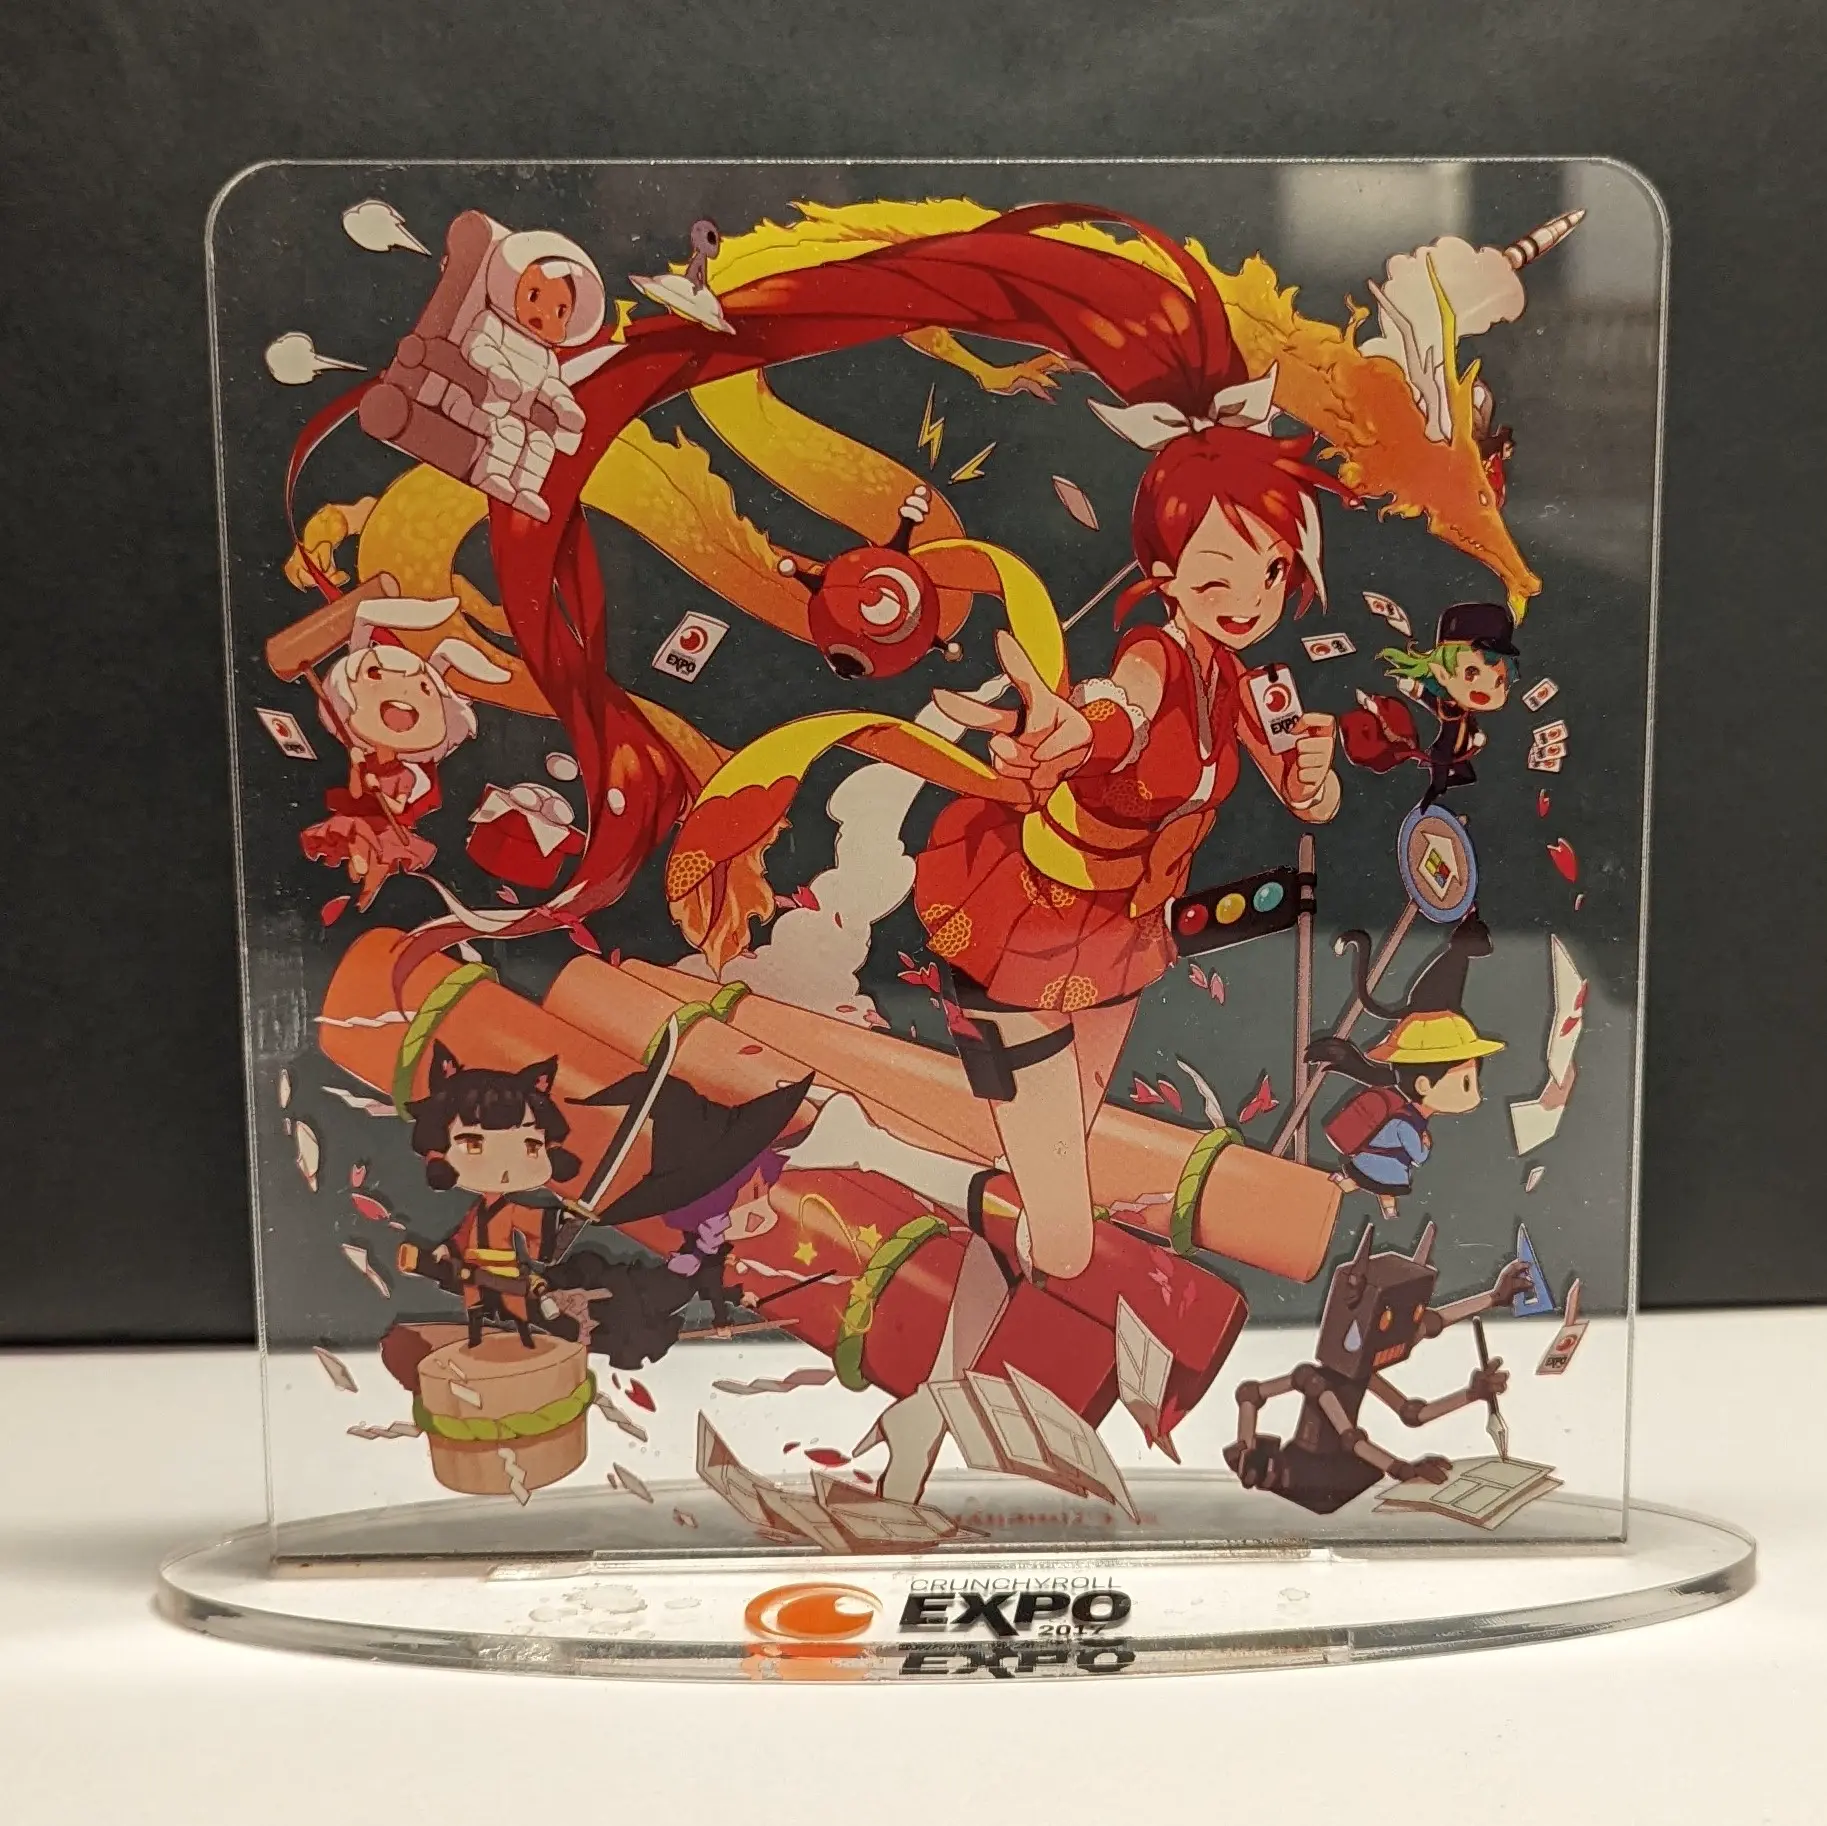 An example acrylic character stand
Gathering Inspiration
The first step is to figure out your composition. For me, I wanted to have Kokomi attacking so that I could demonstrate the her cute fish attacks (each attack is a small fish made out of water). I wanted the character to remain true-to-game but felt that it would be better for the background to be less detailed - because I am not the best artist - and for the attack part to look more lively by having more fish than usual.
With that in mind, I grabbed a couple screenshots of the character animation I wanted to use and of the background to emulate.
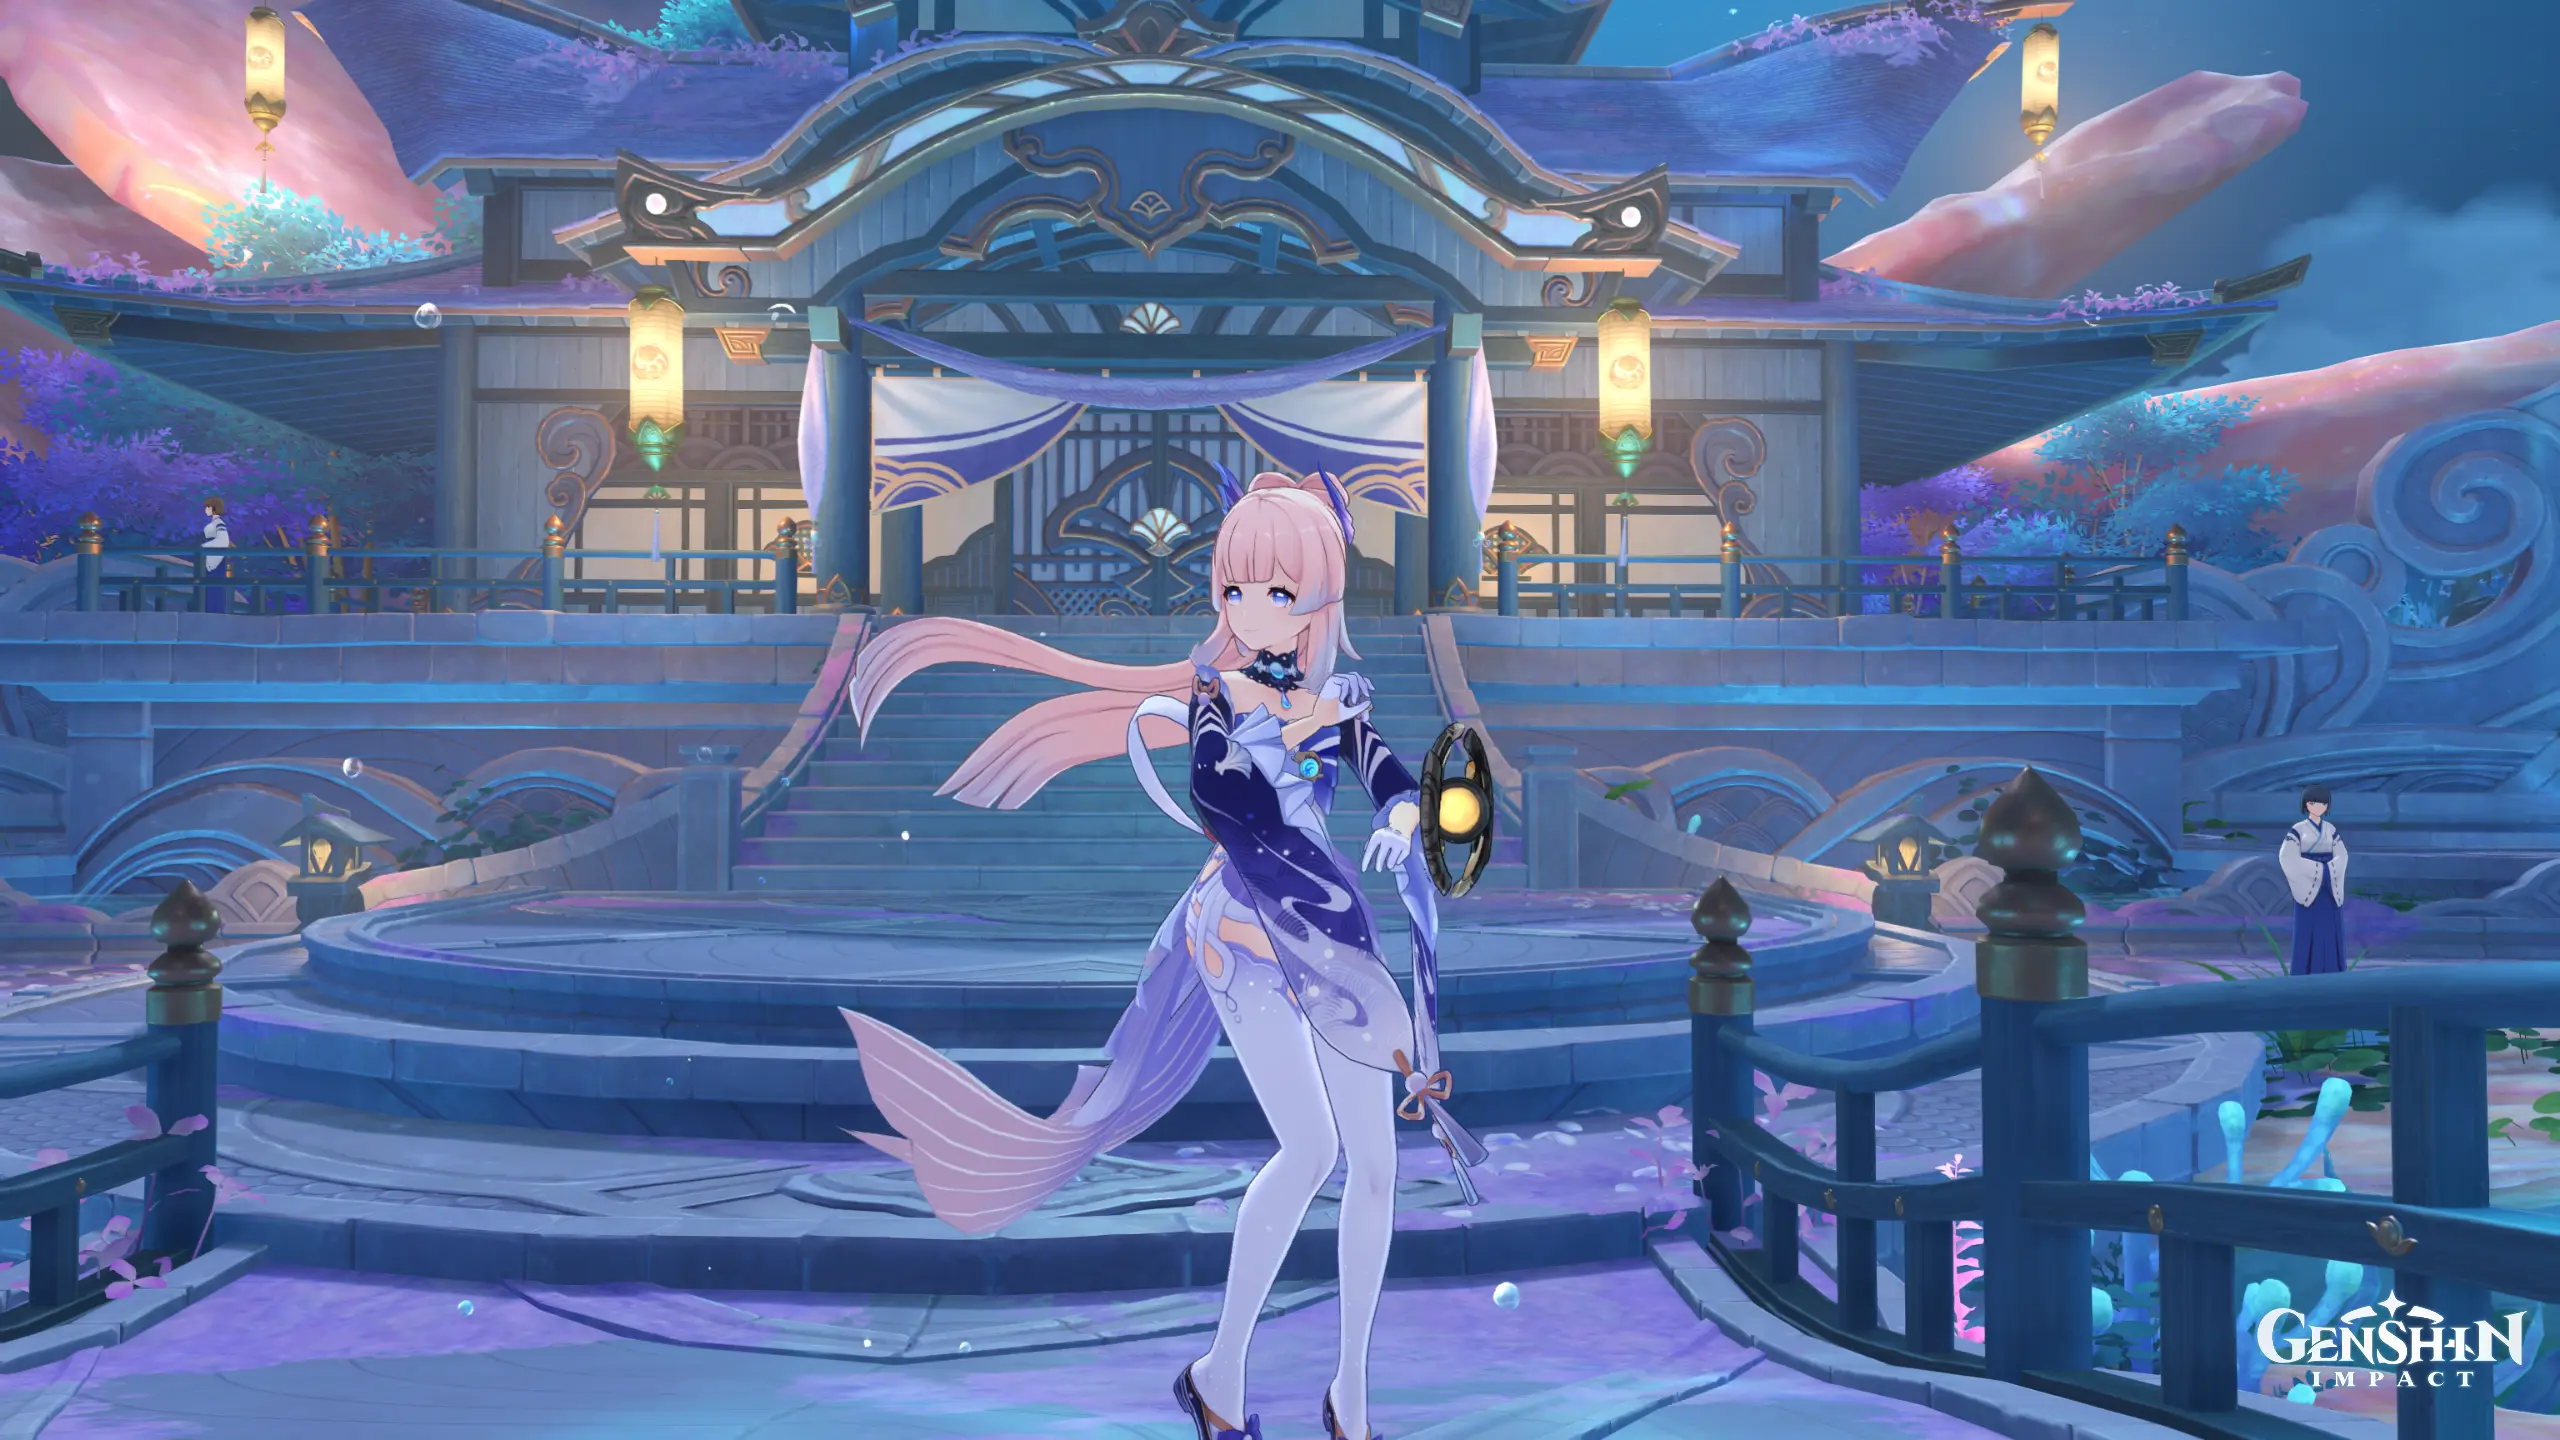 Genshin Impact character Sangonomiya Kokomi
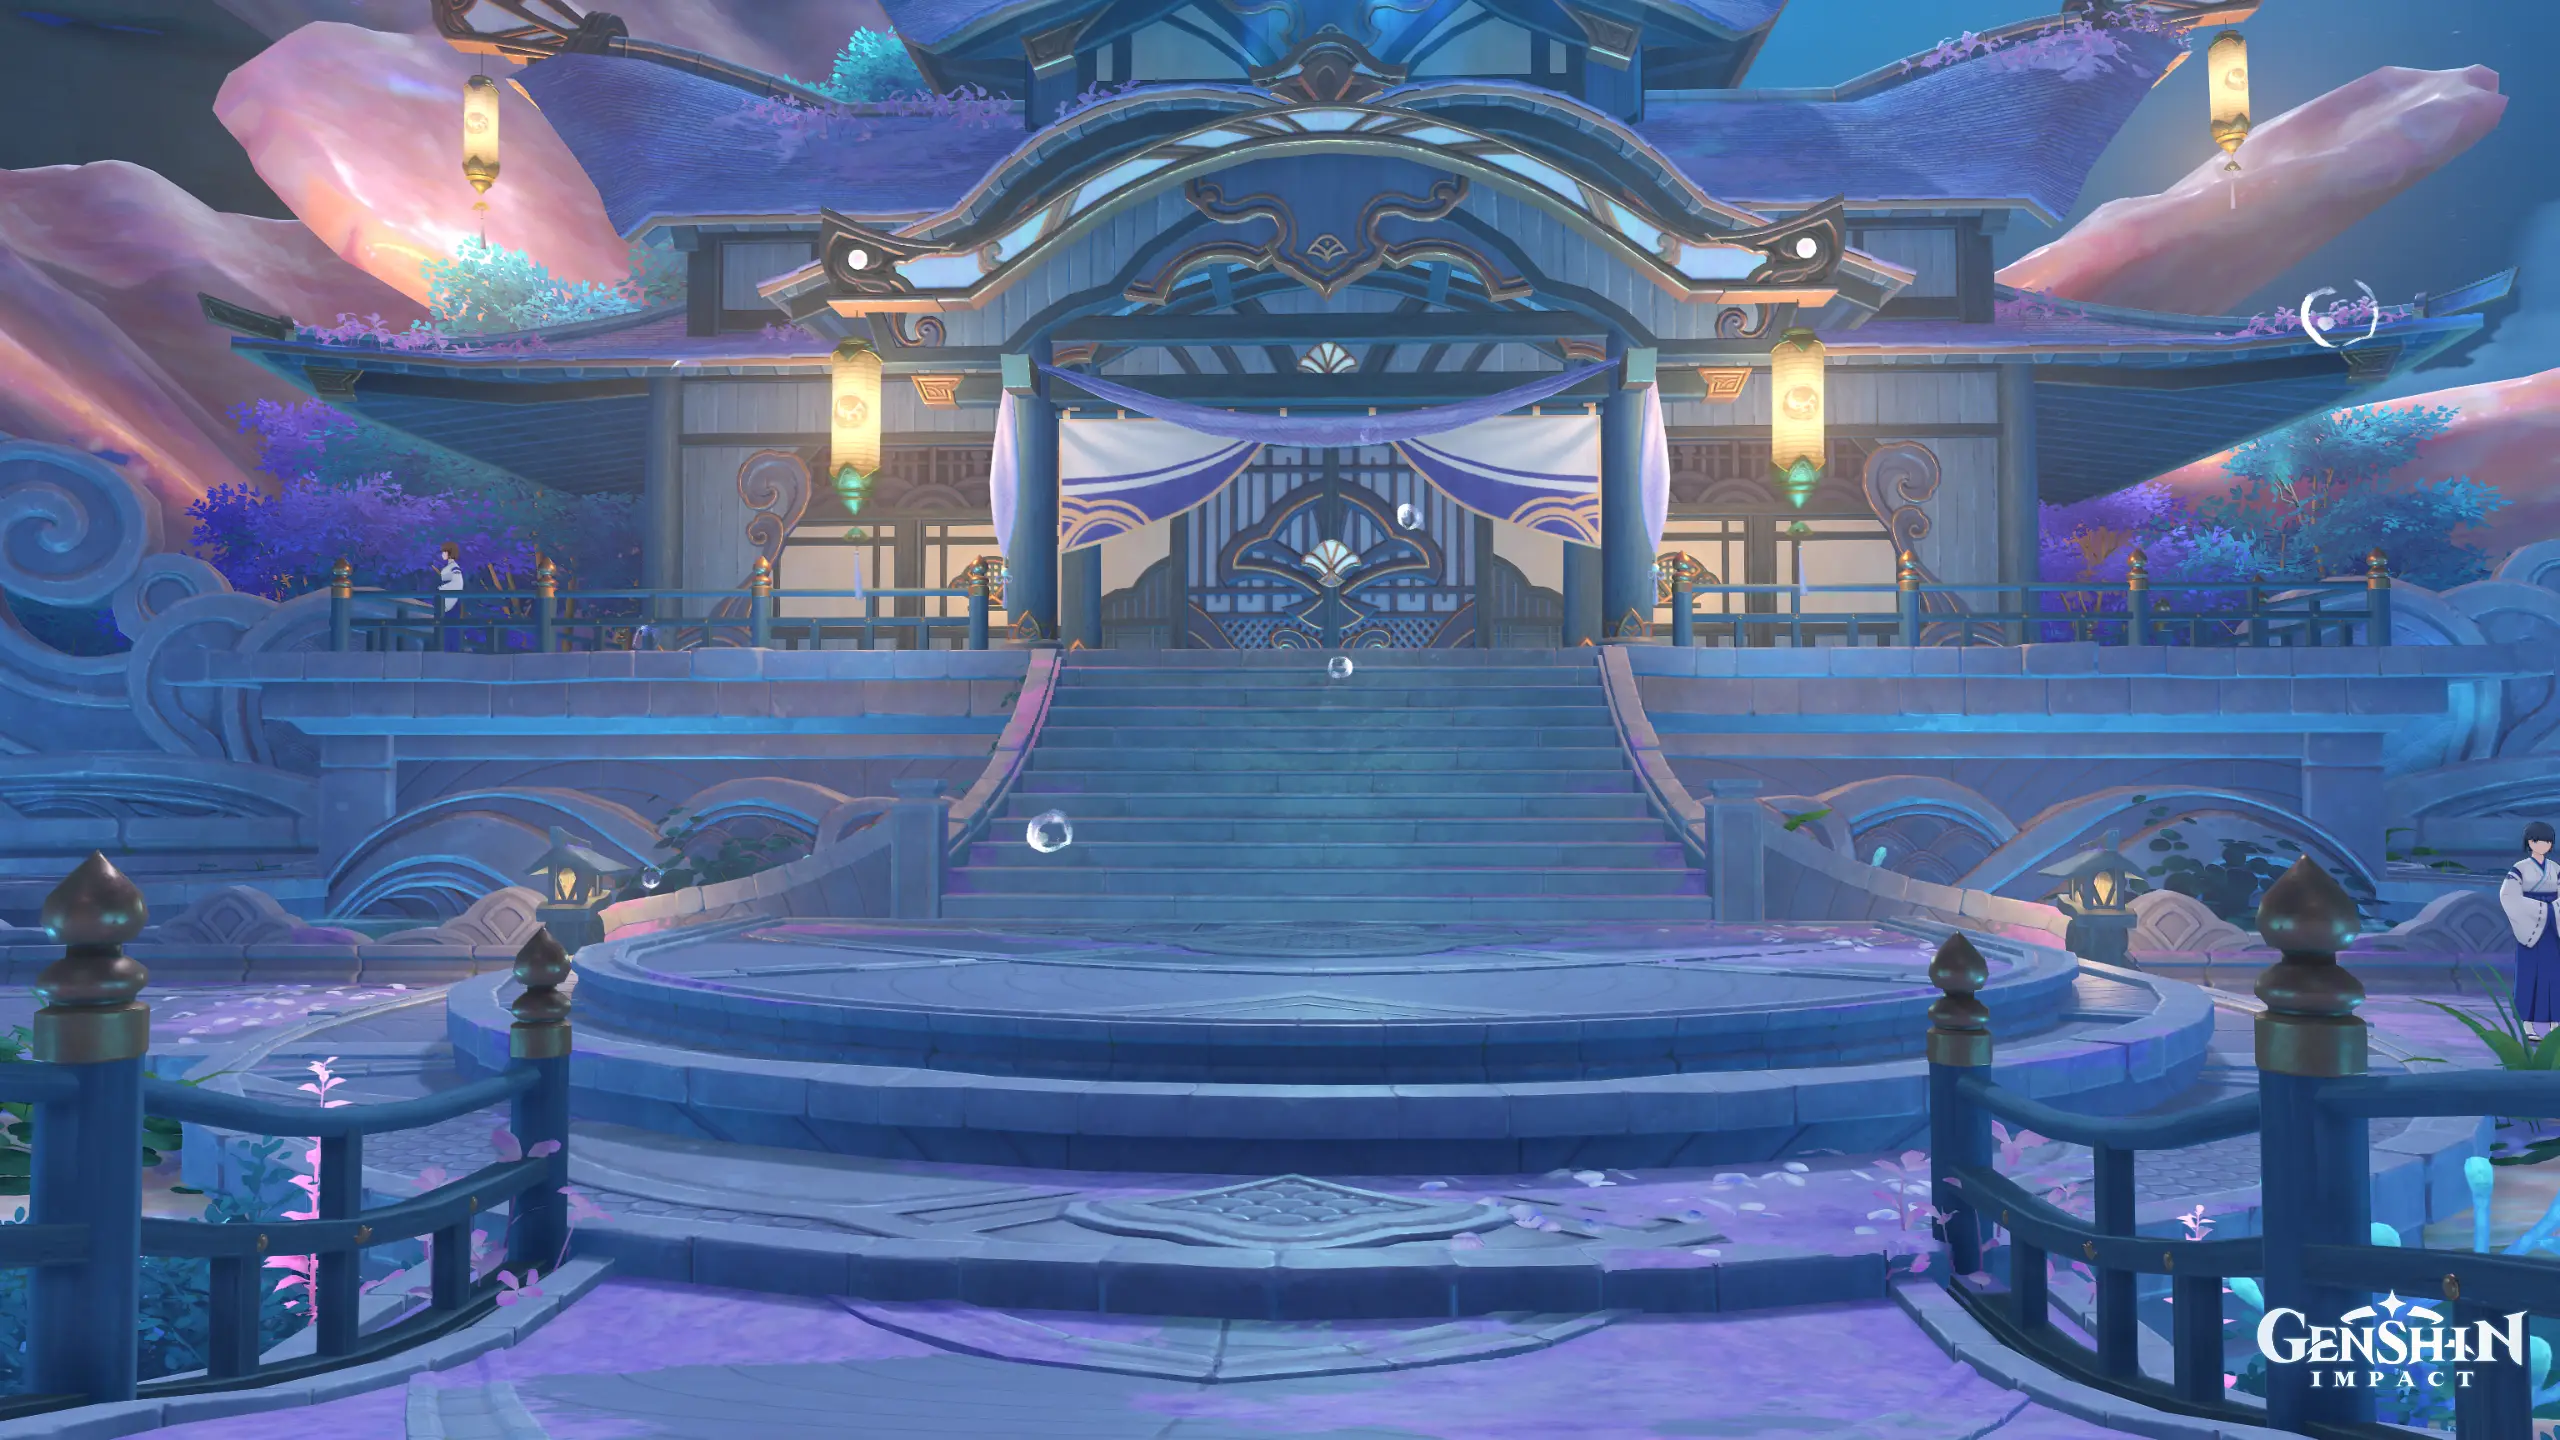 Sangonomiya Shrine on Watatsumi Island
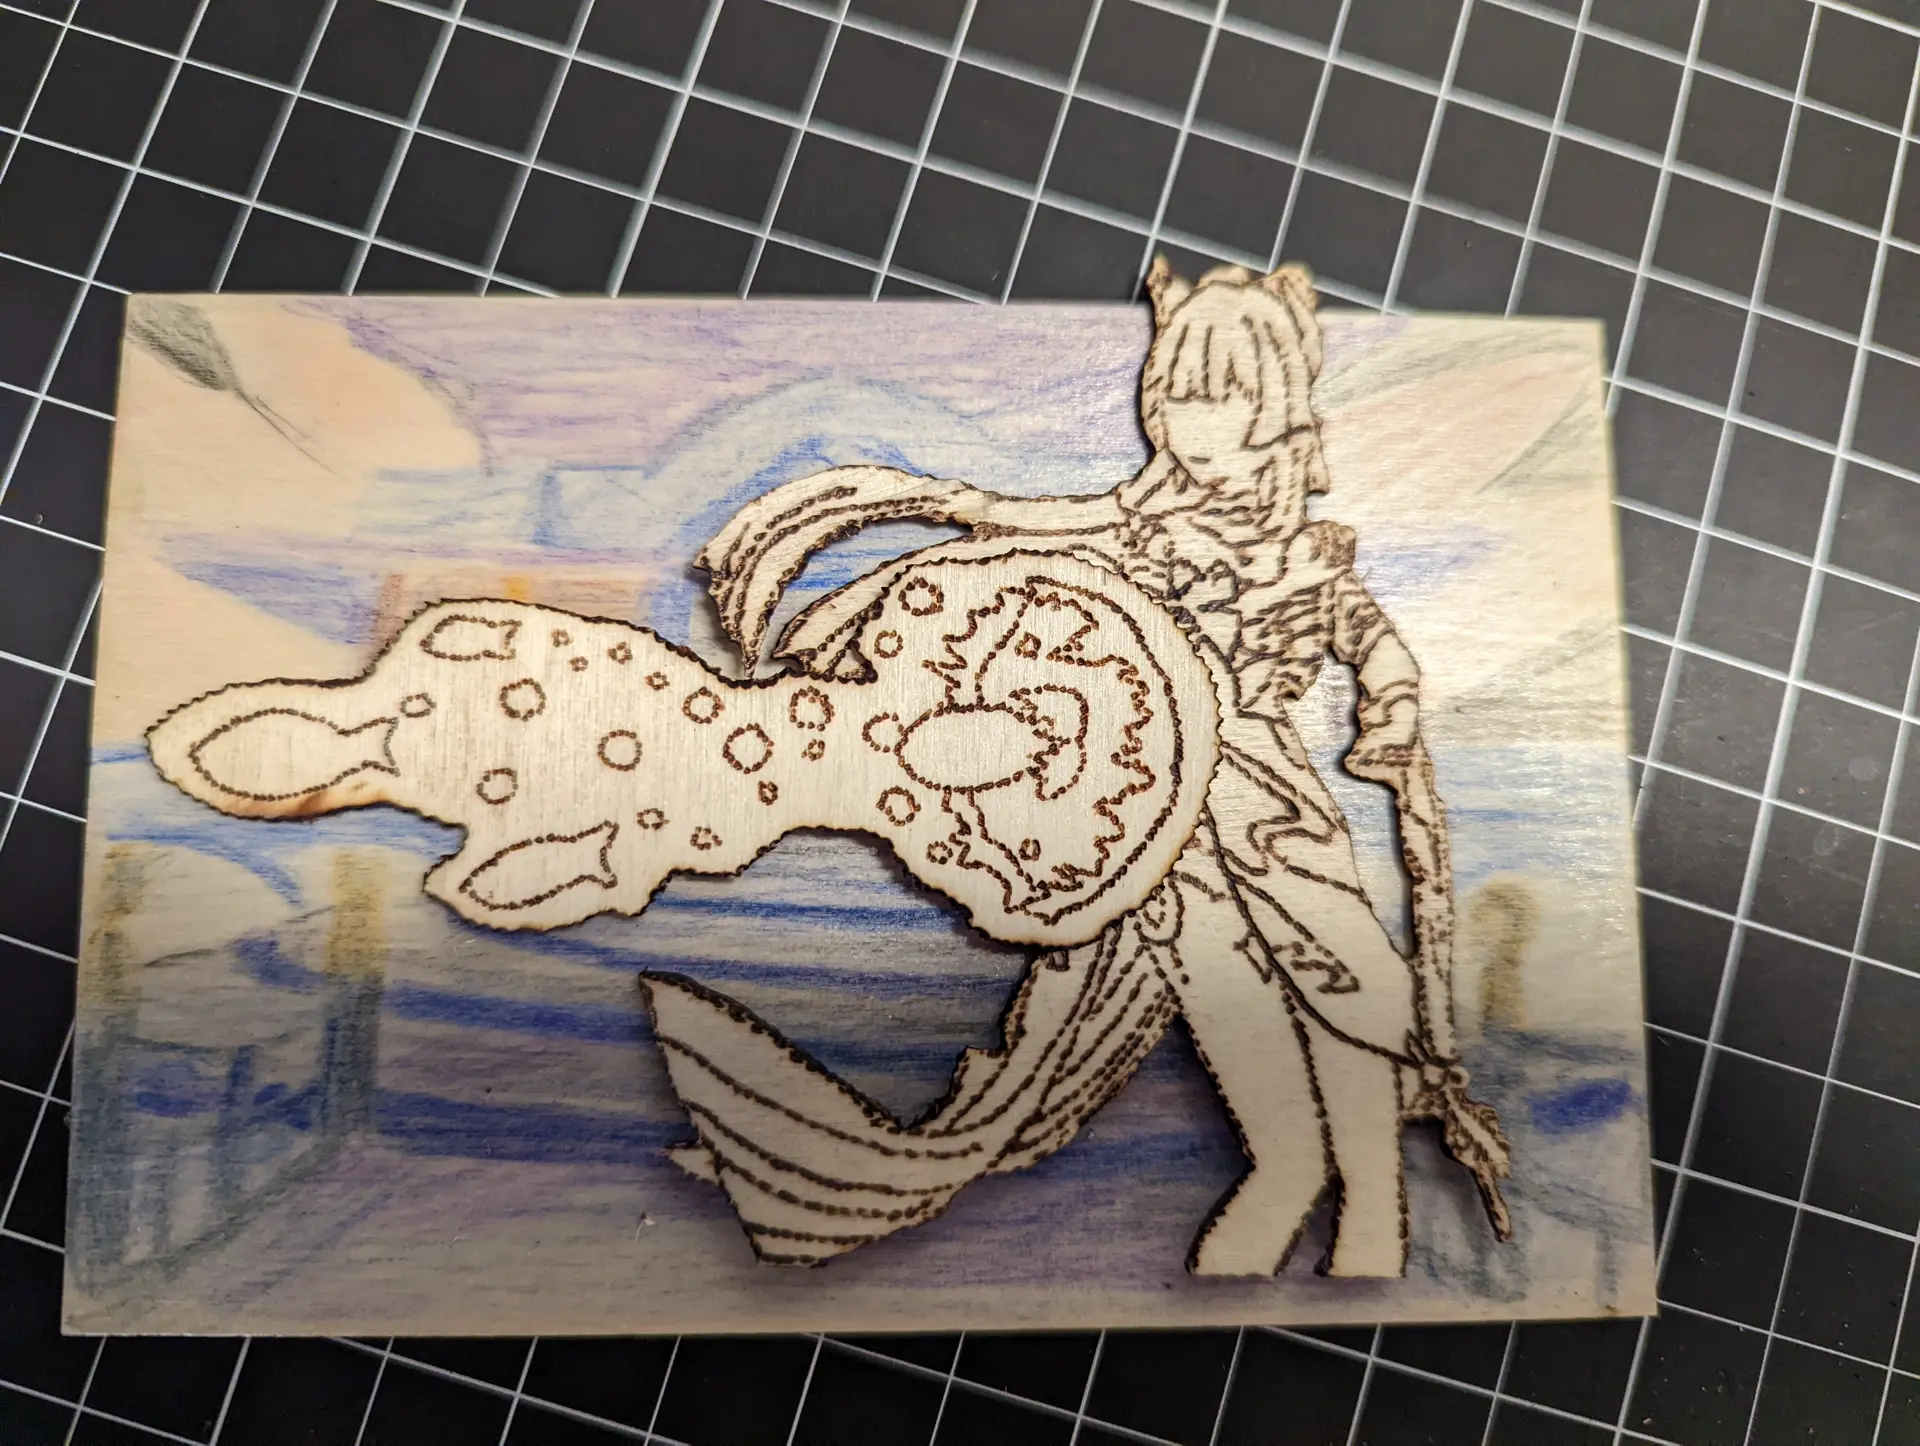
Transferring design
The next part of the process was to transfer the Kokomi outline and fish attack to wood by using carbon transfer paper, similar to what is used in checks to make the second copy for yourself. To do this, you just stack the design you are tracing and a piece of carbon paper and then tape them to the wood you are working on. For this part though, make sure the correct side of the transfer paper is making contact with the wood! The darker side should be contacting the wood or else you won't actually transfer the design.
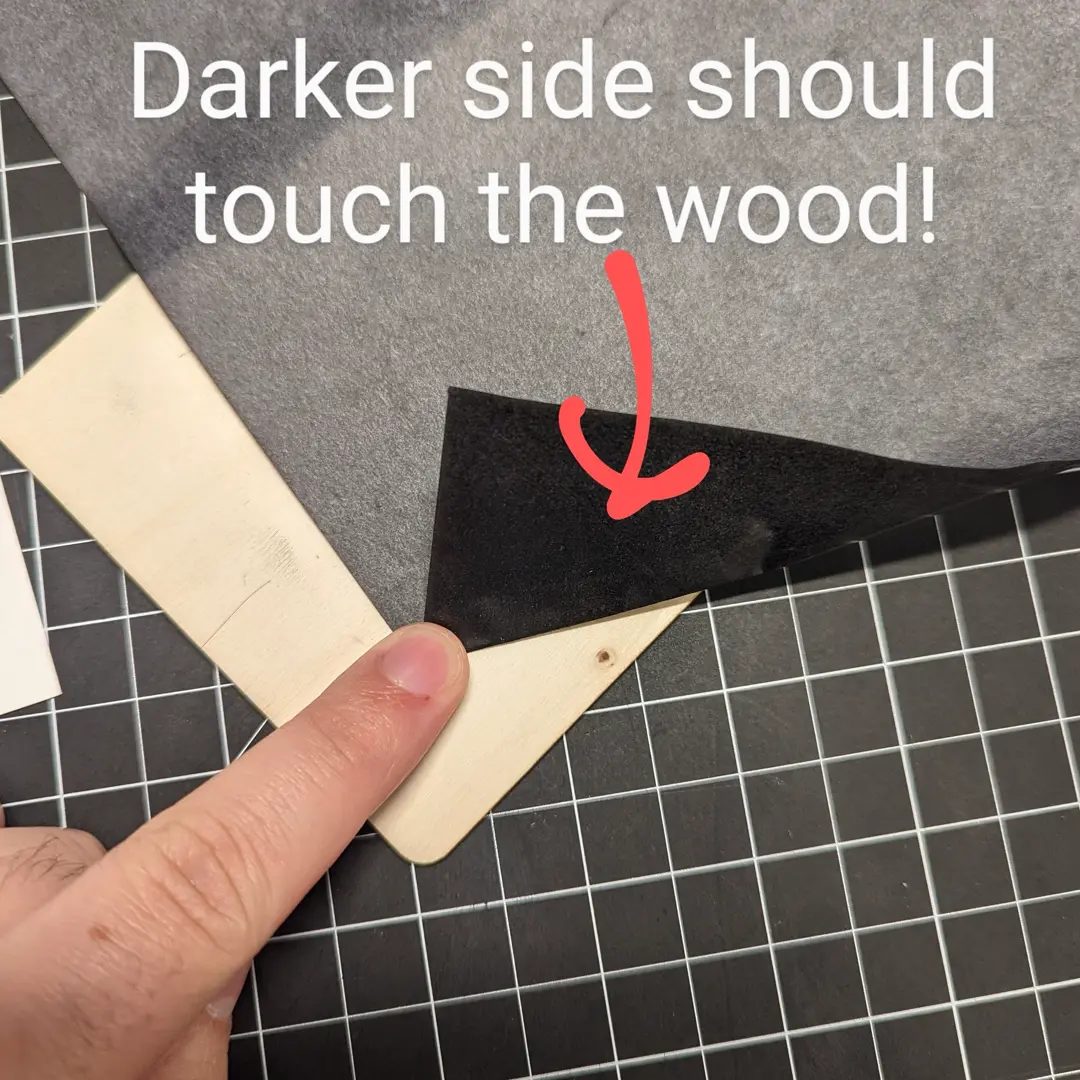 Important for beginners!
After everything is taped up and ready to go, take a pen and trace over the lines that you want in the final piece of art! I'd personally recommend using a pen color different from that of your printout or drawing, just so that it's easier to tell which parts you've already traced.
Afterwards, you will have what looks like pencil drawn on the wood.
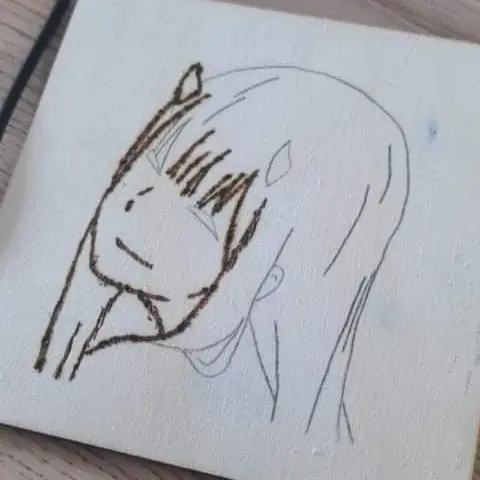 Didn't capture this time, but the above image depicts a previous project at this stage.
Wood burning
To be completely frank, I have no idea what the 'correct' way to wood burn actually is. I personally like the look of the art when I stipple the wood - using the wood burning tool make hundreds (thousands??) of tiny impressions - rather than smoothly drawing the lines. This is probably up to personal preference and experience so be sure to try all kinds of things!
I didn't capture my process this time but you can see me stippling on a previous project in this video on my YouTube channel (starting at around the 41 second mark). The video is a time-lapse but contains most of the elements mentioned in this article including the burning, drawing, coloring, and sanding.
Stippling can get kind of tedious though and I find that I have to take breaks every couple of minutes to prevent hand cramps. In addition to taking breaks, I'd recommend working outside or in a well ventilated area because it creates very fine smoke that probably isn't great for inhalation.
Sanding
After burning it's good to sand your art. This will help make the lines a bit more crisp and all remove extra carbon copy lines that don't erase super well. I personally use 600 grit since I had that sandpaper on hand but I have also seen recommendations for 220 grit. In general, I think finer is better but I personally wouldn't go finer that 600 grit because it's probably diminishing returns, it's not like the wood is going to become reflectively polished like metal might!
Cutting out Kokomi
After I had finished burning and sanding the art, I needed to cut out Kokomi and the attack animation. This is part of the process that I still REALLY need to refine.
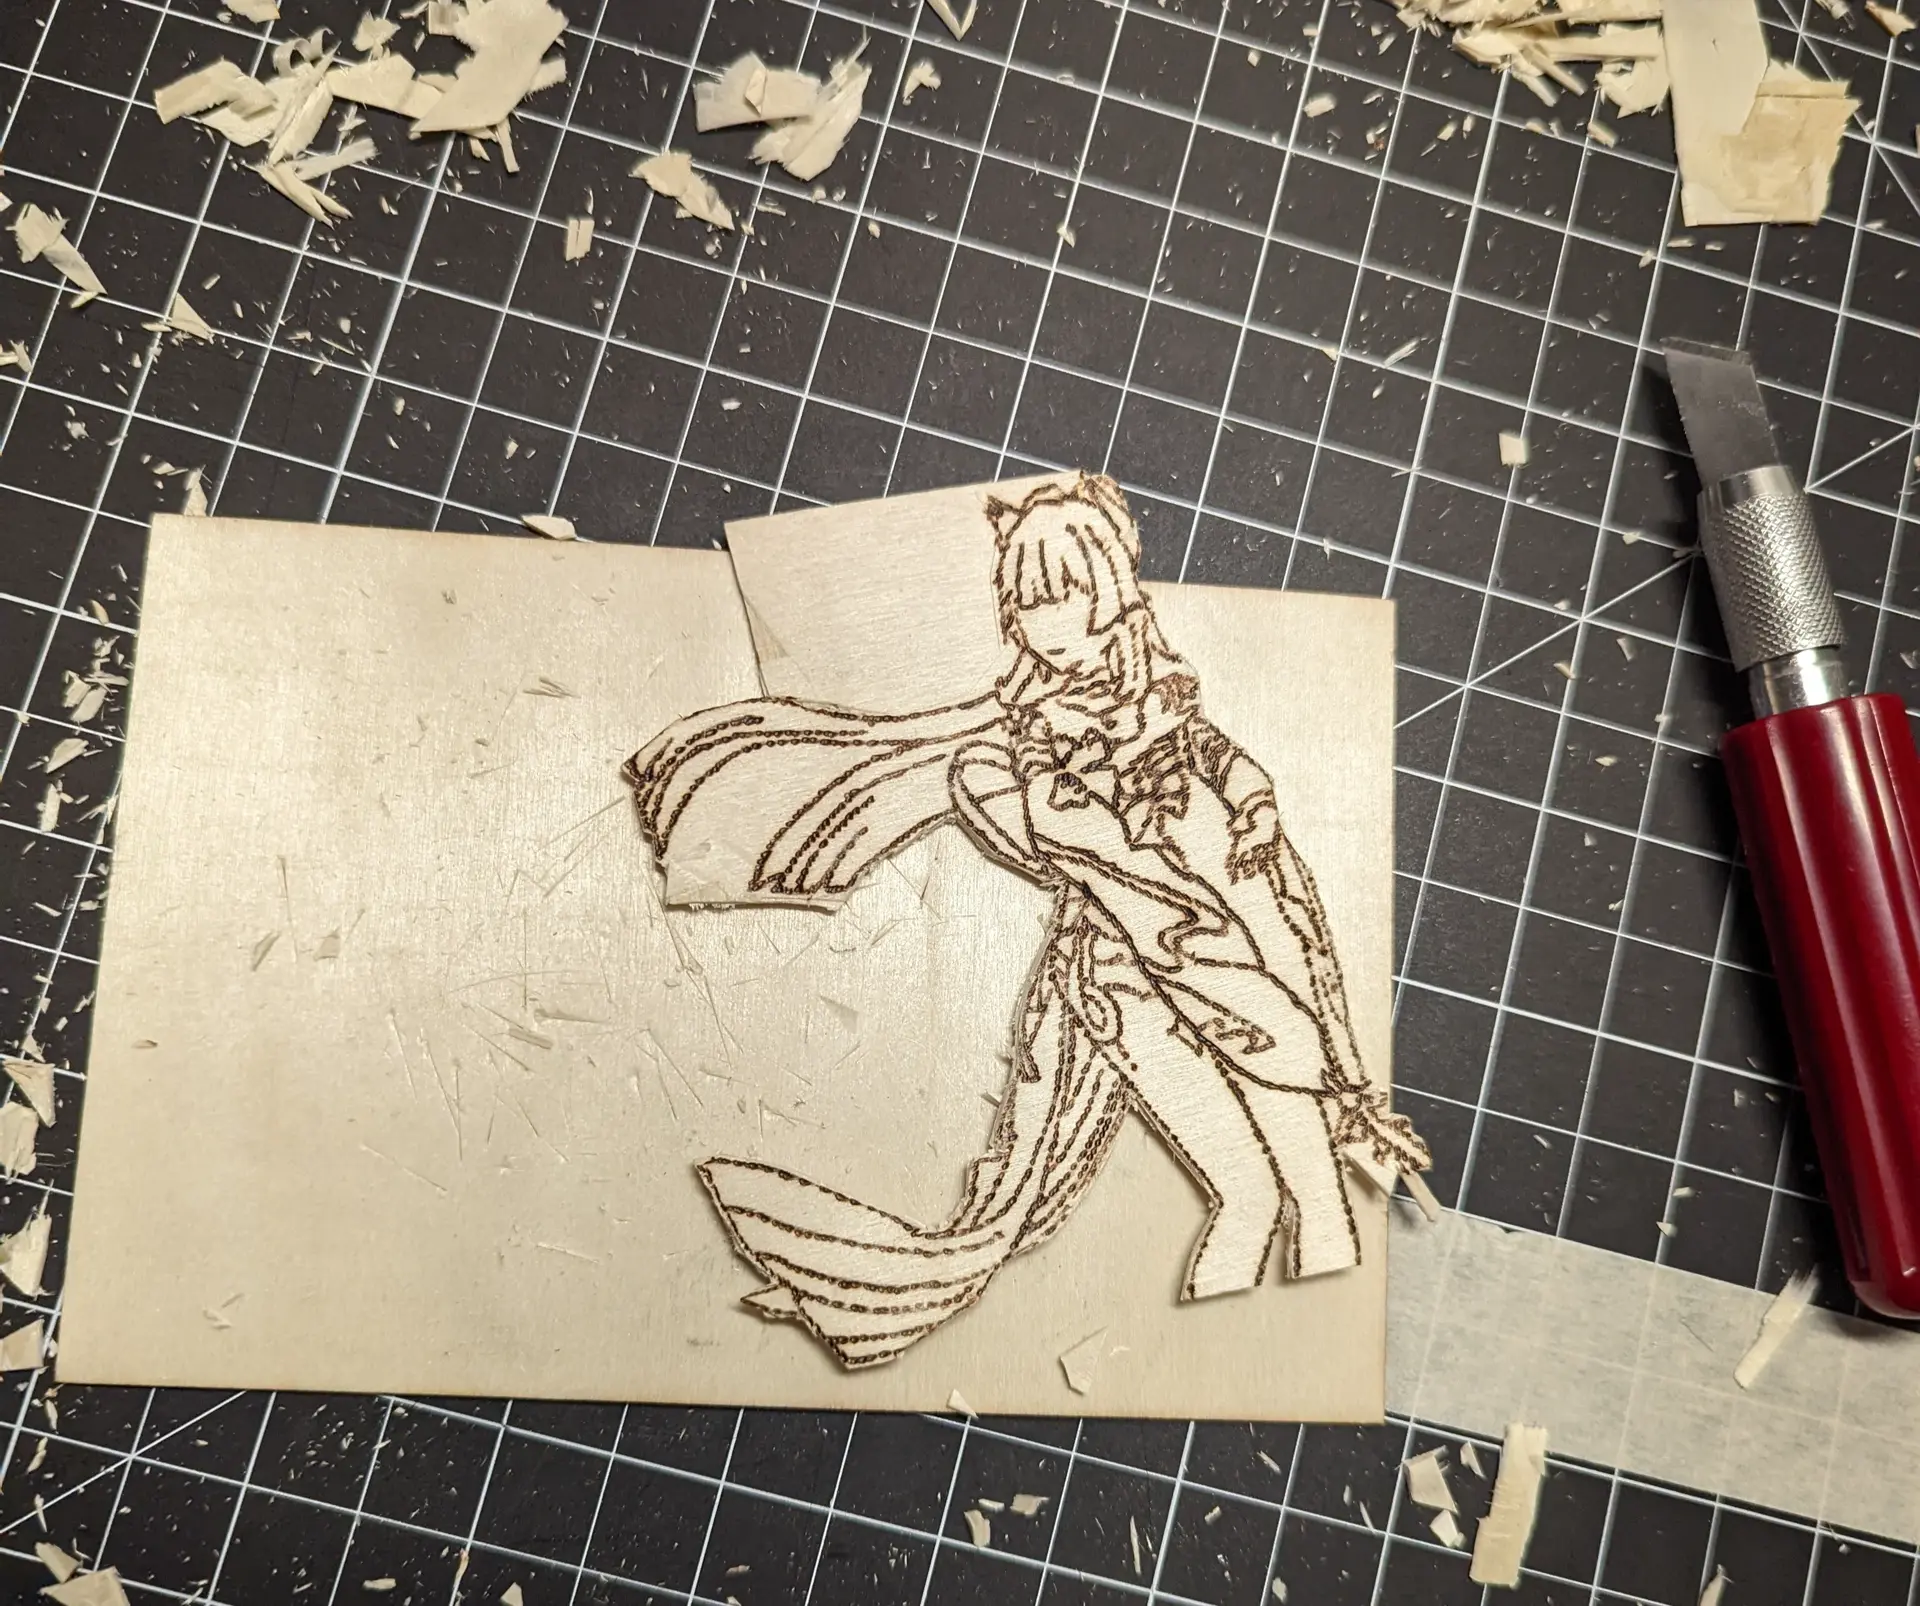 Cutting out Kokomi with an x-acto knife set. Probably not the world's greatest technique!
I tried two separate approaches this time. For Kokomi, I tried cutting out the design with an x-acto knife. This took a long time even though the wood was only like 5 millimeters thick, further, in some places when breaking the excess wood off, it caused chipping (luckily all in the back of the art) and even caused one place with a pretty thin connection to snap right off.
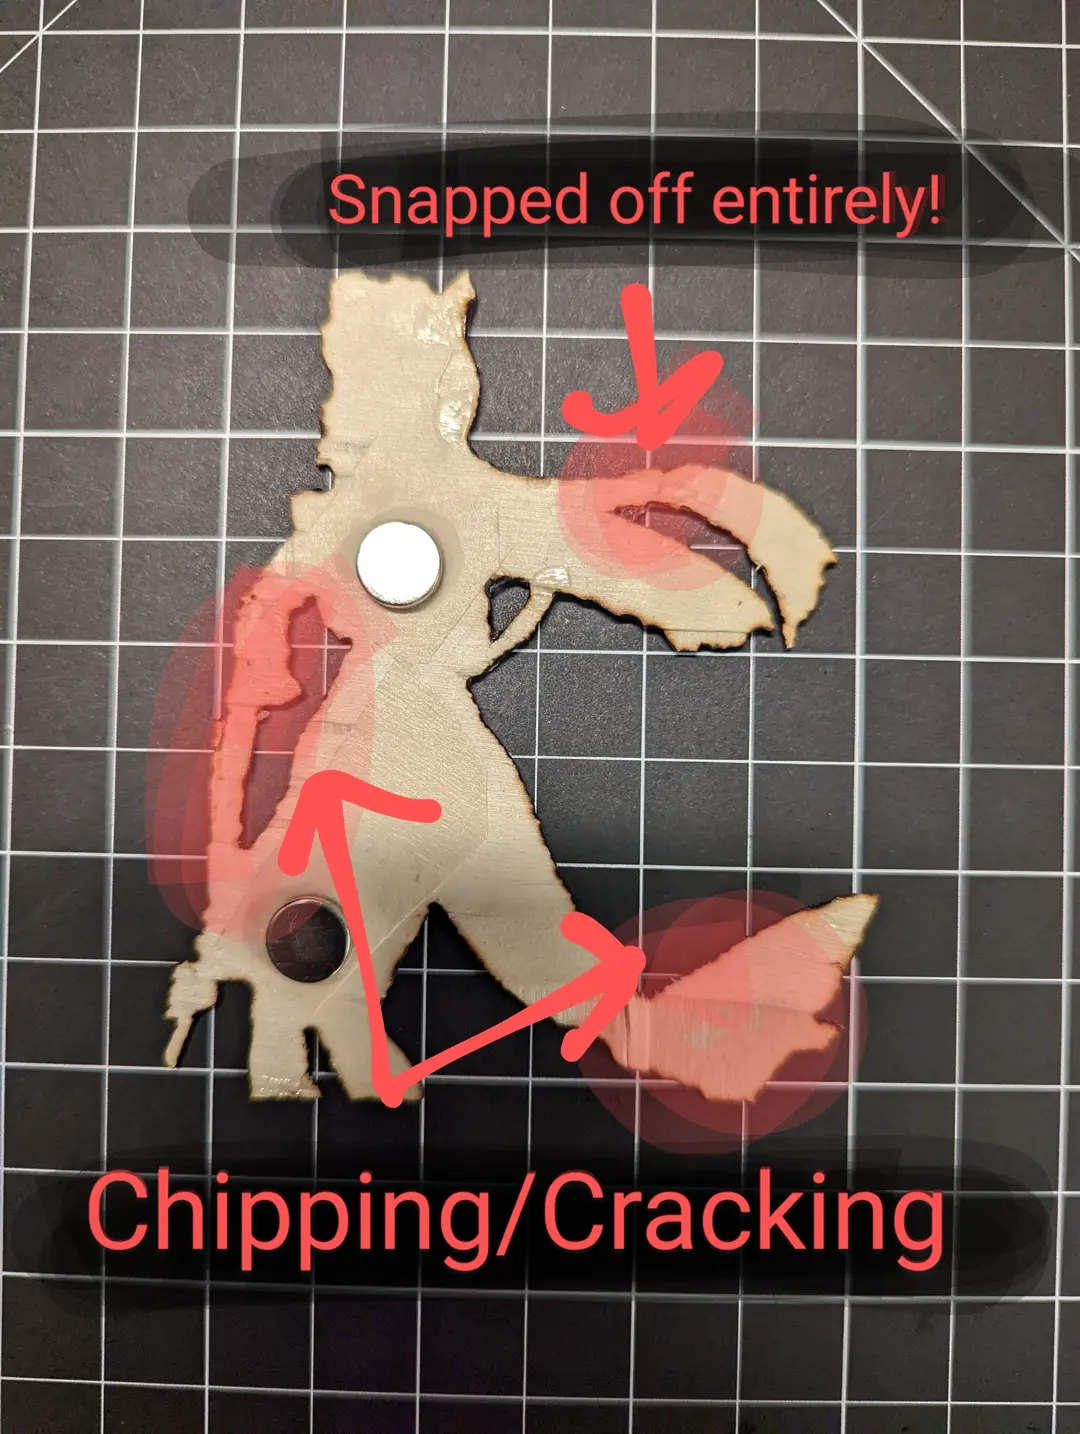 The art sustained injuries
For the fish attack animation, I used the wood burner to burn completely through the wood to cut it that way. This was a good amount faster but much less precise - I wouldn't be willing to do this on more detailed art or close to the actual artwork since it can cause the actual art to burn. Even in the finished art here, we can see a spot where burning through the wood caused the top layer of the art to burn. If this burn isn't too deep, it can be lessened or removed entirely by sanding but that wasn't the case here. Another issue is that the edge ended up being pretty jagged which meant i had to sand it again and then re-burn the edges to get a consistent look around the outside.
 You can see the jagged edges on the fish here
To be honest, I'm not sure which of the approaches I even prefer and wish I just had a laser cutter. But then that might render even the drawing part obsolete!
Coloring
This part is usually pretty fun. Coloring can be done using any number of mediums and will be dependent on preference. I use colored pencils because they are easy to work with, I am familiar with them, they don't take up too much space, etc. You can also use various types of paints, markers, or other coloring mediums you are familiar with but keep in mind that you should probably try out a few things before working on a piece you could ruin. The varnish or finish you use on top could interact in weird ways so you'll have to experiment!
In this case, I had a good idea of how to color the fish since they just use two colors, blue and purple, but was a bit more hesitant about coloring Kokomi. I ended up picking about 10 or so colors I thought would be good and just went at it. I don't really have any advice here because I don't use any semblance of technique or skill but it turned out OK this time!
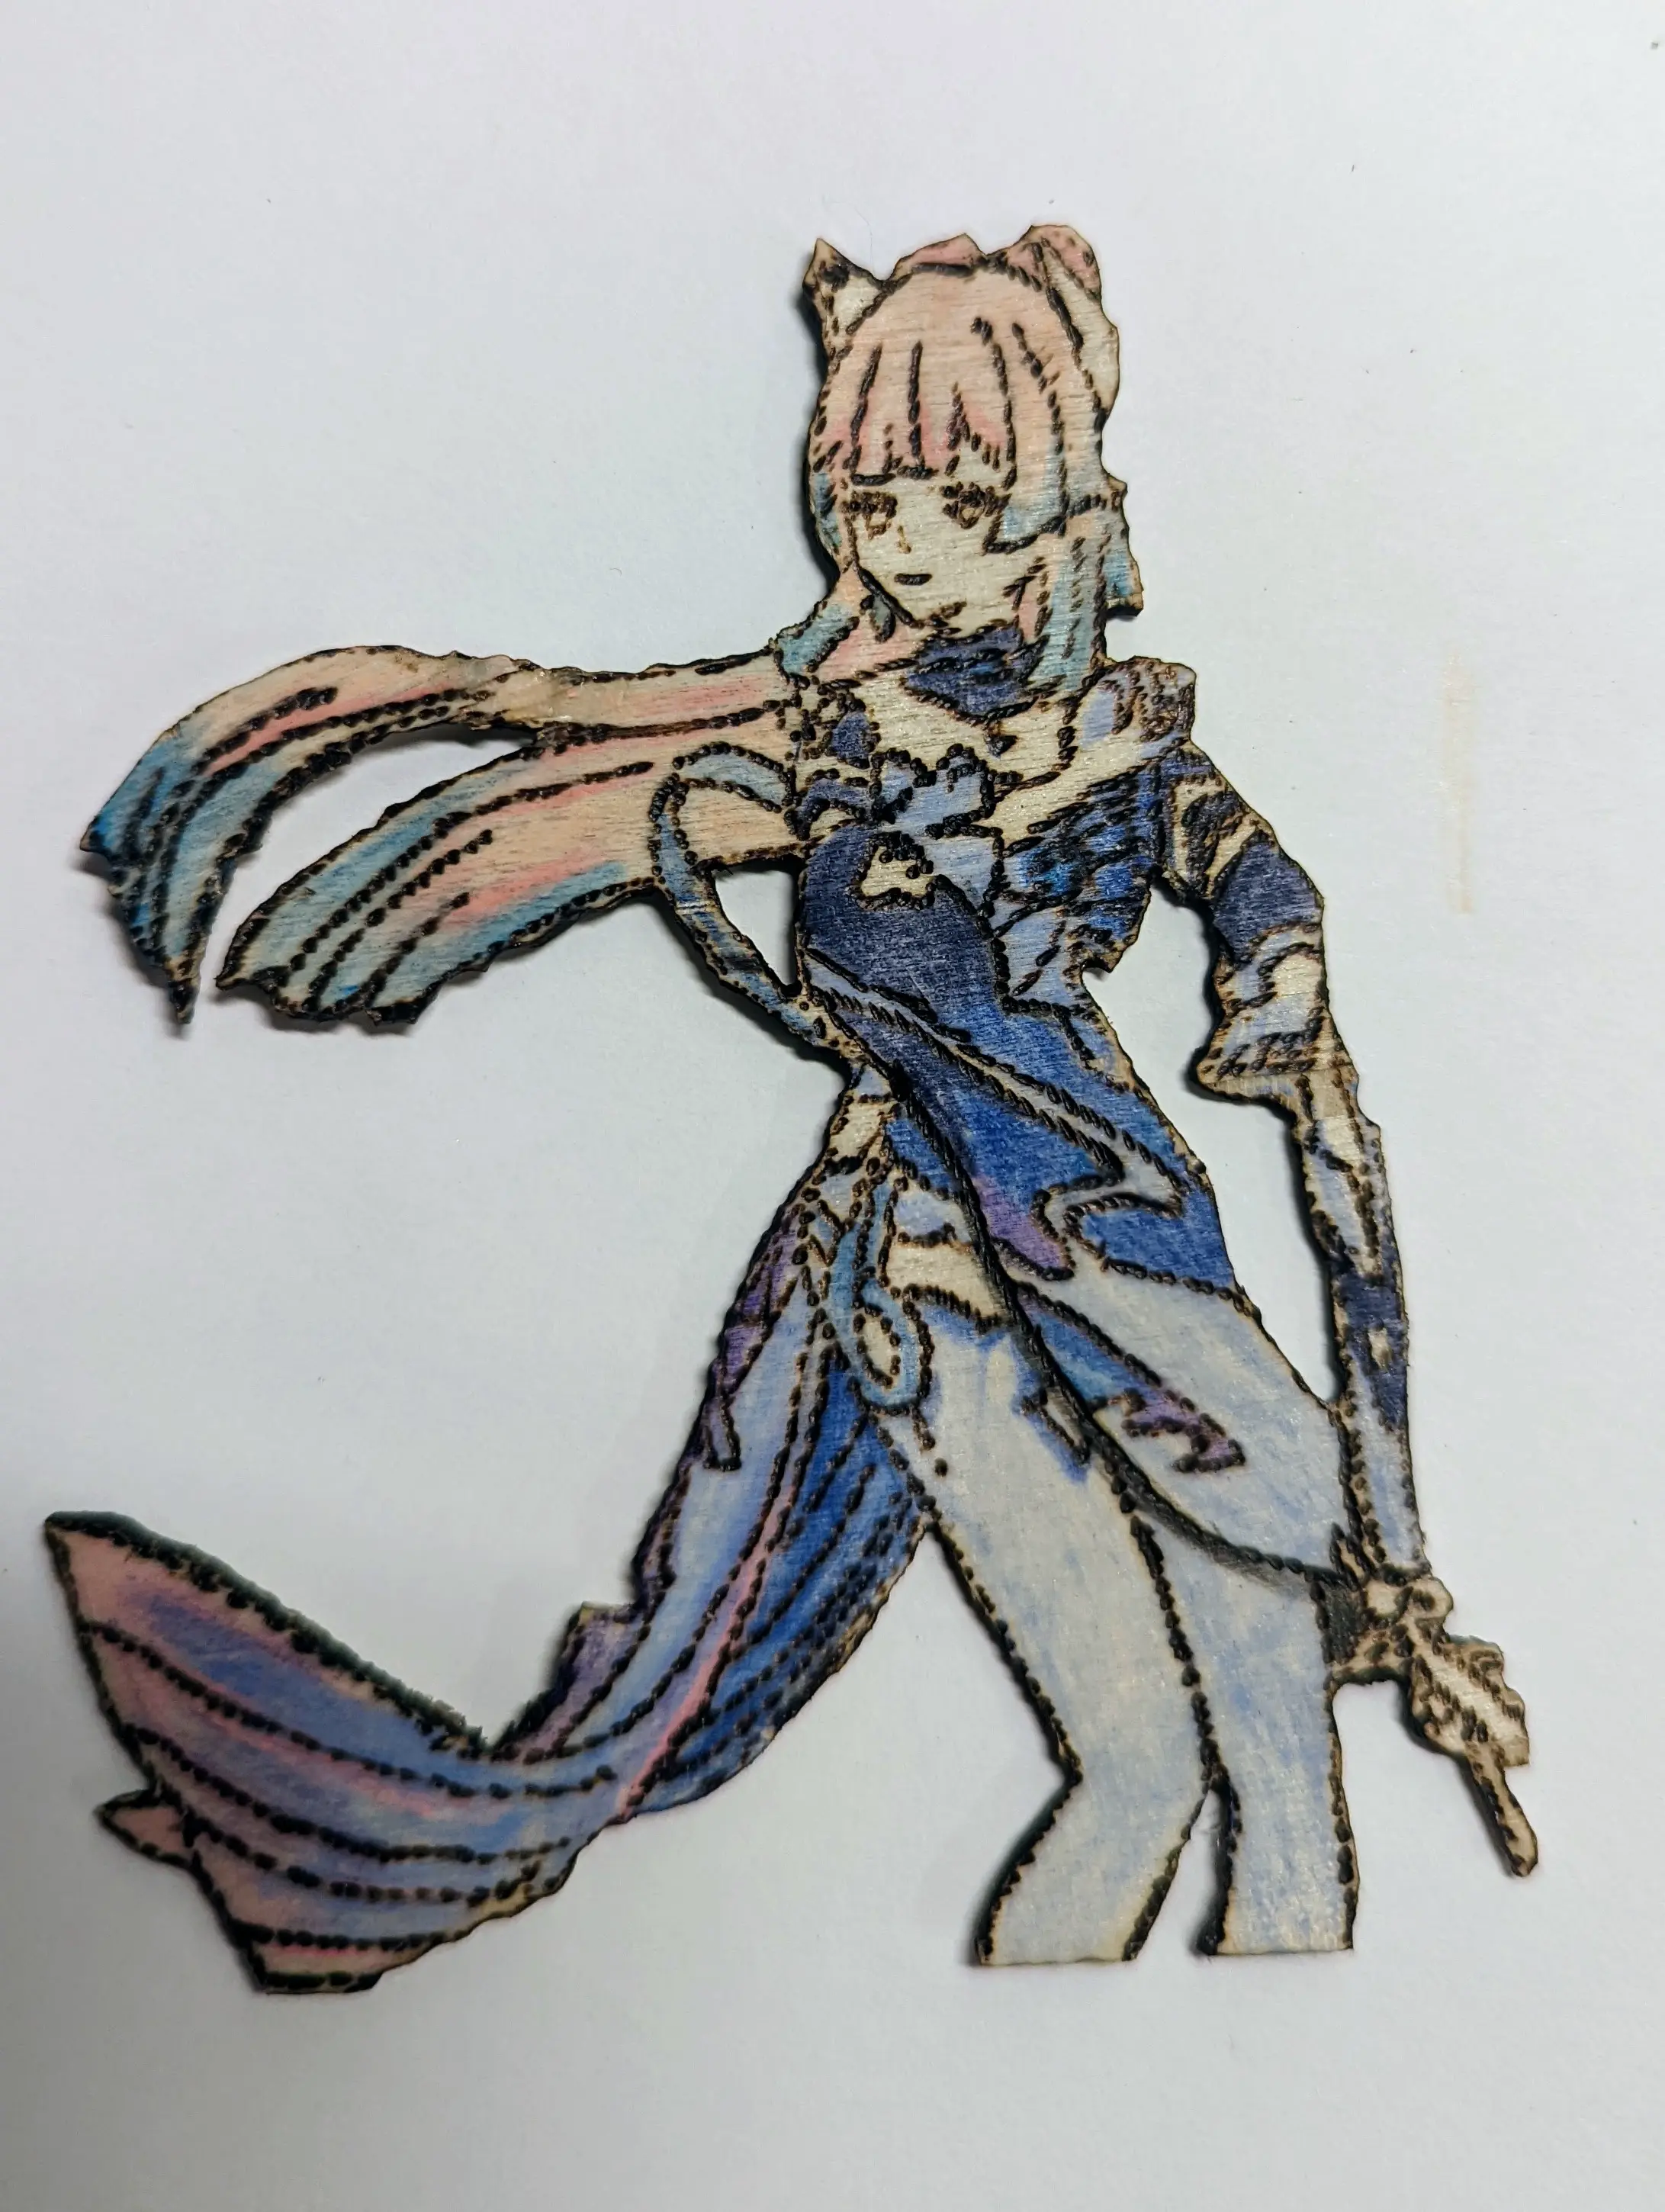 Kokomi after coloring
In case you are very, very curious, I used the following Crayola pencil colors for Kokomi:
- Hair: melon, cantaloupe, sky blue, wild blue yonder
- Outfit: navy blue, blue, true blue, blue bell, purple heart, bubble gum (pinkish color in tail part)
Finishing
After coloring, I typically varnish the piece so that the top layer of coloring is protected. This is especially important if you are working on a practical piece like a coaster but sometimes it might not be necessary at all. One of the very first wood burning projects I did I didn't color or varnish since it just sits on shelf staring at me menacingly. There are also many types of finish you can use. I'm not experienced with many of them so I'd recommend looking into them individually on other sites and seeing what you want to try out. I think I used this guide before I chose to use a polyurethane gloss varnish
When vanishing I apply a thin layer of the varnish and then let the item sit on a drying rack for about 15 minutes (this works for me, but many sites list the drying time as hours or days per layer LOL). I do this for 3 coats and then re-sand. Re-sanding helps it feel less sticky and look more glossy. Sometimes when working on practical items, it might make sense to varnish or finish all of the sides but I just did the top of each element for this project.
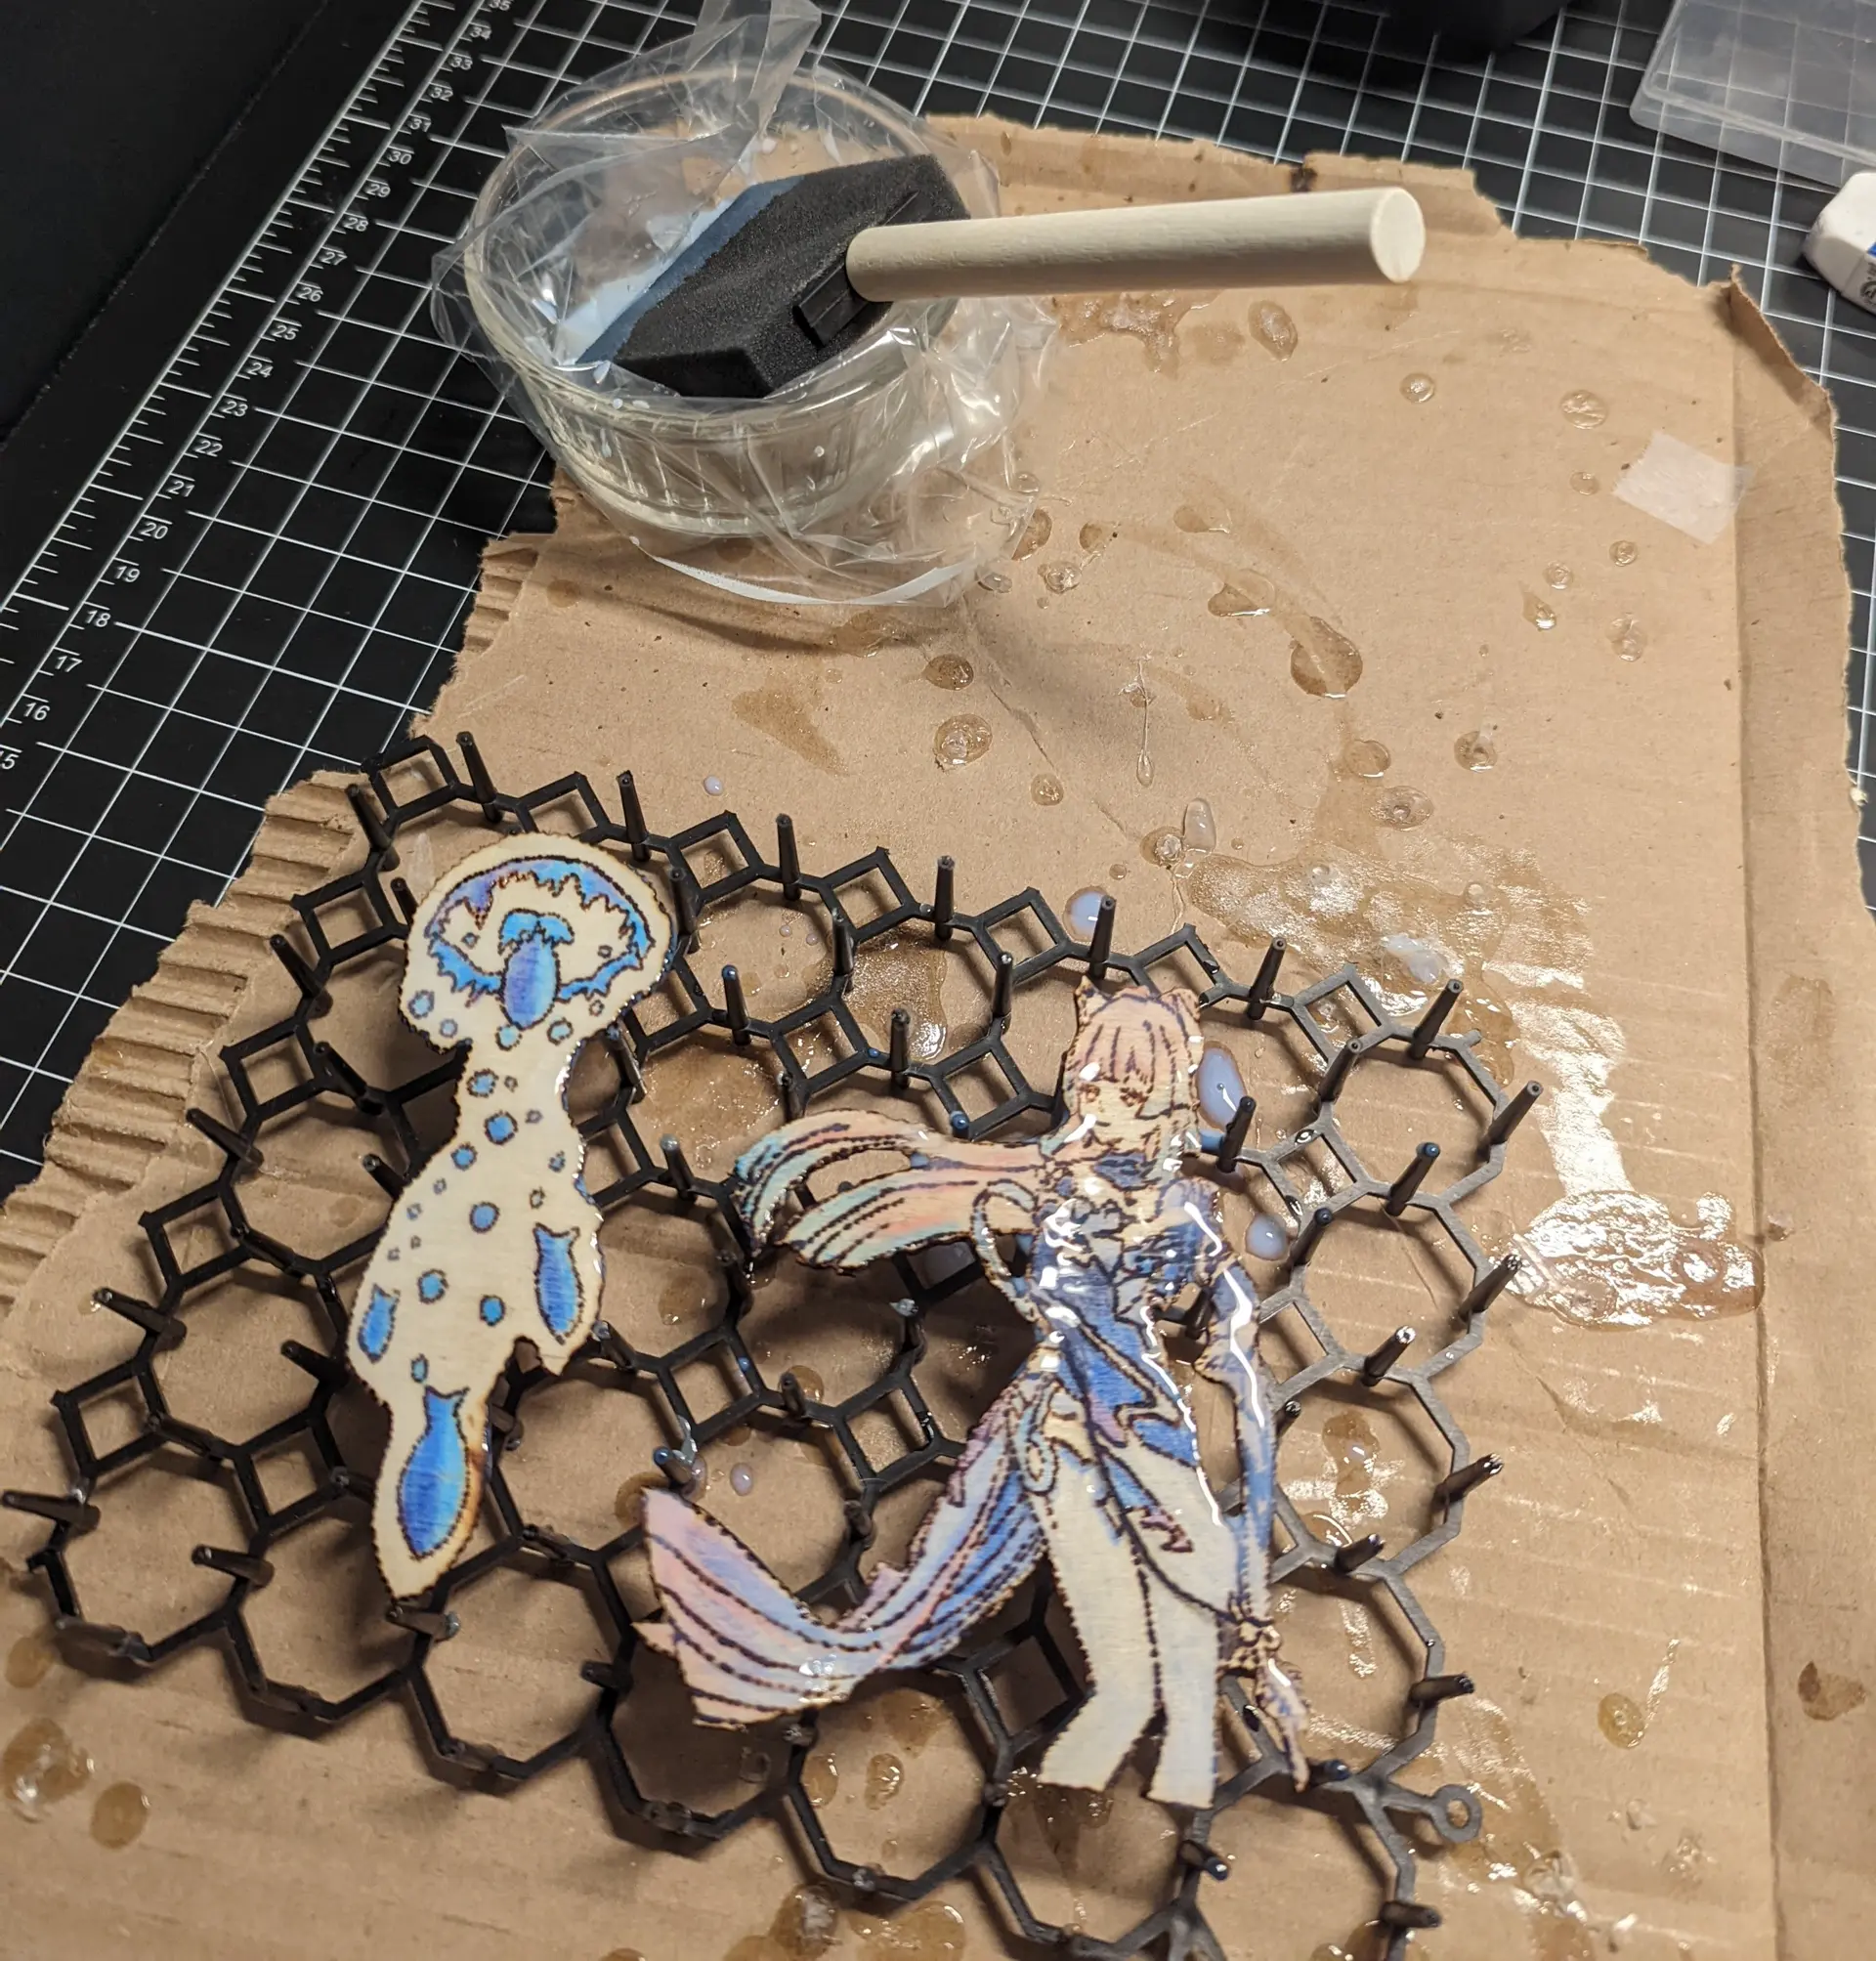 Drying after a layer of varnish.
One thing I have found is that the varnish I use seems to dissolve the color slightly and cause colors to run if I stroke with the brush too much. Because of this, the finished art is often noticeably less vibrant than before finishing.
Final Assembly
Once all of the pieces were dry I had to decide how to attach them. At first I was going to use hot glue but decided to use magnets instead so that I could use Kokomi as a fridge magnet as well since the area I might use to display a stand is a bit full right now. Further, using hot glue might have made it so that I couldn't use the individual parts for anything else if I ever decided to re-purpose anything. As such, I decided to attach magnets to the individual parts on top of a piece of masking tape. The masking tape should be relatively easy to remove if I ever need to and the magnets let me attach the items to my fridge.
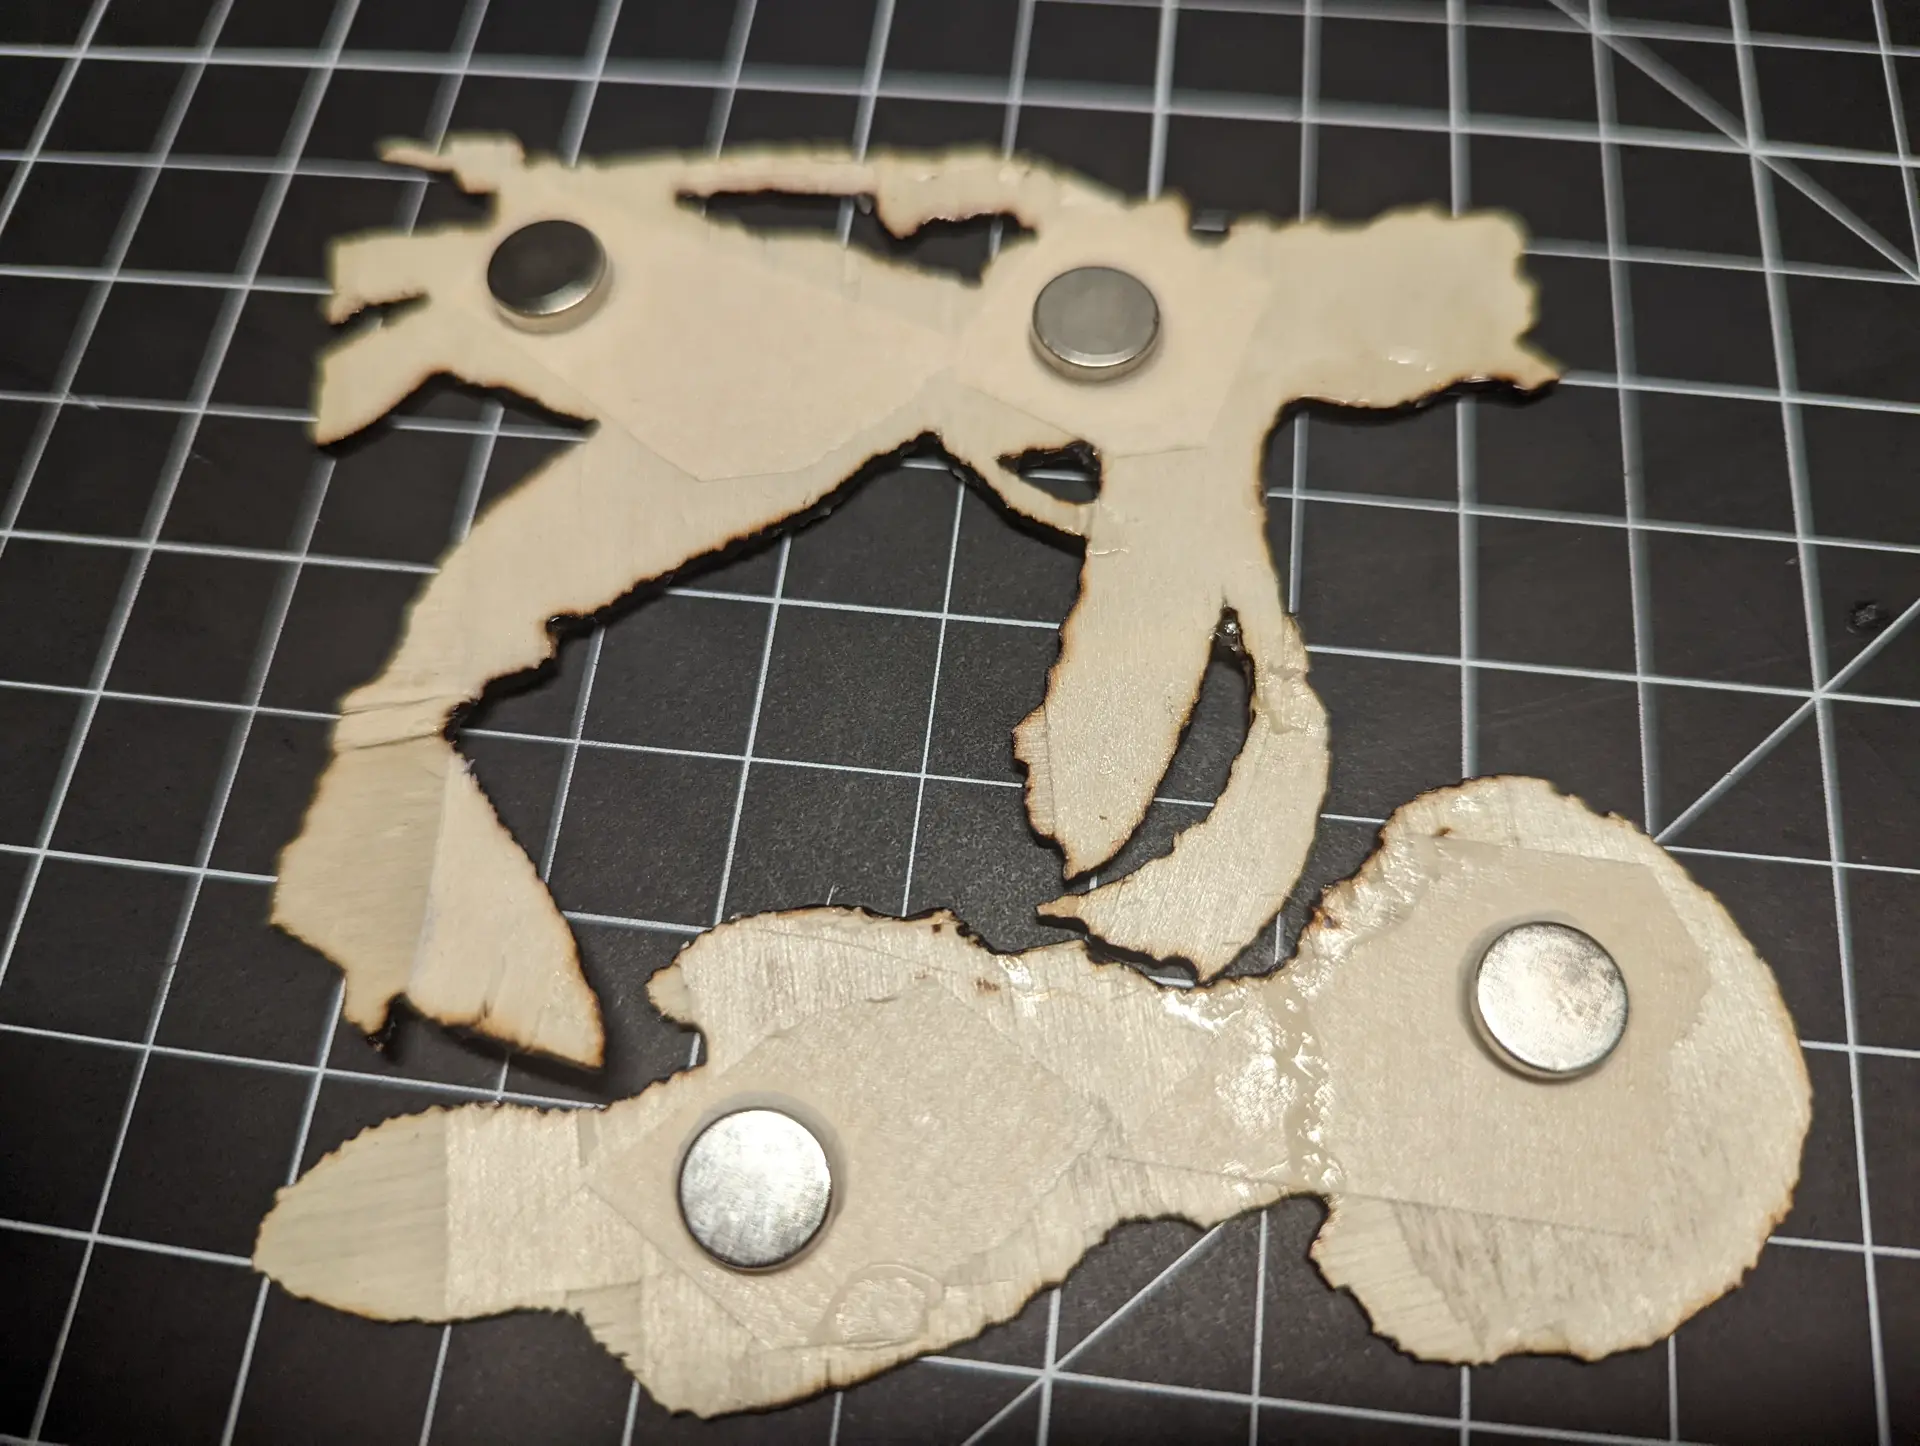 Magnets super-glued to masking tape.
All in all I was pretty happy with the finished product. There were definitely things that I would want to fix. Among them are
- Forgot to color Kokomi's hairpiece - this should have been purple
- The coloring seemed better before putting on the varnish in my opinion
- Cutting out the elements made me want to quit the project altogether
- Stippling causes the lines to fade in and out and makes edges a bit dirtier. This point might actually be a benefit though and show that a human worked on it rather than the whole piece being cut on a laser cutter. IDK, let me know your thoughts in the comments below!
Even with all that said, I still like how it turned out and will be displaying on my fridge! I did enter the fan art contest too, here's my entry! Wish me luck!
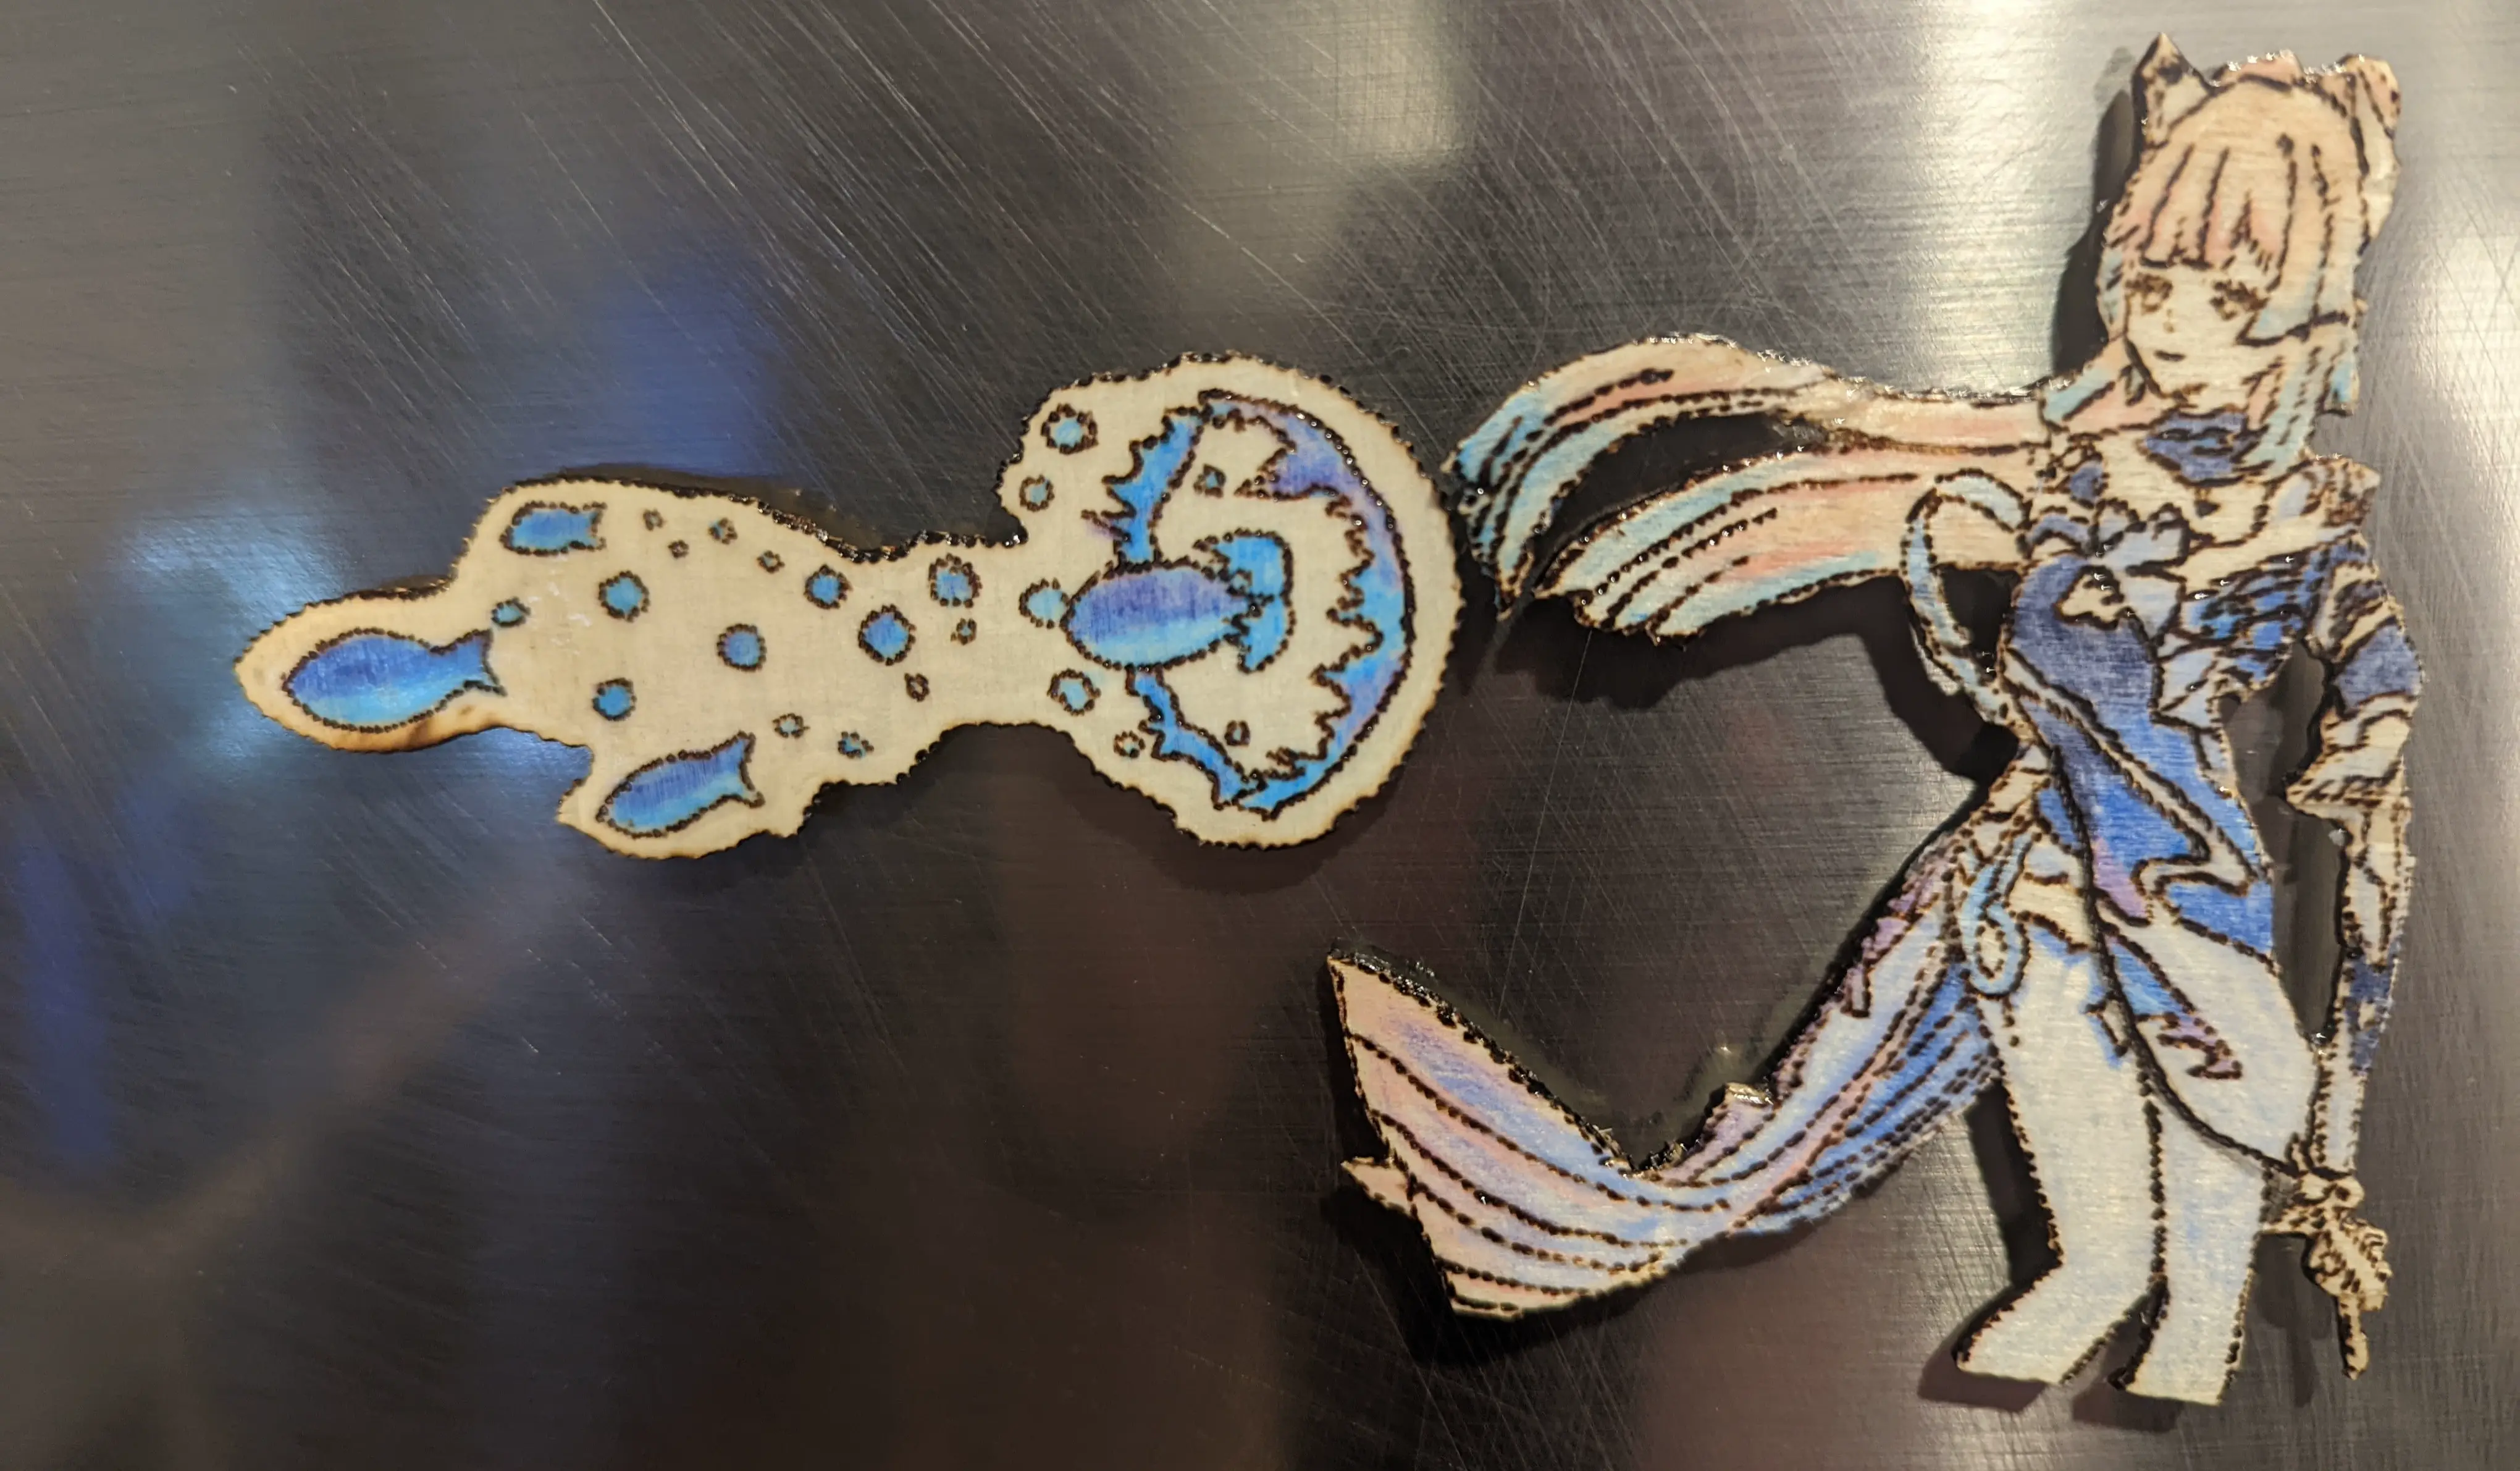 The final product - but this time as fridge magnets!
I hope you enjoyed following along and maybe were inspired to try out wood burning as a hobby! Let me know if you have any suggestions for any of the issues I mentioned above or any questions you may have. Thanks for reading!
Filed under: