Increasing Android Lint Terminal Results
Displaying more than 3 lint results when running lint in the terminal.
by JD Porterfield on updated
When working on a project, it's important to make sure that the code you are checking in is up-to-par with the quality expected for the project, especially as the project gets larger. This is part of the reason why linting and testing are so important and are often validated when raising Pull Requests.
This article is about a specific pain point in the linting process, so if you are unfamiliar with linting, you may want to read the Android Developer Lint Documentation or read one of the many available articles on the topic. The fundamental idea to understand about lint is that it is used to scan for structural and/or stylistic issues in a codebase and report those warnings and errors to the developer.
In my Notification Launcher project, when I raise a Pull Request I know that the following gradle command will be run to validate my PR before it can be merged.
Copied!
./gradlew clean lint test
This command will ensure that all of my tests pass and that there are no lint errors before the PR can be merged. A proactive developer may want to make sure that this validation passes before the pull request is opened in order to ensure that no time is wasted in the PR process and that review goes as smoothly as possible. In order to do so, rather than running tests or lints through Android Studio's GUI, it may be more helpful to directly run the exact same command that the PR validation job will run.
| Running Tests in GUI | Running Linting in GUI |
|---|
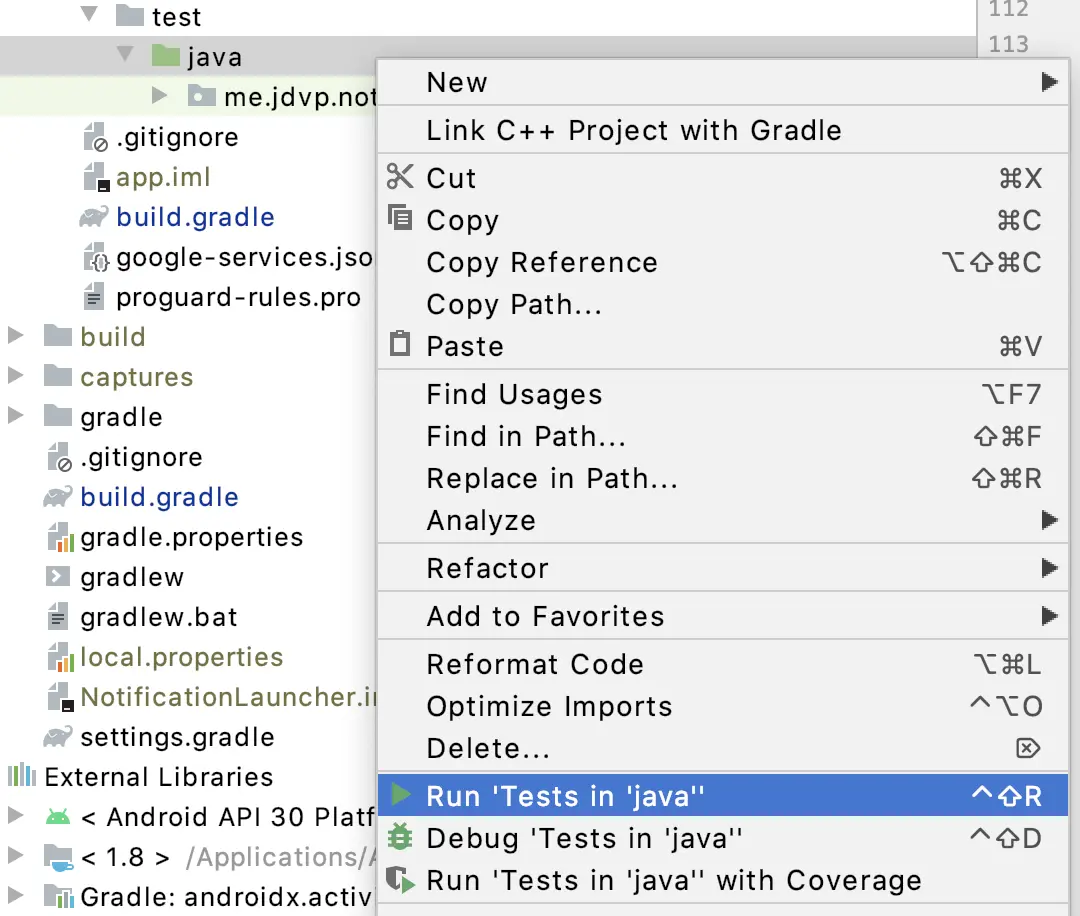 |  |
Lint in the Terminal
Now, let's say that I am about to raise a PR to remove some dead code and want to make sure my PR would pass the review process ahead of time. To do this, I would open the terminal window in Android Studio and then run the gradle command that the PR validation task on the build server would run. In my example, if I removed the code successfully but it ended up causing some resource to become unused, I would start getting UnusedResources lint errors as shown below.
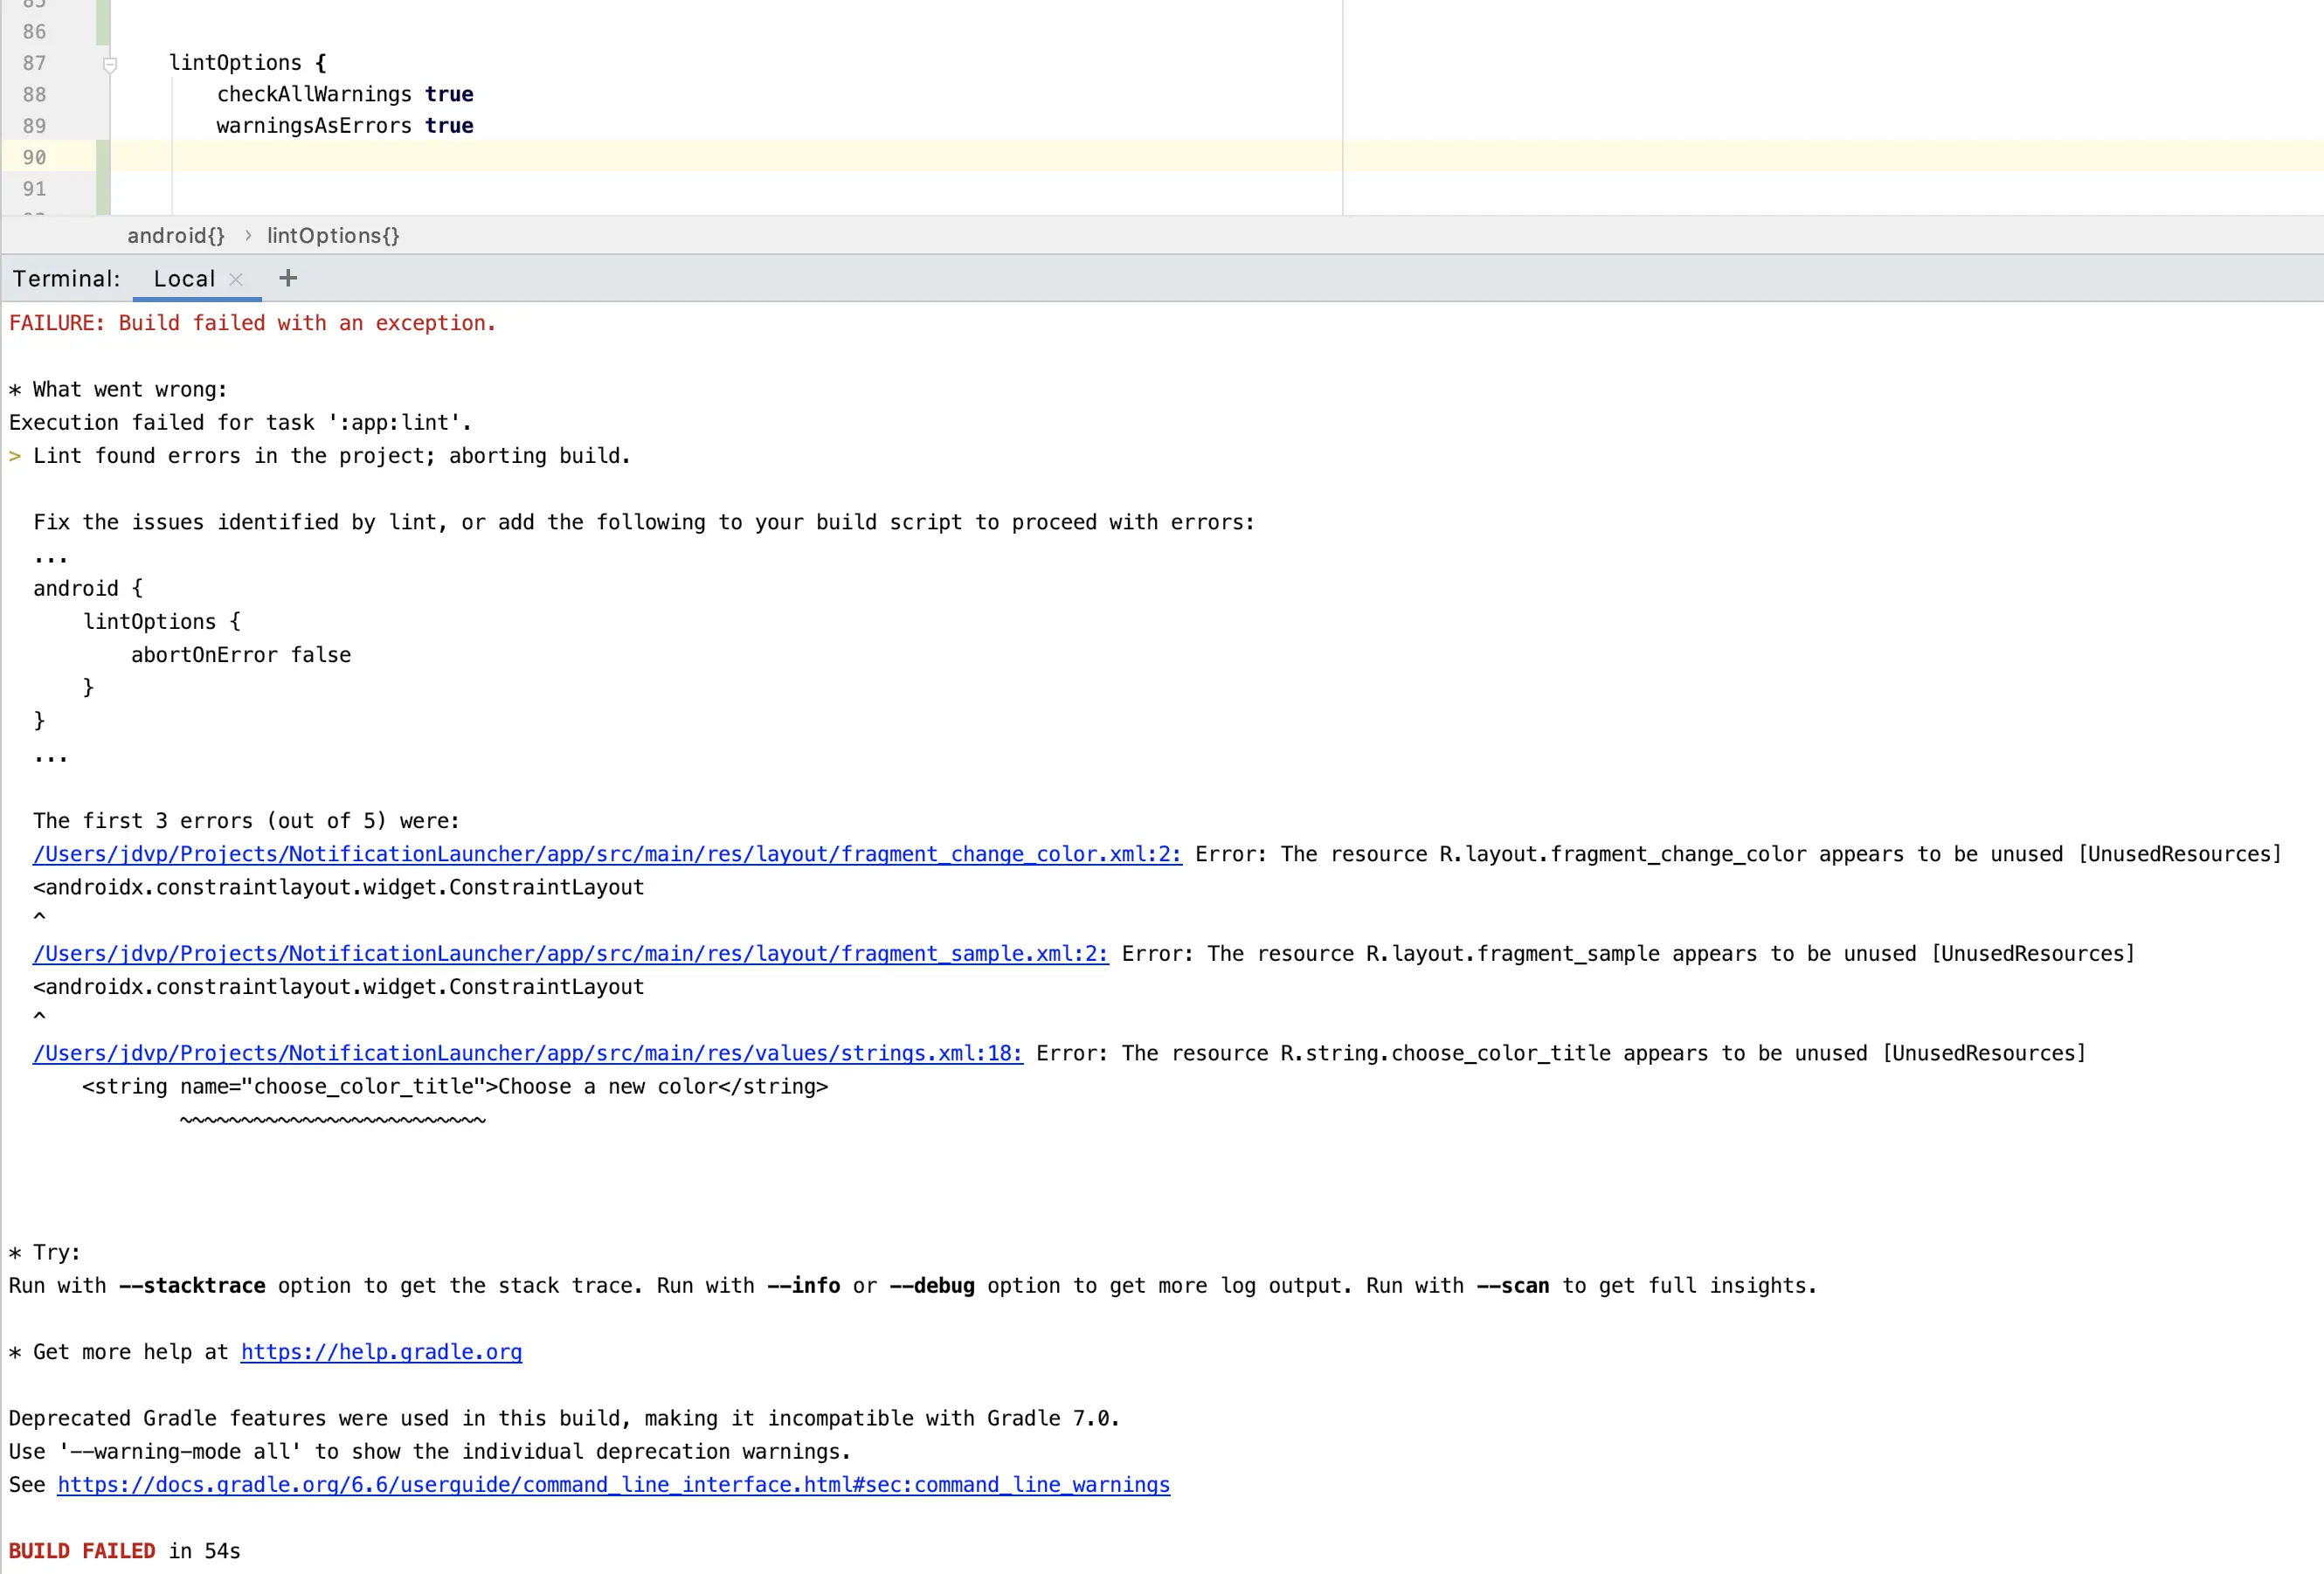
The output from this command-line linting is very helpful. Not only does it mention the specific issues like the lint-generated XML and HTML reports do, but also allows you to jump directly to the issue in code thanks to the IDE support.
However, when you have many issues only the first 3 items are shown. While the output is super helpful, re-running the task over and over after fixing 3 issues might become cumbersome. This is the problem that I set out to solve. I wanted to be able to see all of the lint issues at once from the terminal console when running the lint command.
Whenever we run the lint command in the Android Studio Terminal window, lint will follow the directives specified in the android lintOptions section of the module-level build.gradle file. If we dig around in the documentation, we find the textReport and textOutput lintOptions which seem to be very relevant.
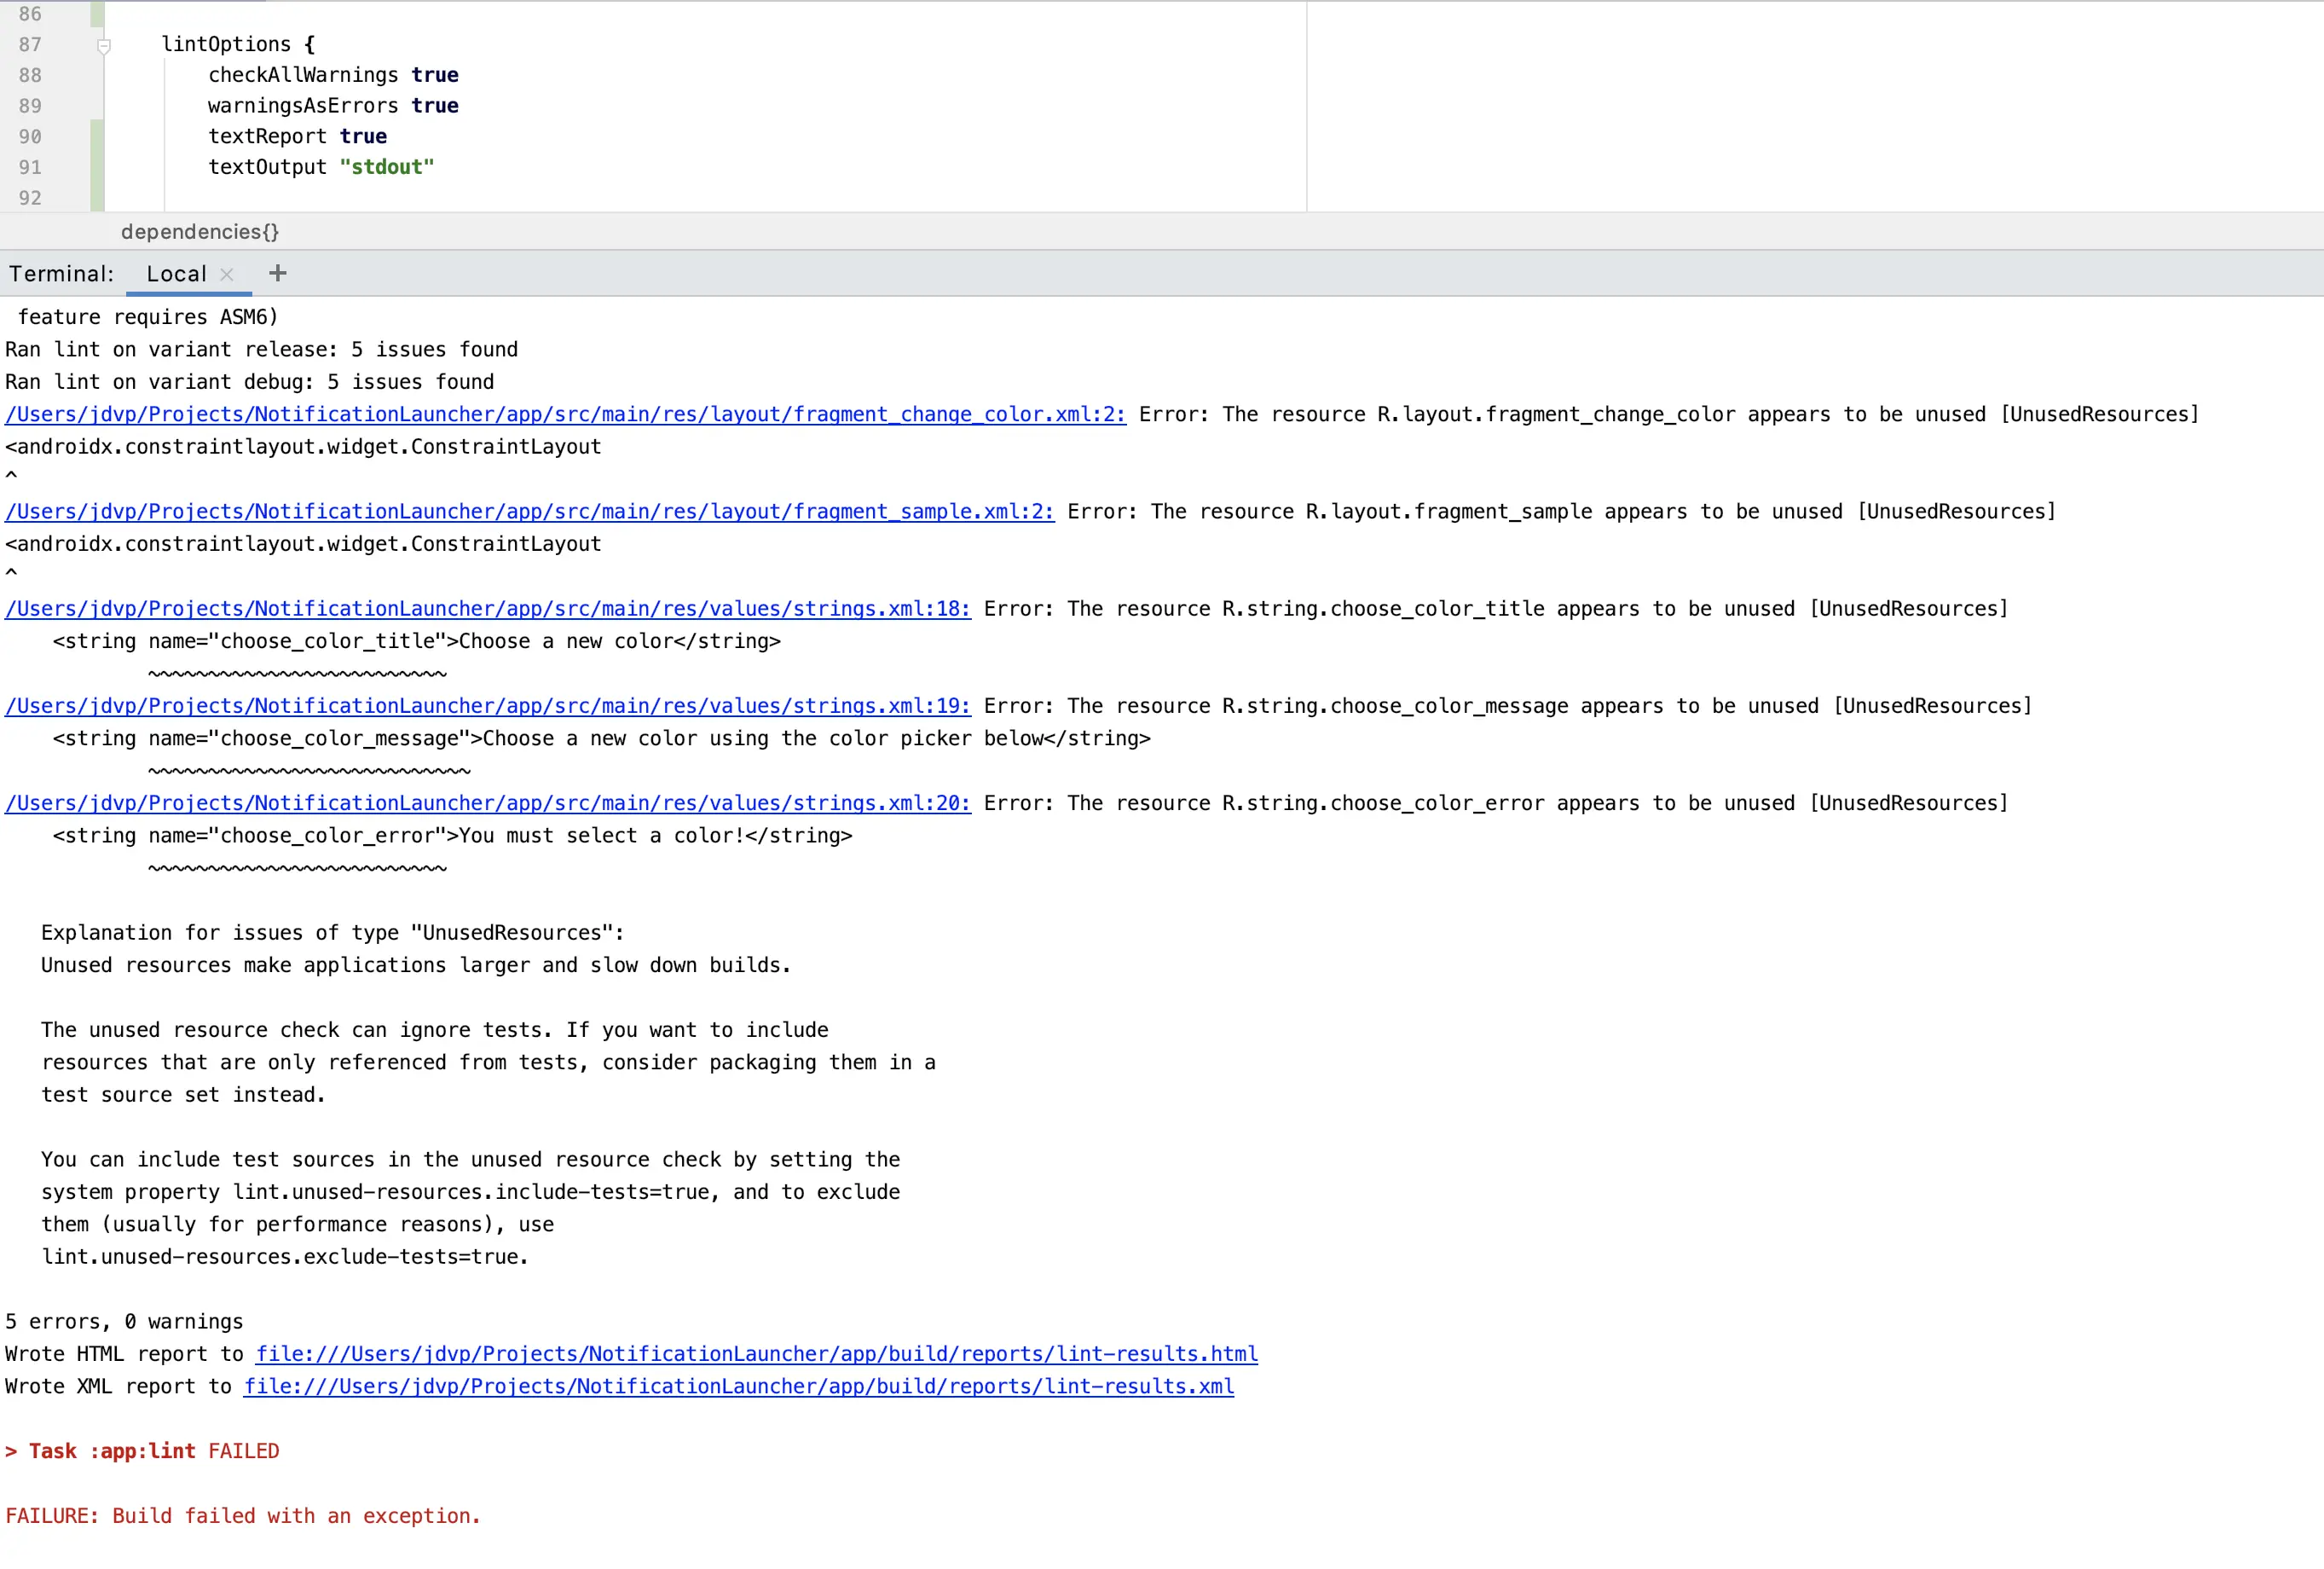
According to the documentation, the textReport option is a boolean value which specifies whether a textReport should be generated and defaults to false. The textOutput field specifies the file that should be used for textOutput but also allows for two special possibilities: stderr and stdout. Taken together, we can use these lint options print the entire lint report to stdout so that we see all of the lint warnings/errors at once in the terminal. To do this, we add the following to our lintOptions block:
textReport true
textOutput "stdout"
Now after we run lint, we see all of the issues at once!
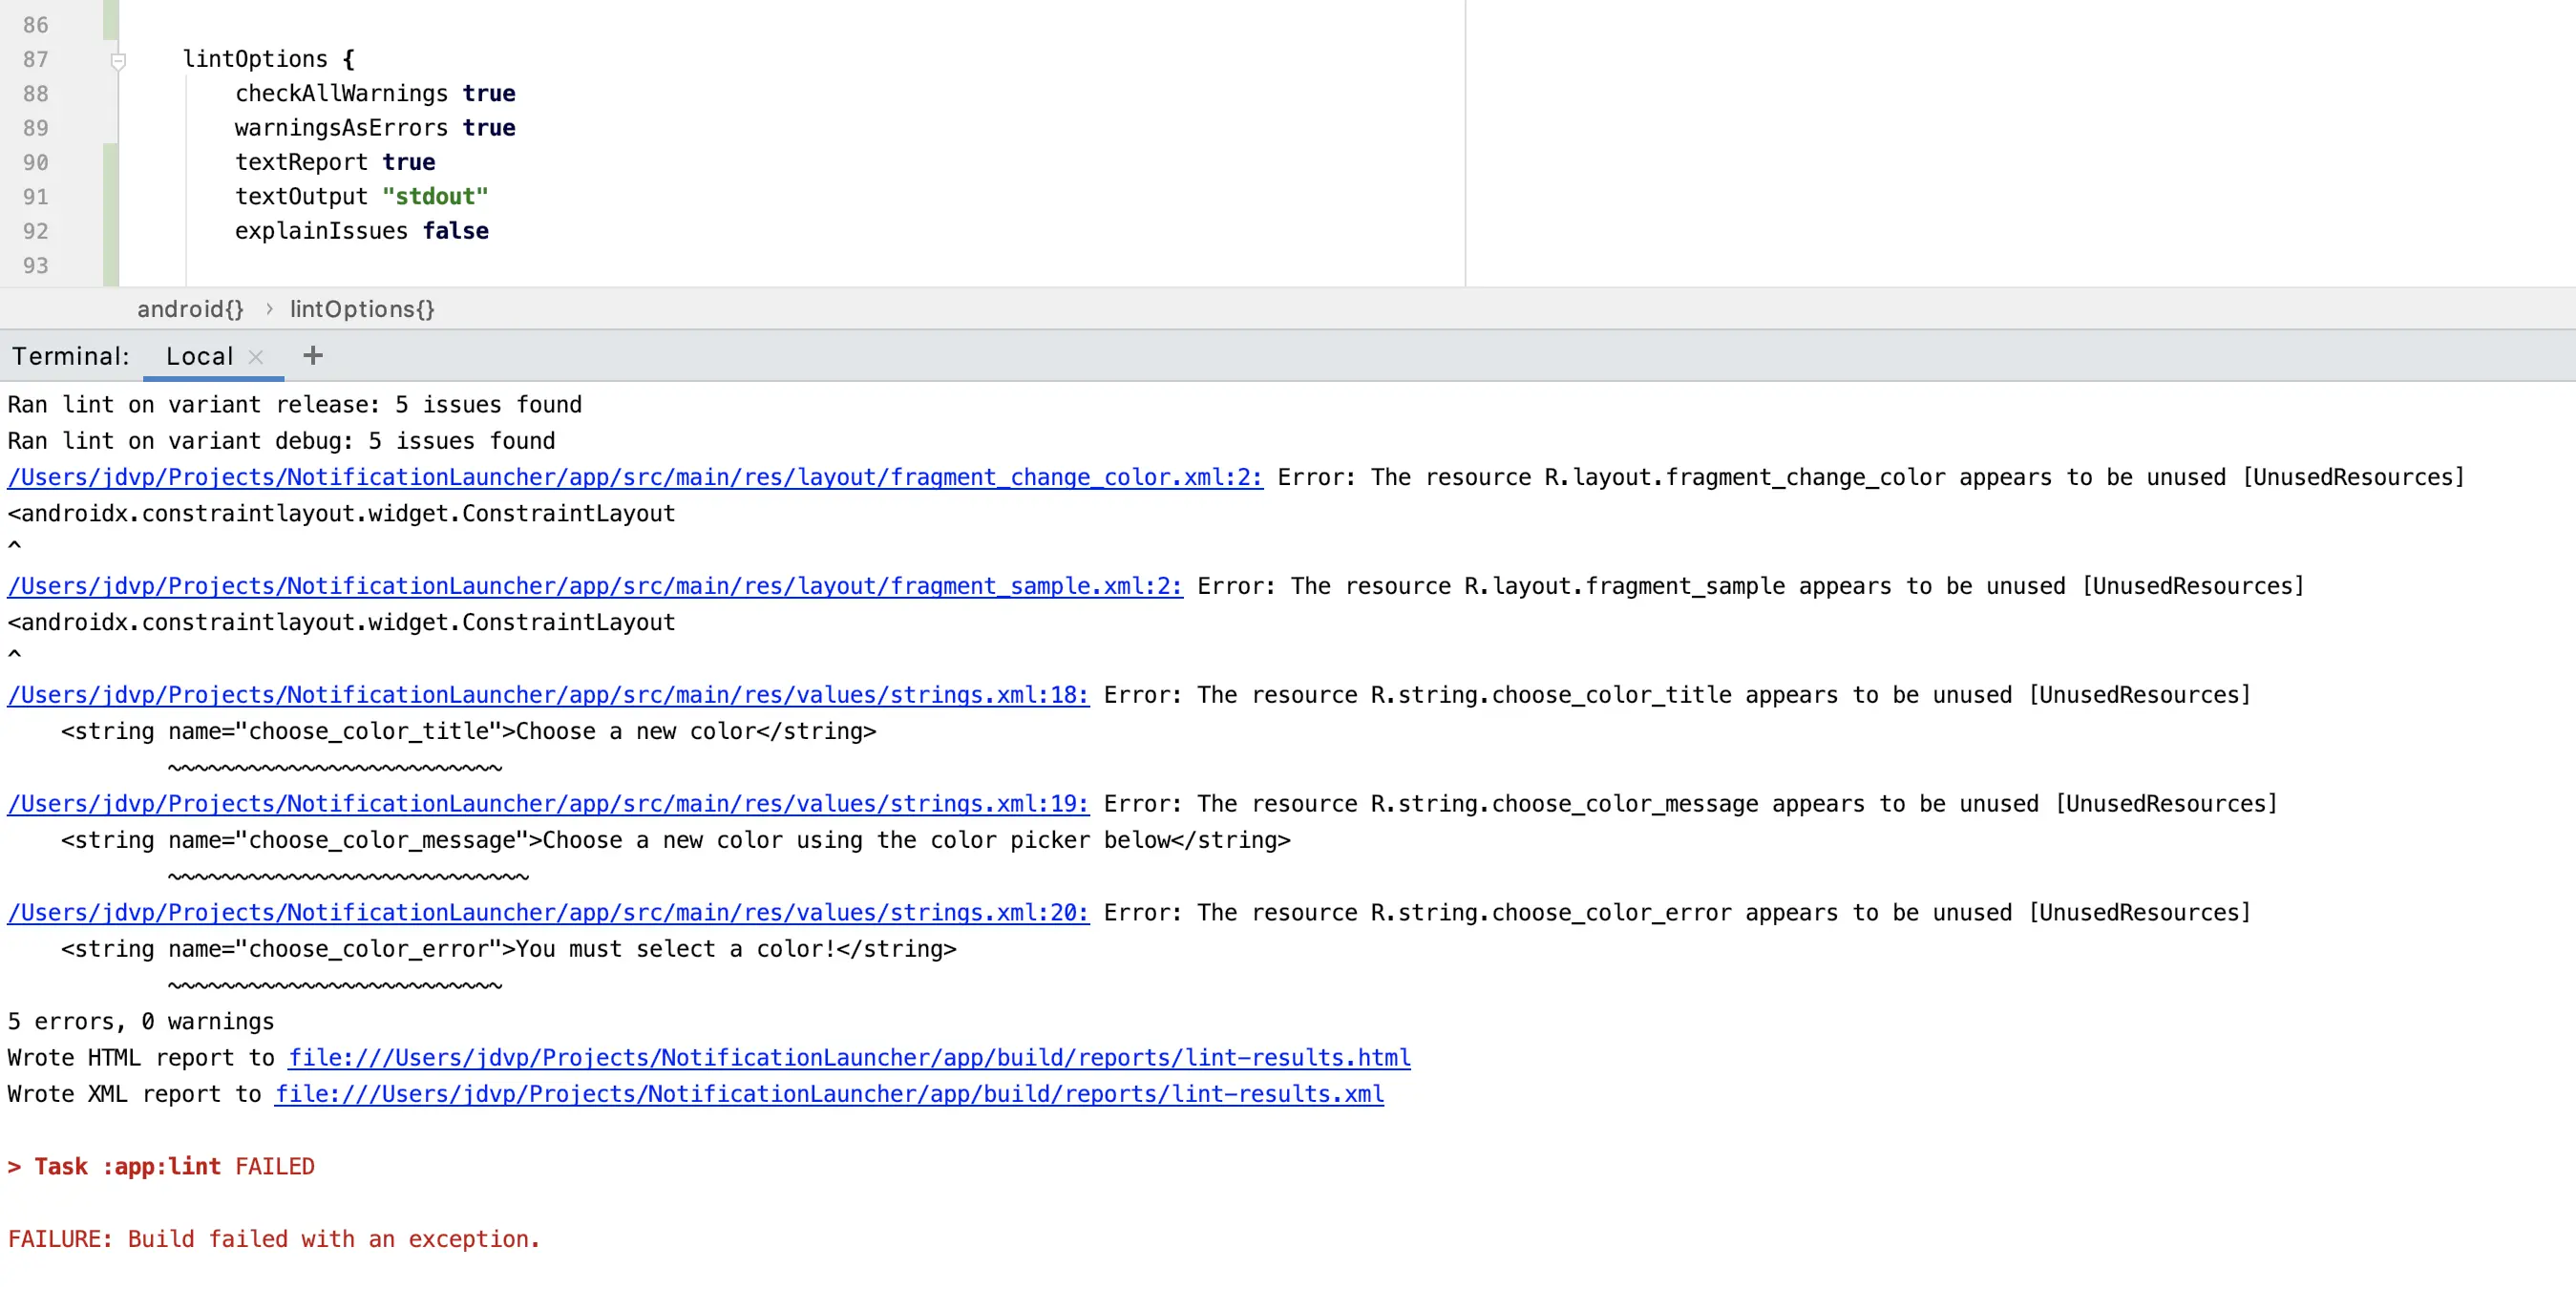
If we want to further condense the output, we can also remove the explanations section shown in the screenshot above (the part that describes what the "UnusedResources" lint issue is). To do this, we use the explainIssues lint option and set the value to false. Since this lint option does not effect the XML or HTML reports, we don't have to worry about inadvertently altering their behavior.
textReport true
textOutput "stdout"
explainIssues false
After making this final change, our output should be a little shorter.
Final Thoughts
All-in-all this change is only a small optimization to save time in the overall development process. However, it's been very helpful for me recently and I hope that you find it useful as well. If you haven't already, I'd at least recommend turning on linting and trying to fix as many of the issues as you can before you have an insurmountable number in the thousands. Although lint warnings are not always an error, they can lead to errors and should be carefully monitored. If the default lints aren't enough for you, and you have issues you call out time and time again in the Pull Review process, I'd recommend you also take a look into creating custom lints of your own!
Thanks for reading and let me know if you have any other lint tips or optimizations in the comments below.
September 30, 2022 Update
I've removed the "Notification Launcher" link as I am no longer maintaining the app and want to make sure not to link to dead pages.
December 15, 2024 Update
I was referring to this earlier since I wanted to turn warningsAsErrors on for a personal project and wanted to resolve a bunch of lint issues at once and realized that the newer Lint DSL doesn't behave exactly the same as the old LintOptions one.
If you want to show all of the lint errors at once when running via command line, your lint block might look like this:
android {
    lint {
        warningsAsErrors = true
        textReport = true
    }
}
The textOutput field is no longer required in this case. In fact, stdout isn't even an option that is able to compile now since the field expects a File now. This was actually wrong in the documentation for the Lint DSL at the time of writing, but this issueTracker comment confirms the expected behavior and mentioned that the docs have been updated (which should show up in the upcoming versions documentation).
---
This article is also available on Medium. You can find it
here.Filed under: